
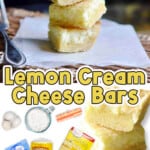
This easy recipe for Lemon Cream Cheese Bars uses cake mix and lemonade mix to make an irresistible dessert. With just 6 ingredients, you'll get a rich & chewy crust with a creamy, tangy top layer - delicious!
💛 Why You'll Love This Recipe
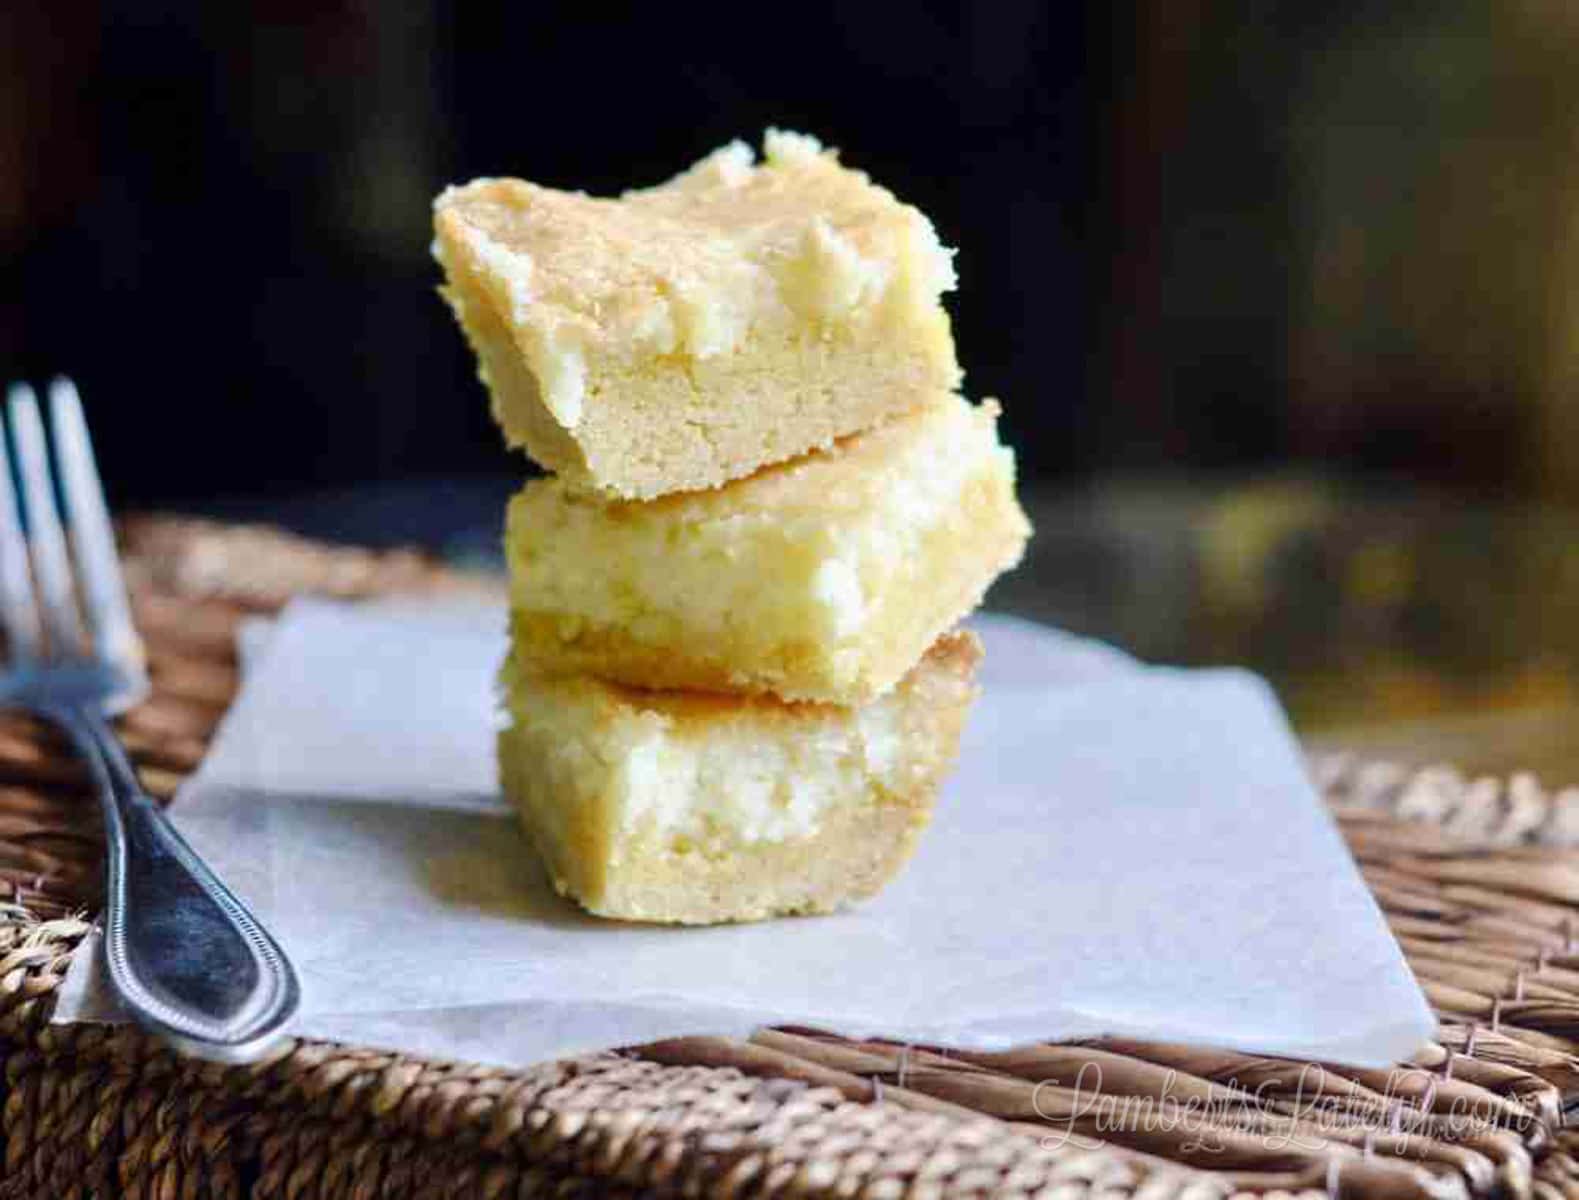
- Two delicious layers. On the bottom, you have a rich, chewy cake crust that has a hint of lemon flavor going. On the top, you have a tangy, creamy cheesecake filling that's sweet, playing perfectly off of the rich crust.
- Great recipe for summer. It's bright and fresh, but filling and comforting at the same time. It's also super simple to whip together - just mix ingredients for two layers and bake.
(If you love bright, fruity recipes, you'll want to check out my easy fruit dip and cake mix pancakes recipes, too!)
🍋 Ingredients & Substitutions
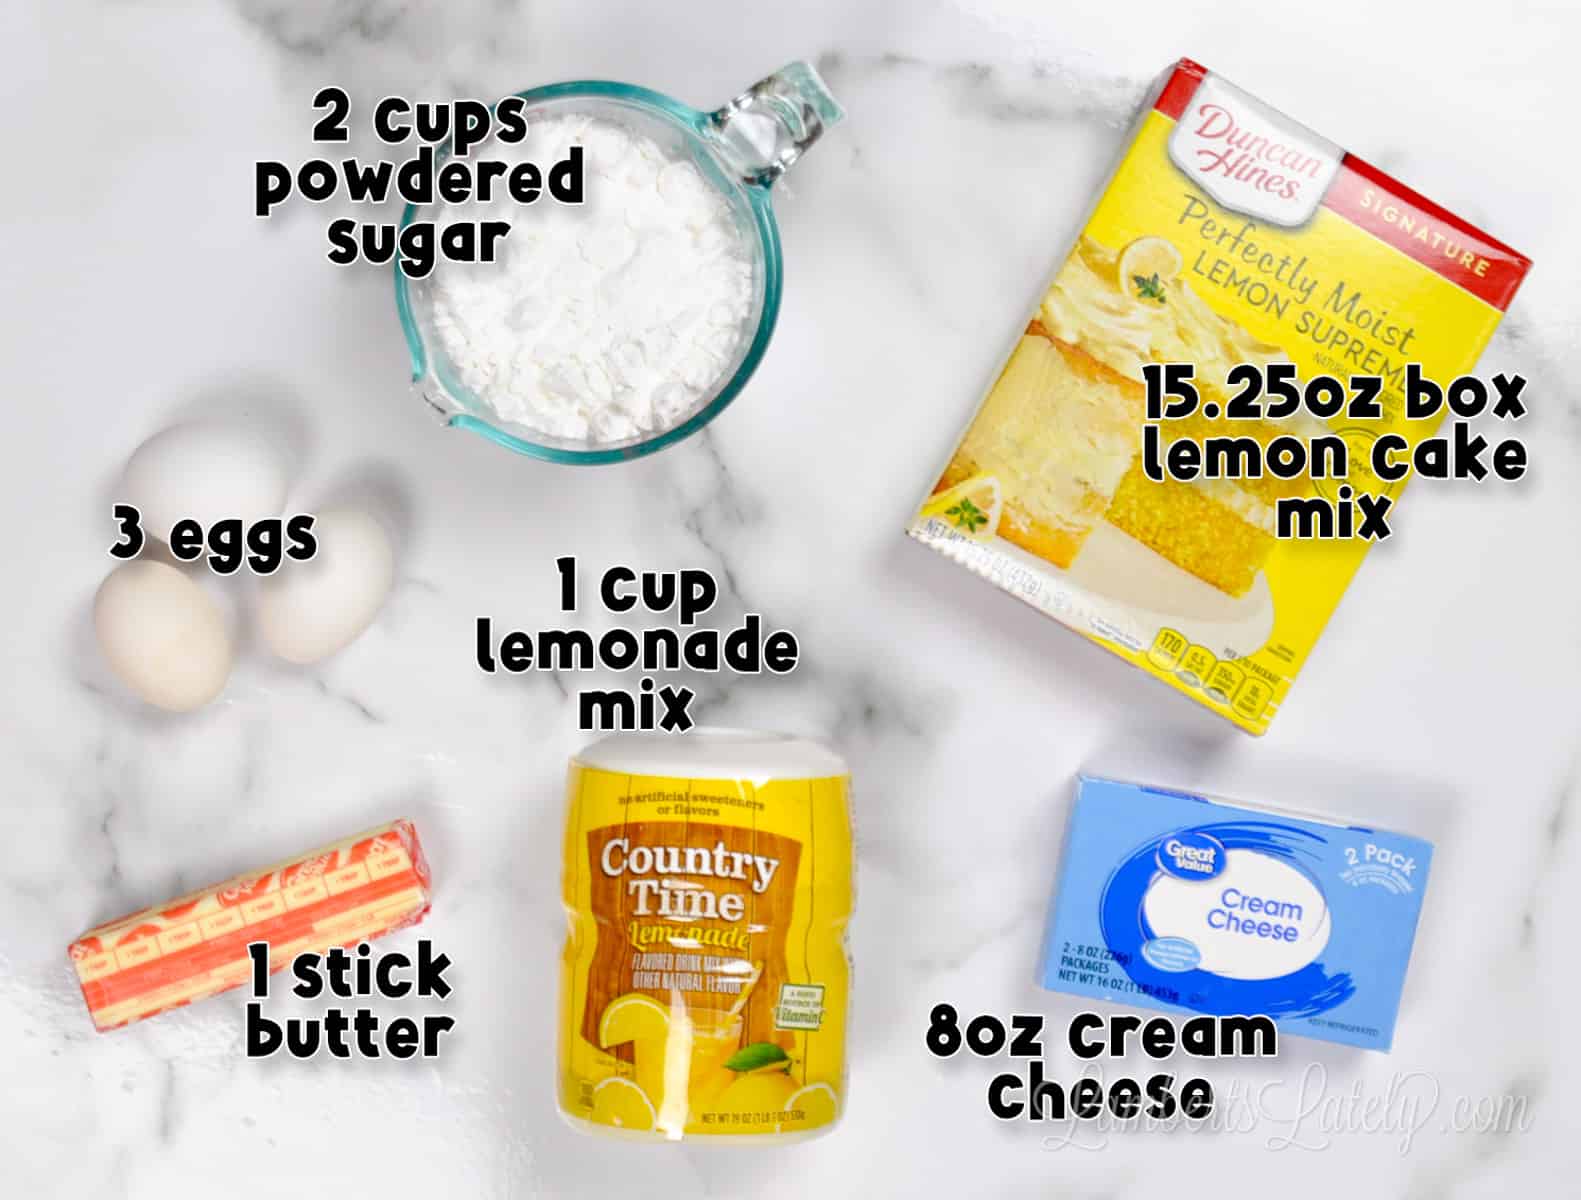
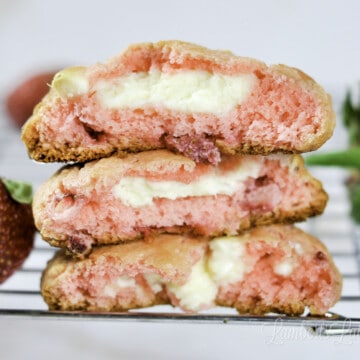
- lemon cake mix - if you ever want to change the flavor of this recipe, it's so easy! Simply use a different flavor of cake mix. I'd recommend strawberry cake mix, orange cake mix, or even pineapple cake mix to give this recipe more depth. (See my tres leches with cake mix or my slow cooker peach cobbler for more recipes that use cake mix.)
- lemonade mix - This should be a sweetened lemonade mix. If you're changing the flavor, simply sub 1 pack of flavored gelatin mix to match your flavor of choice.
- eggs - Go with large eggs.
- butter - I recommend melting your butter before making this recipe. It makes mixing much easier and will result in a smoother batter.
- cream cheese - Make sure your cream cheese is at room temperature before mixing. This will help your cheesecake layer stay nice and smooth. While I used full-fat cream cheese for my recipe, you can cut the fat content of the bars a little by using reduced-fat cream cheese.
- powdered sugar - Don't be tempted to use granulated sugar here. The powdered sugar keeps the cheesecake layer from getting super grainy.
Recipe Additions
This is a great recipe for little additions. The lemon flavor goes so well with tons of different fruits! Use the following variations to make the flavor even more complex:
- Add frozen or fresh berries to the cheesecake layer before baking. You could mix in a cup of blueberries, strawberries, raspberries, or even cranberries to give a really fun and different element to the bars.
- If you'd like to jazz up that lemon flavor even more, add fresh lemon juice (2 lemons worth, or ¼ cup).
- Give this dessert another texture element by topping bars with a dollop of whipped cream.
- Sprinkle the finished lemon bars with a light layer of powdered sugar.
🧑🍳 How to Make Cream Cheese Lemon Bars
Step 1: Make the cake layer.
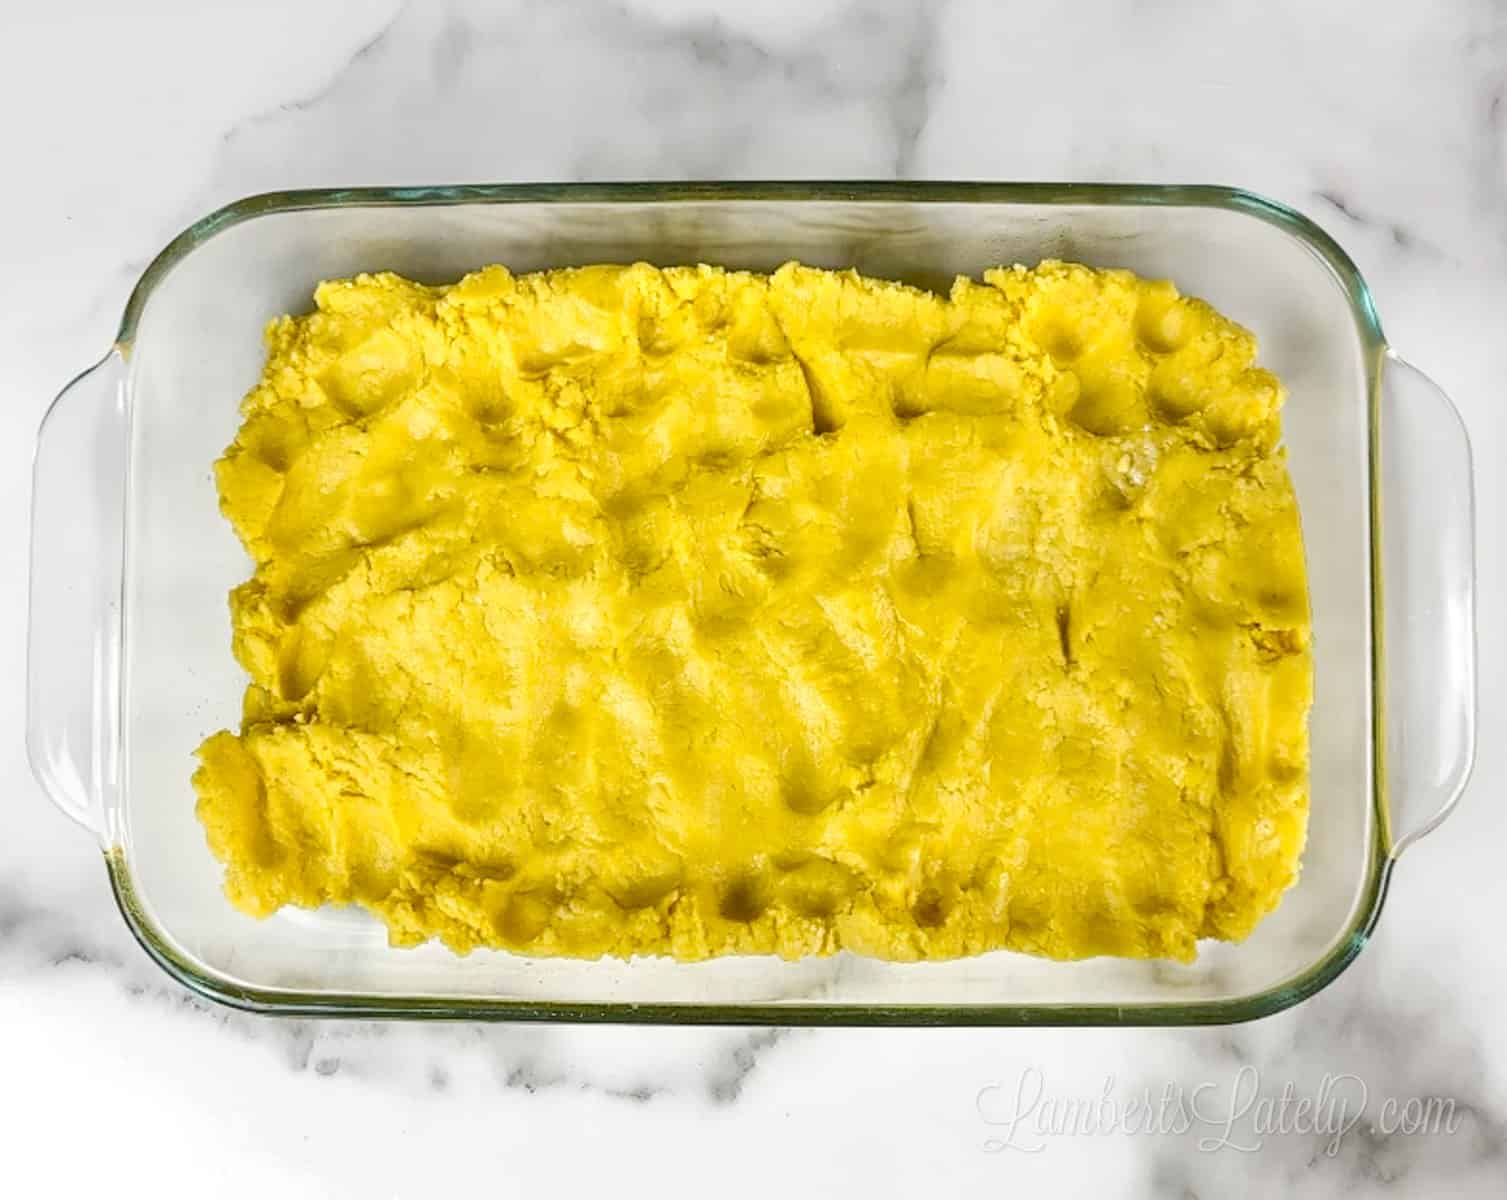
For the cake layer, mix together cake mix, 1 egg, and a stick of butter in a medium bowl until smooth (it will be the consistency of cookie dough). Press this mixture into the bottom of the prepared baking dish.
Baking Dish Sizes
I used a 7x11" glass Pyrex baking dish for this recipe. This makes for a thicker cake crust and an average-sized cream cheese layer. You would get similar results to mine with an 8x8" glass Pyrex dish.
If you'd like thinner layers, I'd suggest going with a 9x13" glass baking dish.
Step 2: Add a lemony cheesecake layer.
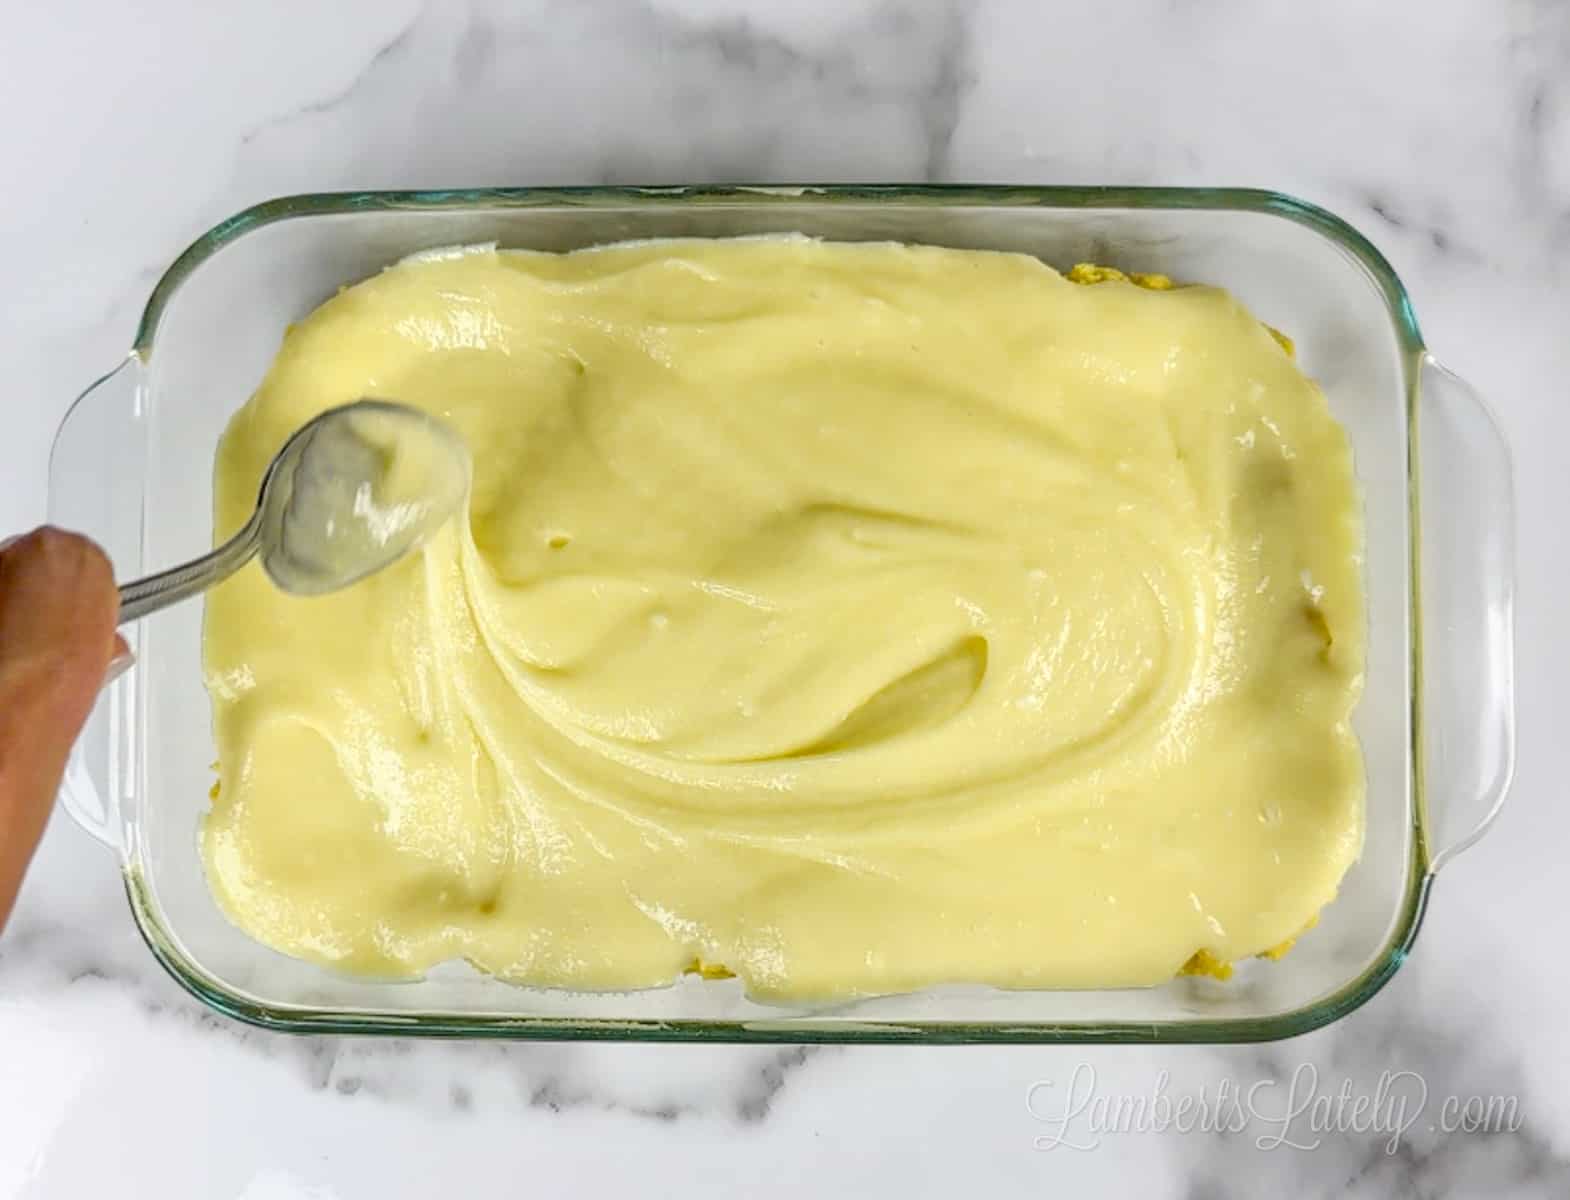
Mix together the remaining ingredients (cream cheese, lemonade mix, powdered sugar, and 2 eggs) in a large bowl, using a hand mixer, until smooth. Pour this cream cheese mixture on top of the cake mix already in the glass baking pan.
Step 3: Bake.
Bake the lemon cheesecake bars in a preheated oven at 325 degrees for 35-40 minutes, until the top mixture is set and the top turns golden brown. (Inside will still be slightly jiggly, but should be browned on top.)
Allow bars to cool for about 30 minutes after removing them from the oven, then chill for 3-4 hours before cutting.
🎥 Step-by-Step Recipe Video
❄️ Storage & Freezing Instructions
Because of the cream cheese filling, you'll want to store any leftover lemon bars in the refrigerator after serving. Cover them and place them in an airtight container when storing. These should last 3-4 days in the refrigerator.
This recipe can be frozen as well. Bake as instructed, wrap bars tightly with aluminum foil and plastic wrap, and freeze for up to 6 months. When you're ready to serve them, simply thaw them in the fridge and enjoy!
📝 Other Helpful Tips & Tricks
- Make sure to spray your baking dish with cooking spray. These will stick!
- Before cutting the lemon cream cheese bars, allow them to cool in the fridge for a few hours. Use a sharp knife to make the bars' edges smooth. Fill a bowl with warm water and dunk your sharp knife in the water before cutting each bar. I prefer to chill my bars before cutting so those edges are neat.
- Make sure you don't bake too long. Over-cooking will dry out that luscious creamy cheesecake layer - nobody wants that. These should be pulled when the top just starts to brown.

Making this recipe? I'd love to see it! Make sure to tag me on social media 📸 with your results (@lambertslately). I'd also love it if you gave this recipe a rating ⭐️ and a comment 💭 to help other people find it.
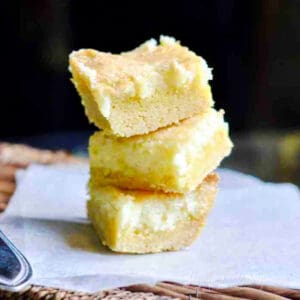
Lemon Cream Cheese Bars
Affiliate links used.
Ingredients
For the Cake Layer
- 1 box lemon cake mix
- 1 stick butter, melted
- 1 large egg
For the Lemon Cream Cheese Layer
- 8 oz cream cheese room temperature
- 3 cups powdered sugar
- 1 cup sweetened lemonade mix
- 2 large eggs
Instructions
- For the crust layer, mix together cake mix, 1 egg, and a stick of butter until smooth. Press this mixture into the bottom of a greased 9x13" glass dish.
- For the lemon cheesecake layer, mix together the remaining ingredients (cream cheese, lemonade mix, powdered sugar, and 2 eggs) using a hand mixer until smooth. Pour this mixture on top of the cake mix in the glass baking dish.
- Bake at 325 degrees for 35-40 minutes, until the top mixture is set and starts to brown. Allow to cool for about 30 minutes after removing from oven, then chill for 3-4 hours before cutting.
Notes
- Make sure to spray your baking dish with cooking spray. These will stick!
- Before cutting the lemon cream cheese bars, allow them to cool in the fridge for a few hours. Use a sharp knife to make the bars' edges smooth. Fill a bowl with warm water and dunk your sharp knife in the water before cutting each bar. I prefer to chill my bars before cutting so those edges are neat.
- Make sure you don't bake too long. Over-cooking will dry out that luscious creamy cheesecake layer - nobody wants that. These should be pulled when the top just starts to brown.
- Because of the cream cheese filling, you'll want to store any leftover lemon bars in the refrigerator after serving. Cover them and place them in an airtight container when storing. These should last 3-4 days in the refrigerator.
- This recipe can be frozen as well. Bake as instructed, wrap bars tightly with aluminum foil and plastic wrap, and freeze for up to 6 months. When you're ready to serve them, simply thaw in the fridge and enjoy!
- I used a 7x11" glass Pyrex baking dish for this recipe. This makes for a thicker cake crust and an average-sized cream cheese layer. You would get similar results to mine with an 8x8" glass Pyrex dish. If you'd like thinner layers, I'd suggest going with a 9x13" glass baking dish.
This is exactly the type of recipe I love. These bars look incredible!
These bars look so, so yummy!!
I'm with you on struggling to resist the leftovers - fortunately I have 6 other mouths in my house so leftovers don't last long around here! These look delicious!
I was wanted to know if you make the cake first or do you just spread the mixture?
No, you won't make the cake as directed on the box. Just use the cake mix as an ingredient in the recipe!