
Ready to put plantation shutters on your windows, but don't know where to start? This series walks you through plantation shutter installation, including selecting, measuring for, and purchasing. See before and after!
Affiliate links used in this post; discount on shutters was given in exchange for post. Read more about my link policies here.
Why We Wanted Plantation Shutters
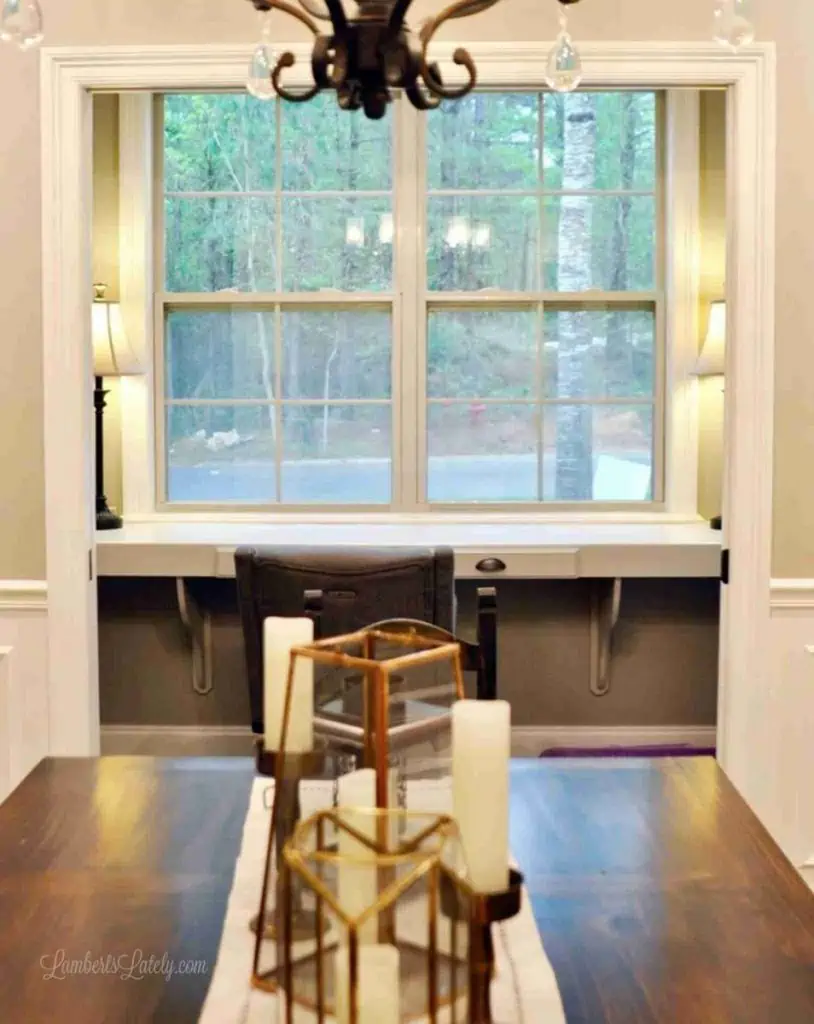
One of the reasons we originally fell in love with the lot for our home was the view. The wooded setting outside of our home is absolutely stunning. From the time we started designing our home, we knew that we wanted lots and lots of windows throughout to take advantage of the gorgeous light and beautiful views.
But, one thing I didn't really account for was the privacy we might need out of our front windows. Having nothing covering the back windows isn't an issue; they're (mostly) south facing, so the light is nice and even most of the day. We face a wooded area on most of those windows as well, giving us lots of privacy. But, from the time we moved into our home, it was obvious that we needed some kind of solution for the front windows.
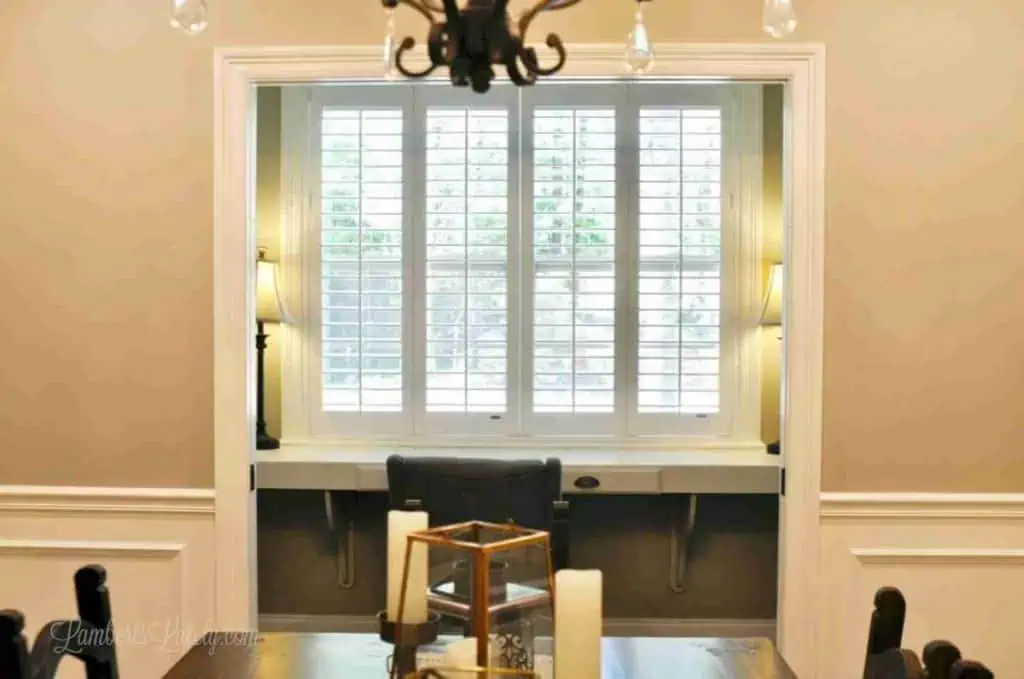
Not only did I not want people looking in those windows (especially the bedrooms), but I discovered that our office window has a good bit of light the majority of the day, making it pretty difficult to work in there during the afternoon hours.
I have always loved the look of plantation shutters. They're just classic and really make a statement in just about any setting. But honestly - I didn't know where to start when it came to selecting, ordering, and installing these beauties.
They're an investment; it's not something you want to mess up. So, I thought I'd document the plantation shutter installation process for those of you out there who might be in the same boat I was in a couple of years ago!
Let's start at the beginning.
Step 1: Select Your Shutters
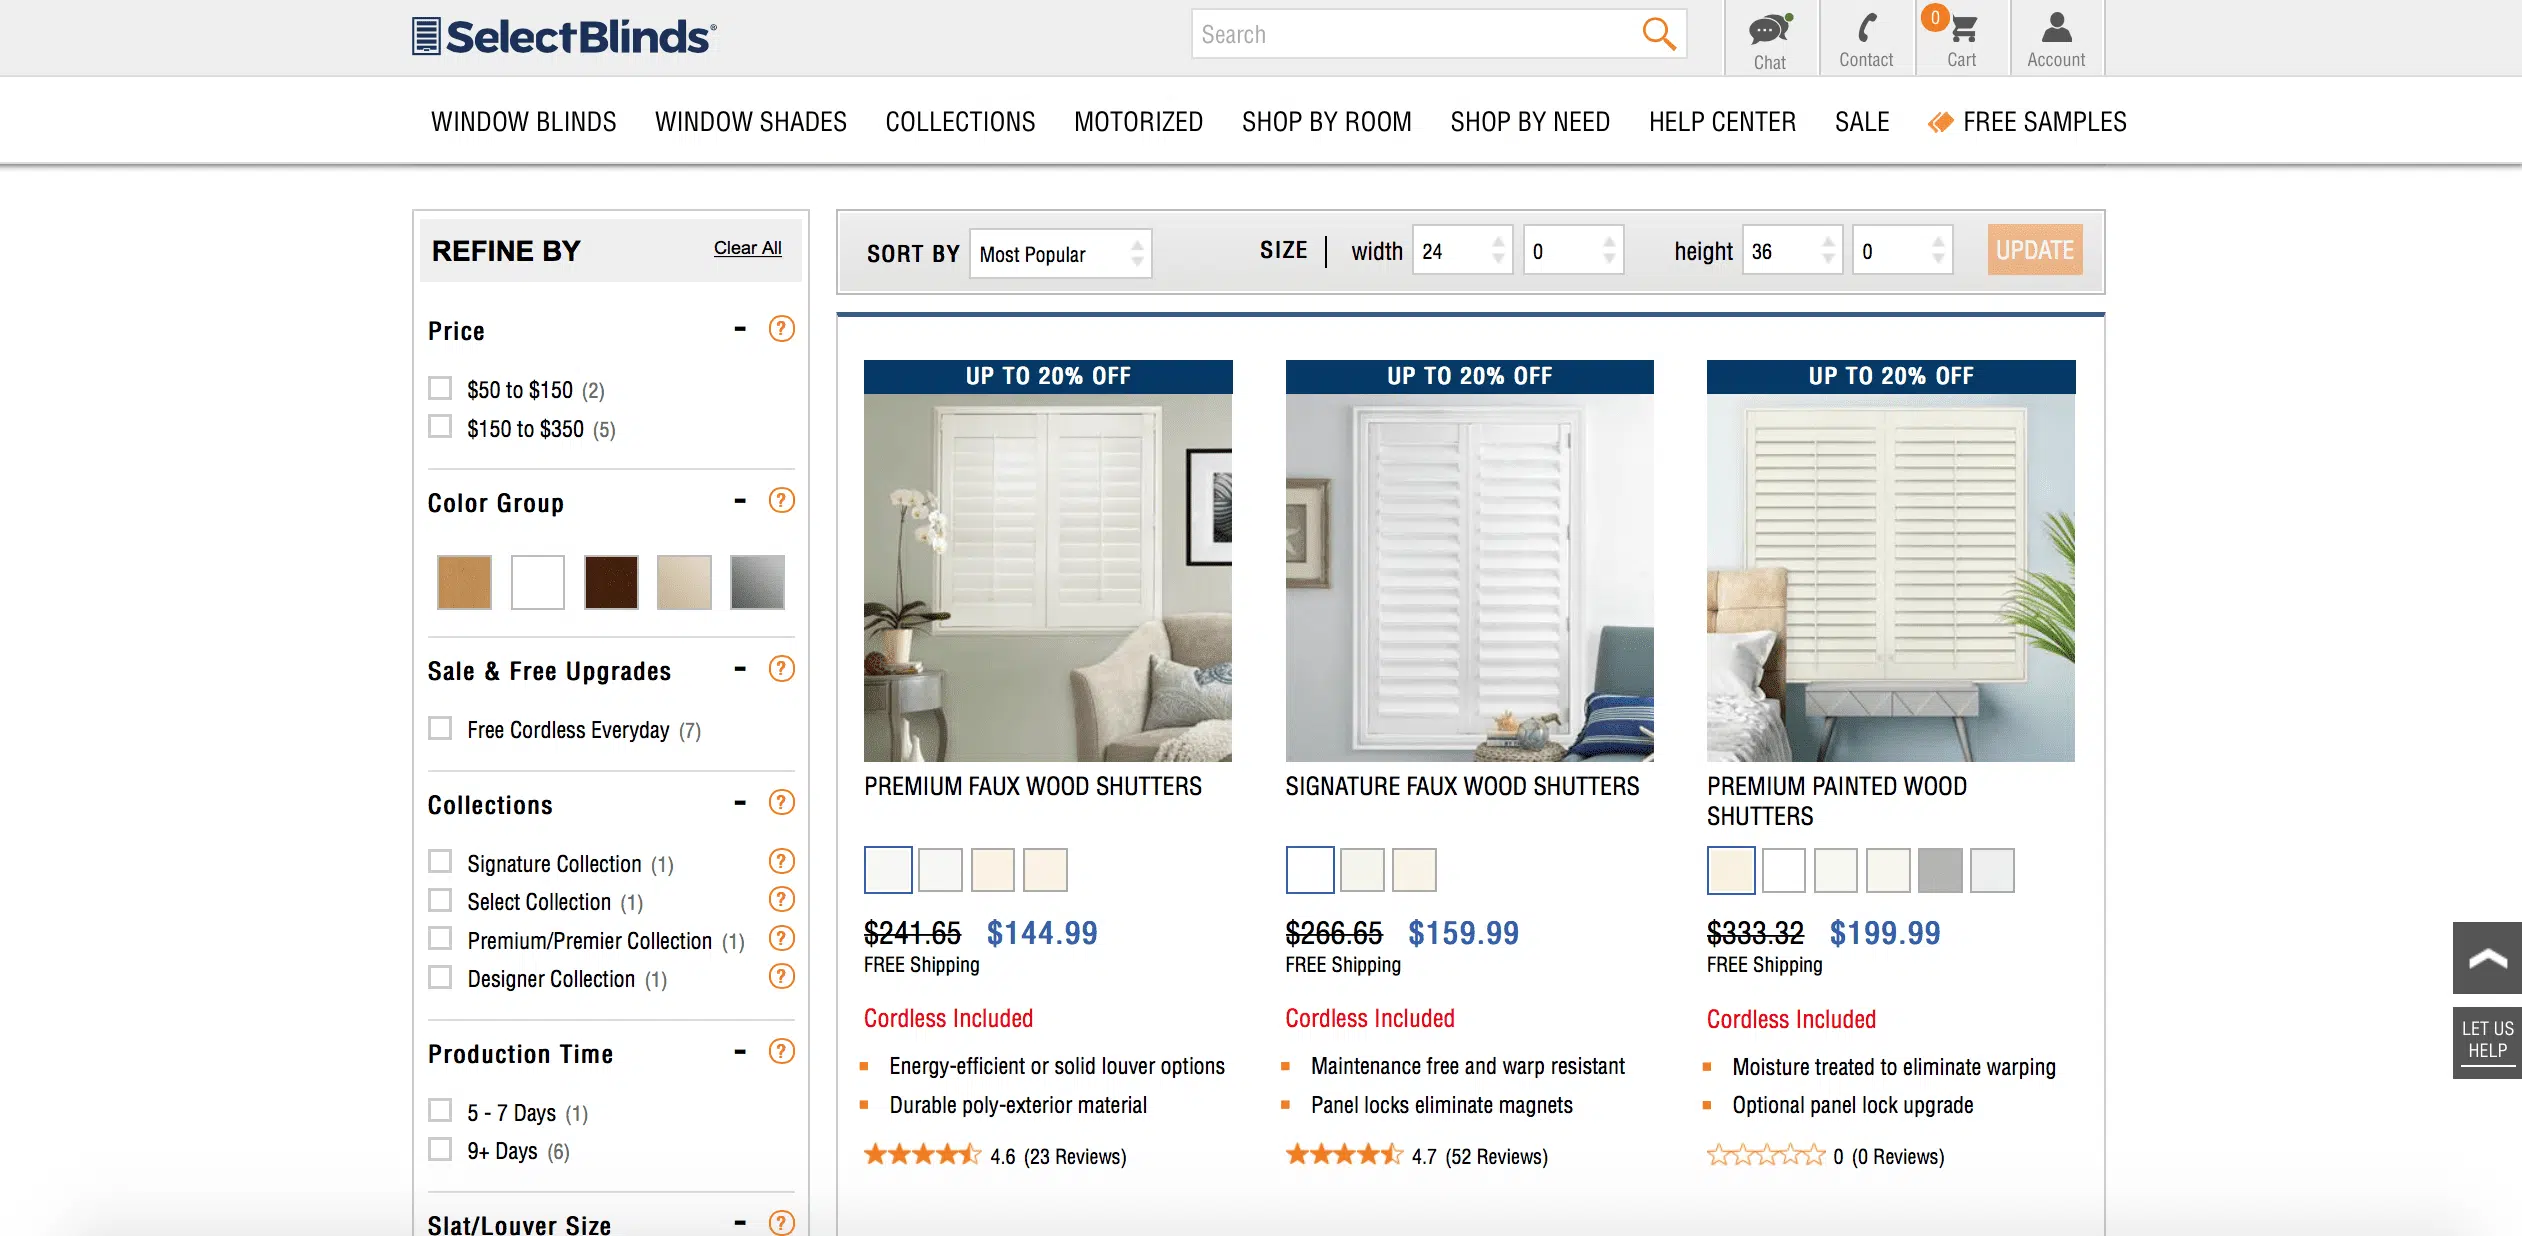
I chose Select Blinds for our new plantation shutter installation because of their mix of style, quality, and price. Their promotions are fantastic, their selection is great, and I couldn't beat the price. I'm also so happy with the quality; they have blended into our home seamlessly and I'm sure they're something we'll enjoy for years to come!
Choosing Color and Type
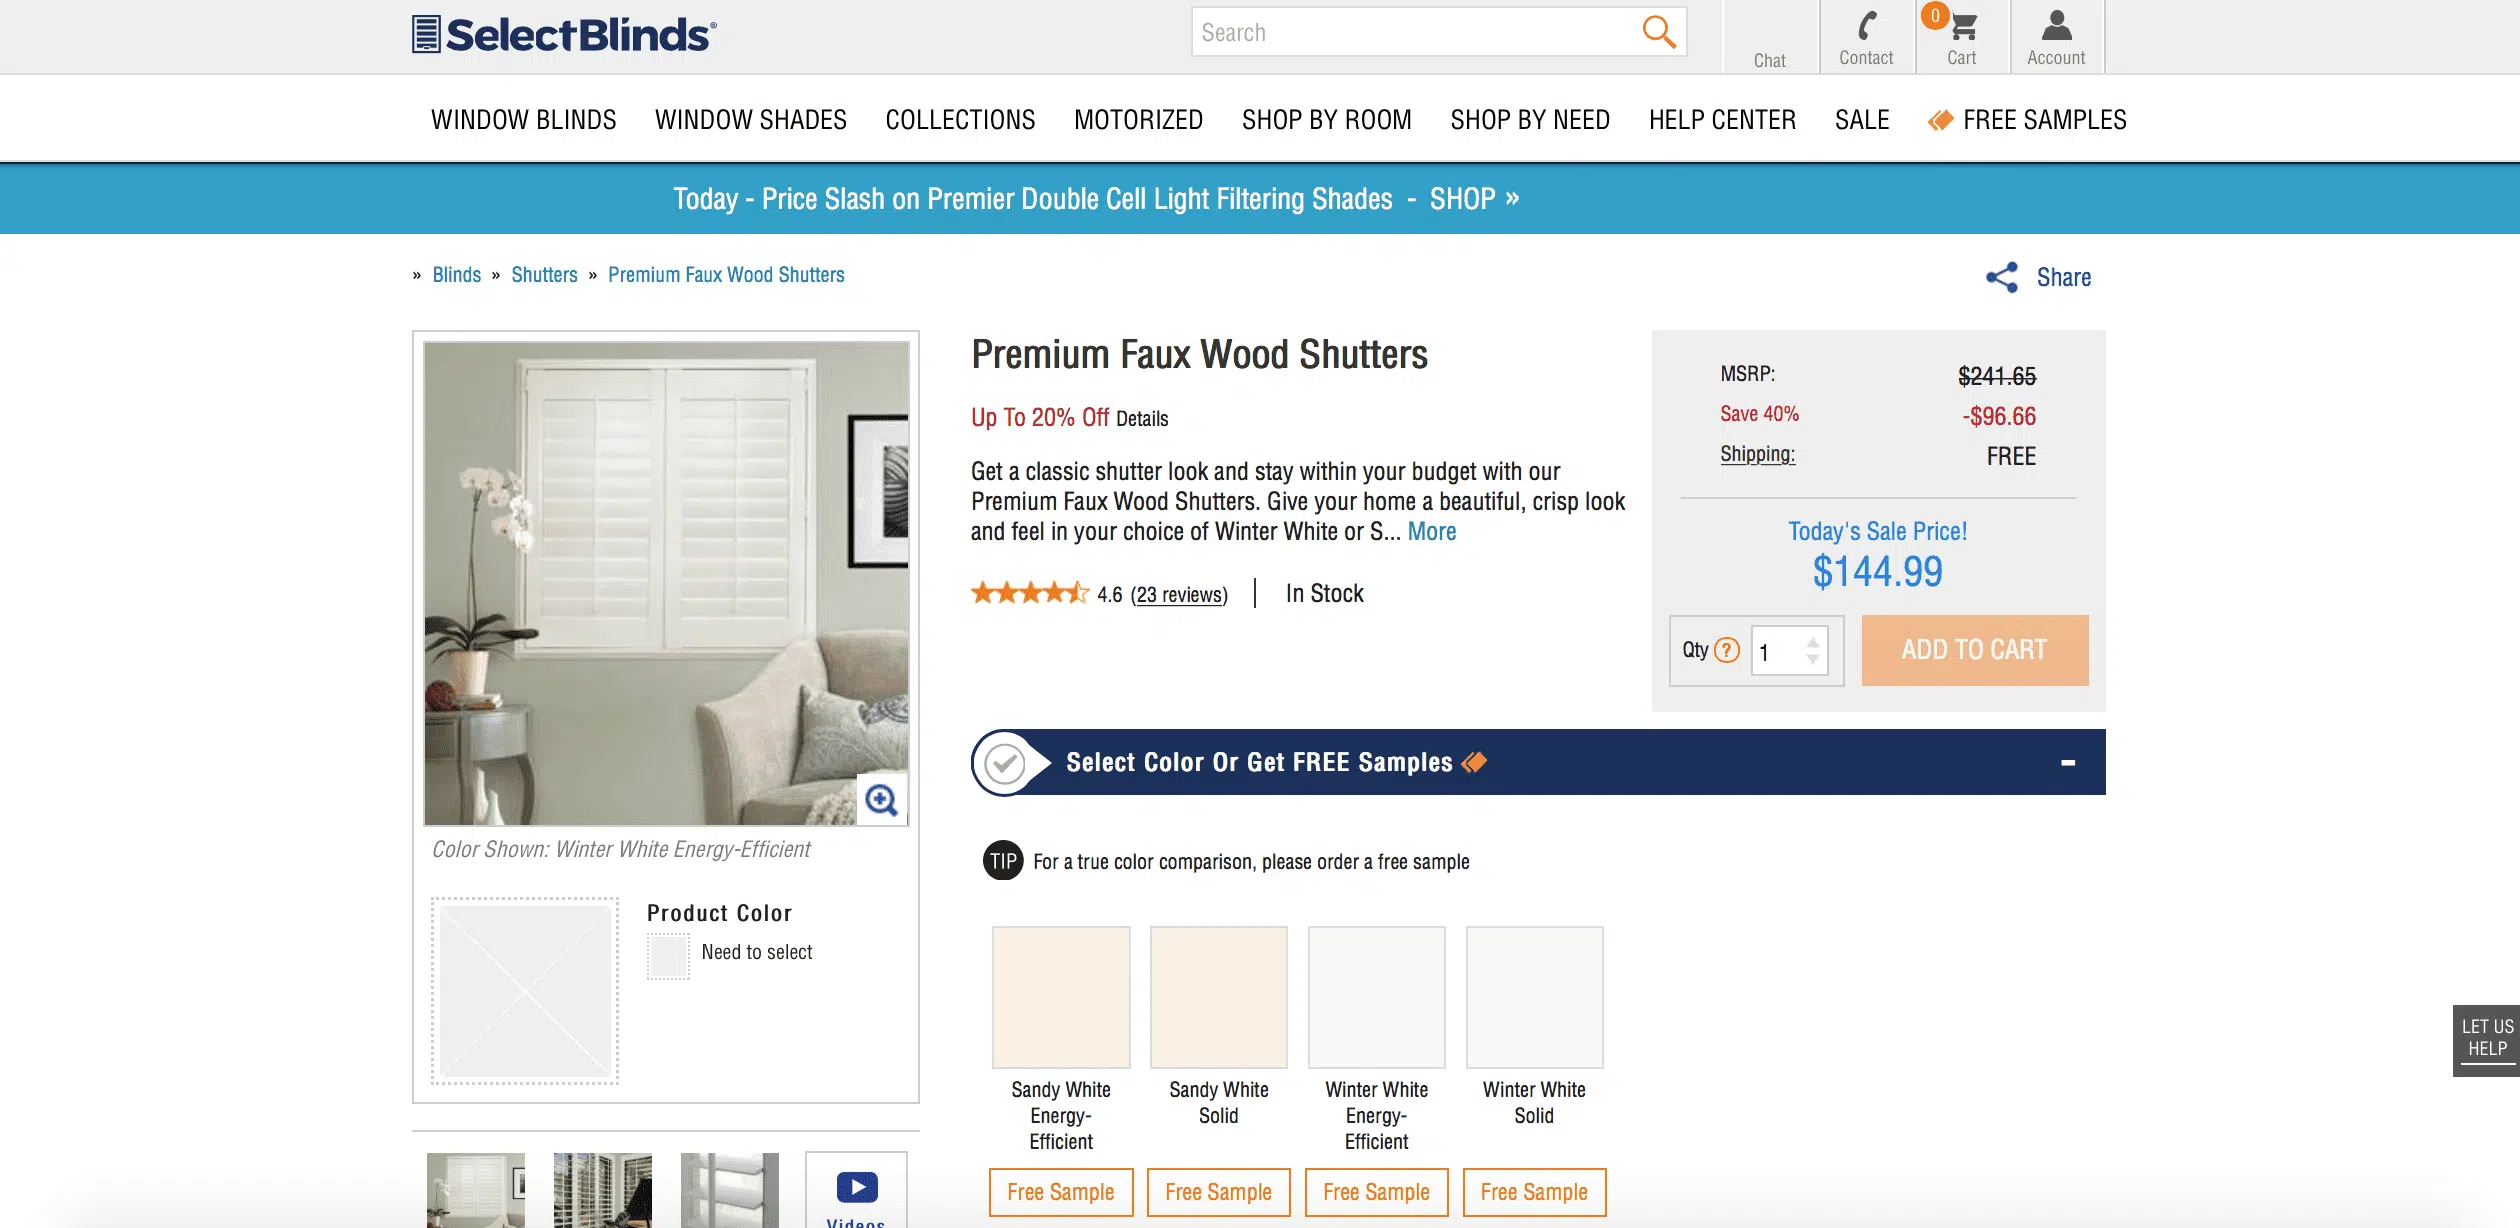
We chose the Premium Faux Wood Shutters for the front windows in our home. There are lots of different options available on their site, but for us, this was the best combination of quality and price. They are much more cost-effective than the Painted Wood Shutters (running 25-35% less), and, like I mentioned, definitely don't slack in quality! Looking at ours, you would never know they're not real wood.
Once you're set on the type of shutters you want, there are quite a few personalization options to select.
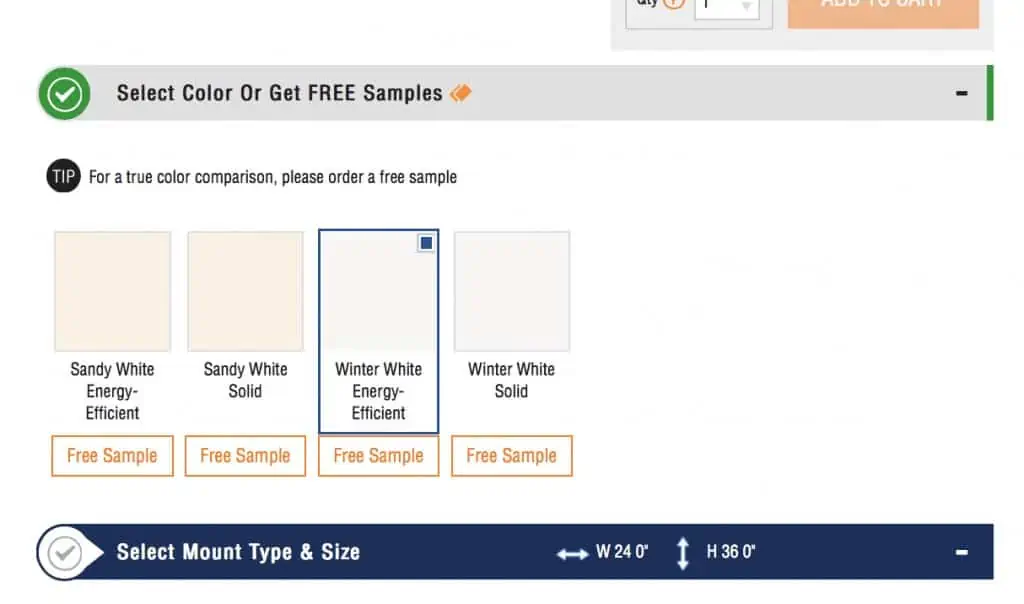
First up, you'll need to select your color. We went with the energy-efficient Winter White. They work perfectly with our trim color (Sherwin Williams Snowbound) and I love that they lock in a little bit of energy savings too!
Measuring Windows
Now, the big one…measuring your windows. Select Blinds has a very specific process for measuring their window. The video below helps:
Definitely invest in a metal measuring tape for this one. The stability helps measure bigger windows accurately. If you have another person around, make this a 2 person job.
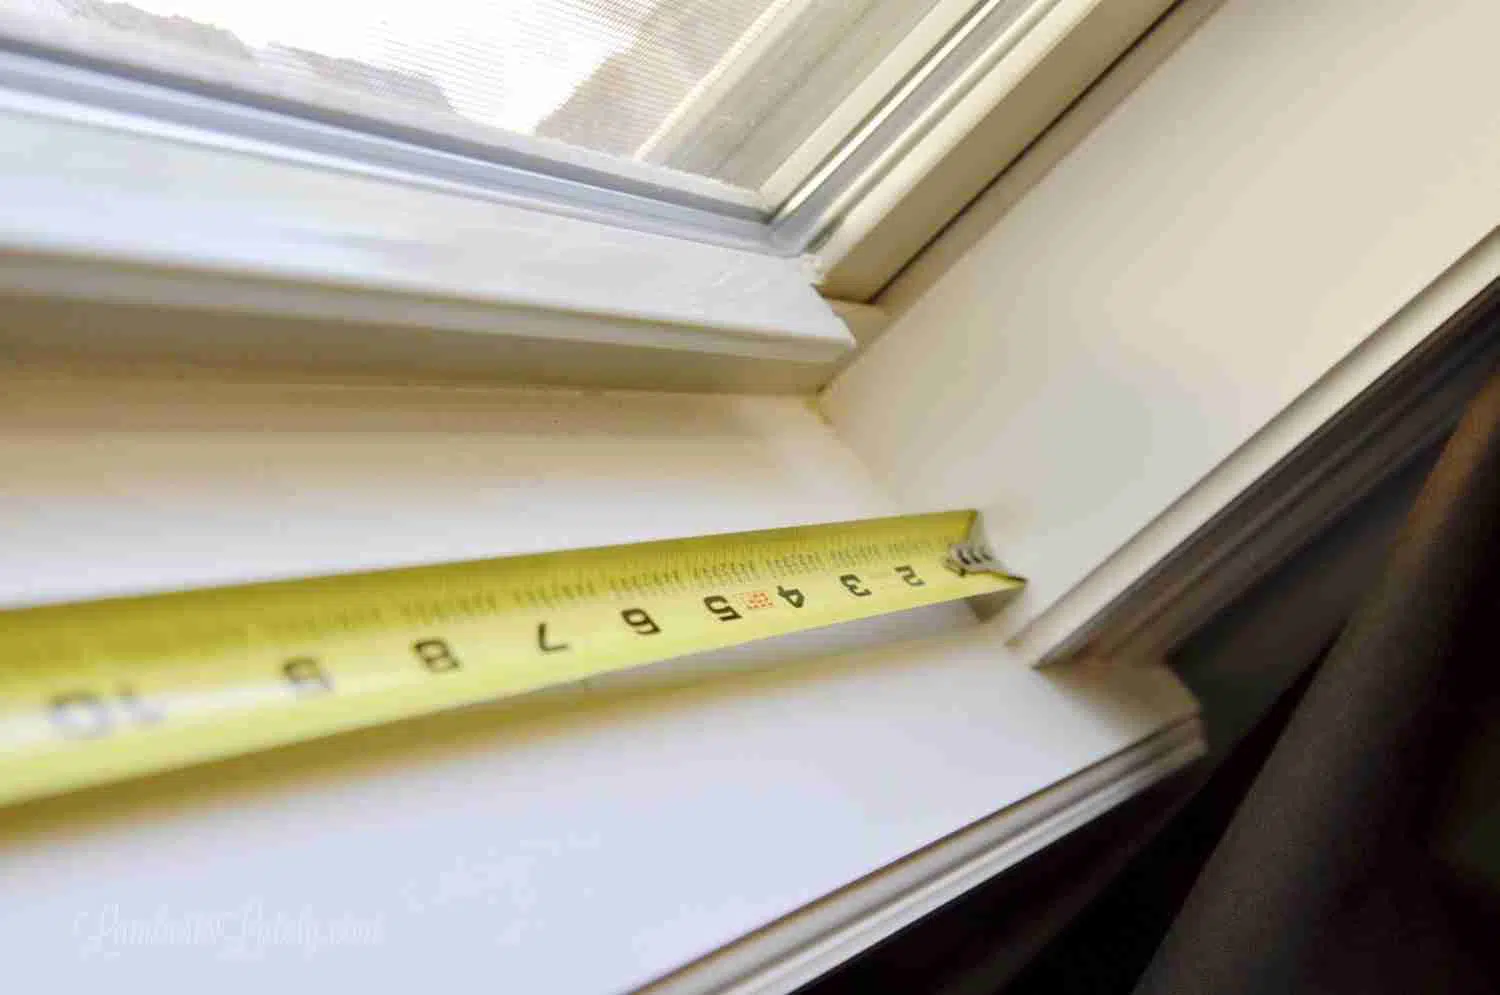
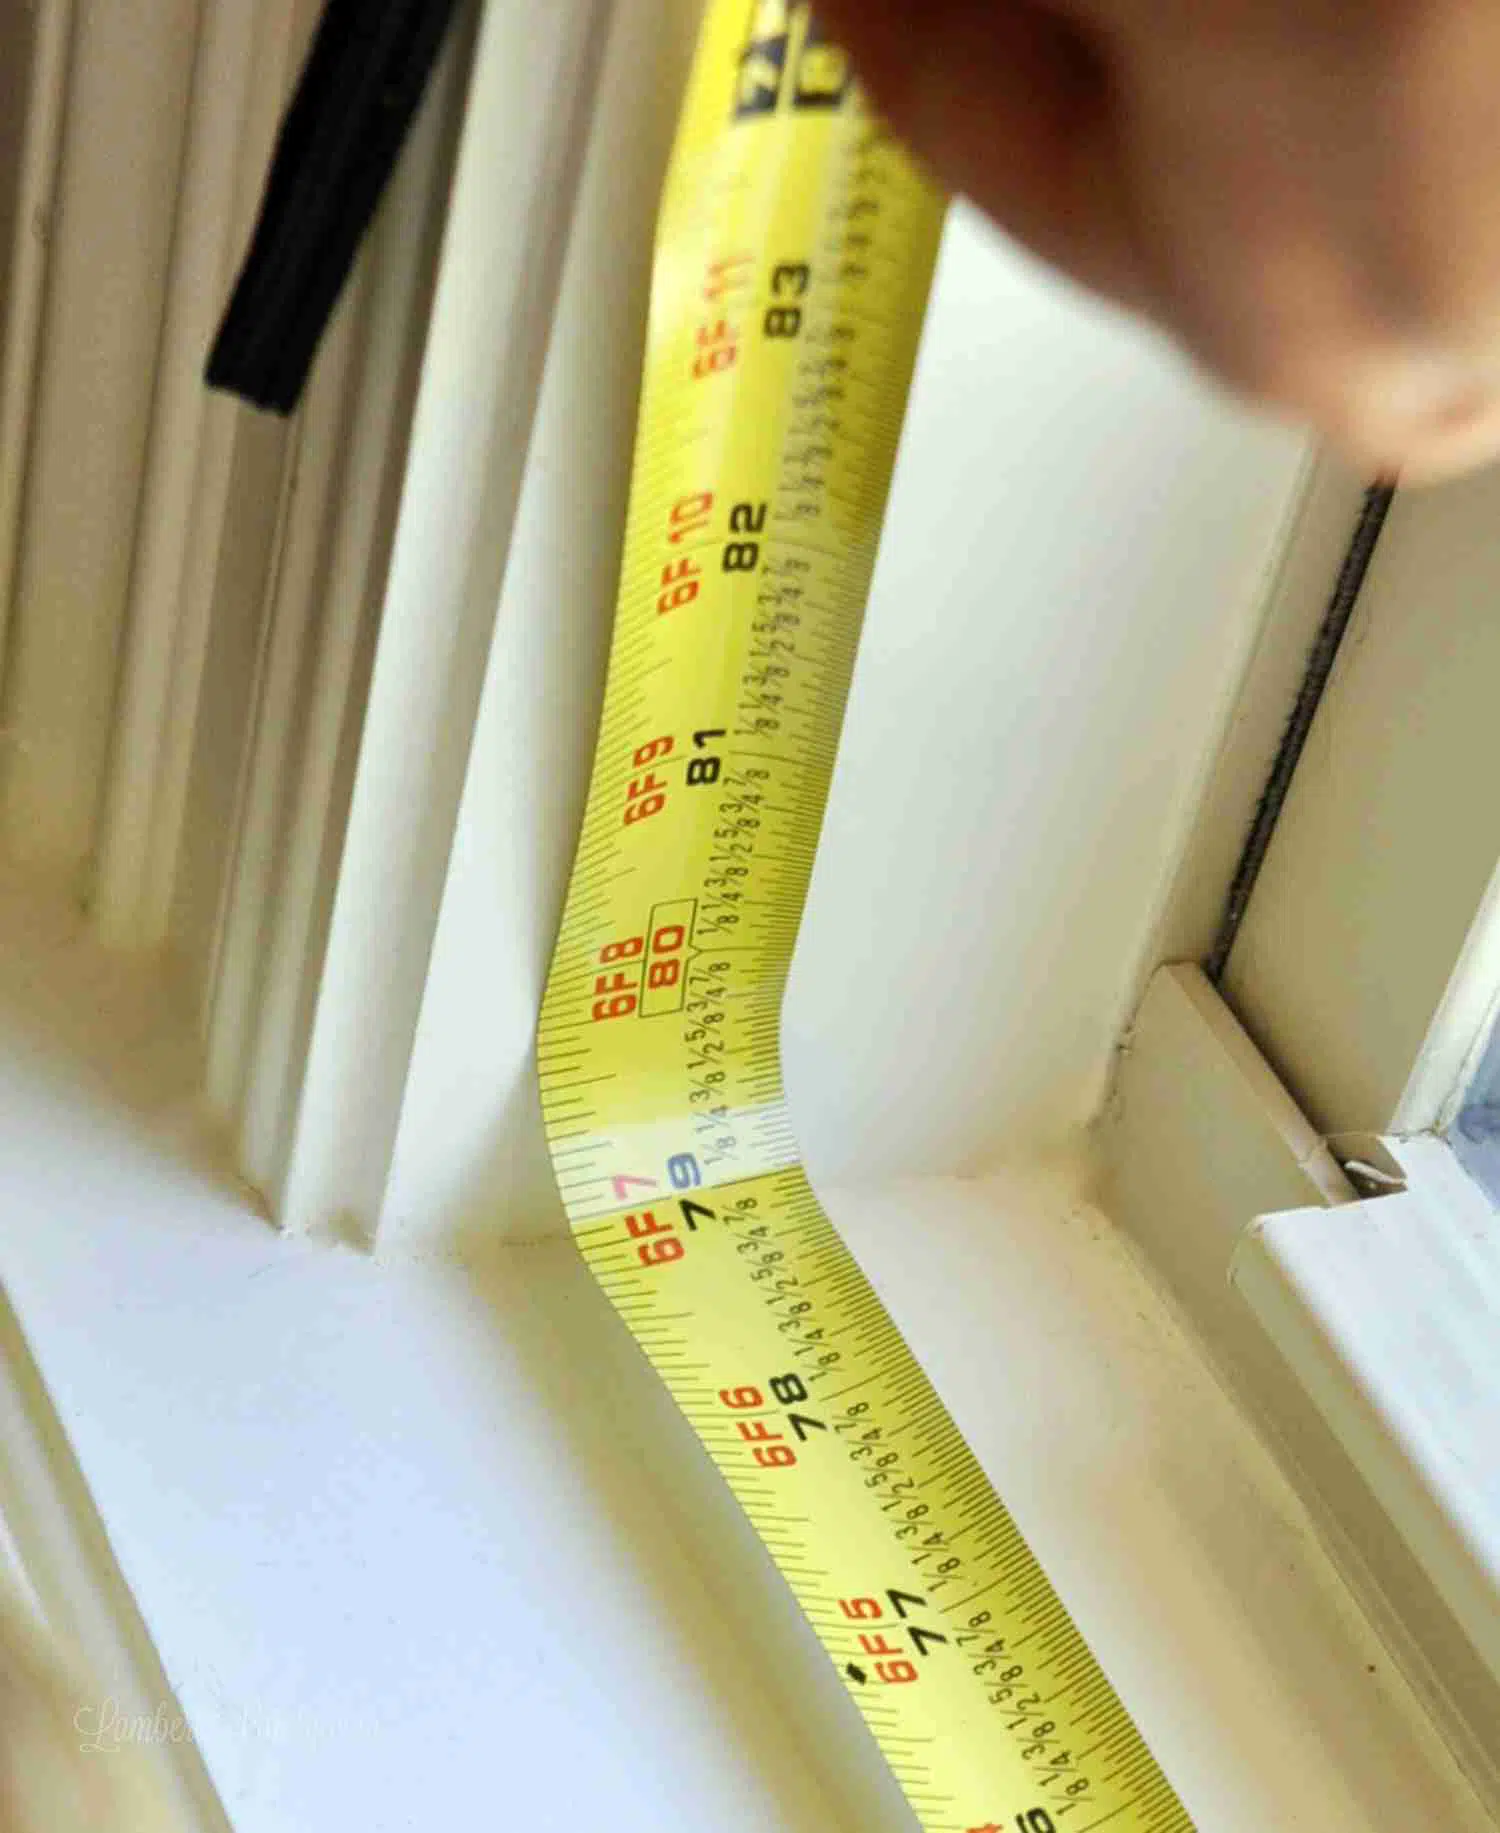
For interior mount blinds, lock one side of the tape into one end of your window framing. On the other side, carefully bend your metal tape as close to the corner of your framing as possible. Measure down to an eighth of an inch, and when in doubt, round down (I'll show you how to fix that issue later on in the post).
Repeat this at three different spots in your frame (you'd be surprised how different it can be), and use the smallest measurement you get. You'll need to get both the length and width of the interior of your window frame.
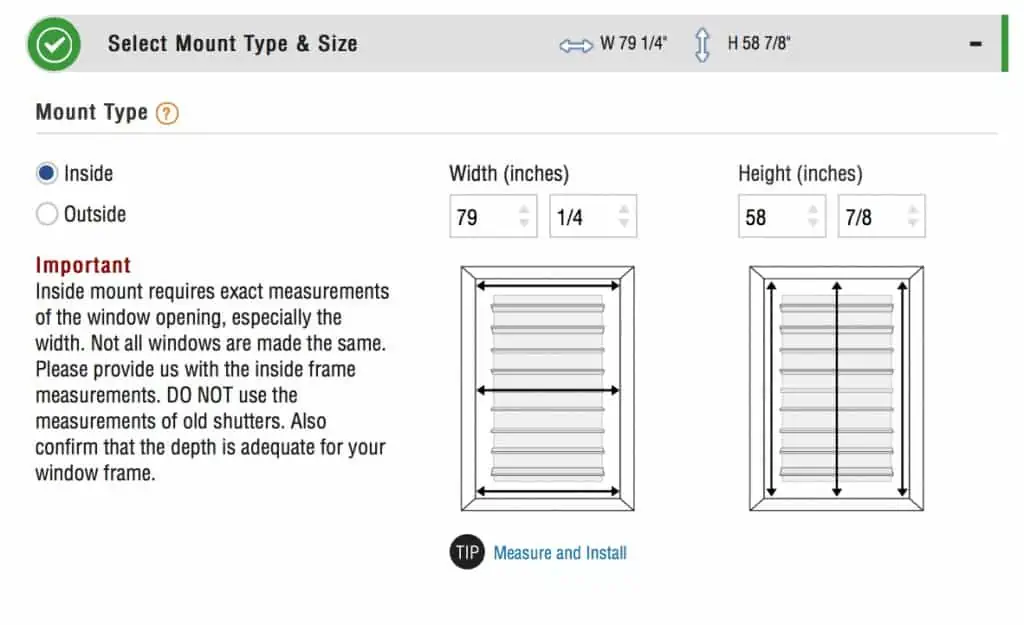
Then, simply put that smallest measurement in on the options page! I used an inside mount since we already had framing on our windows. If you do not have a window frame or want to hide the one that's there, you can use an outside. Just ensure that the outside frame blinds will work with any existing window framing.
Note: the installation tutorial in this post is for an inside mount.
Check out more DIY tutorials with my post on how to paint laminate wood or my DIY side table plans!
Selecting Plantation Shutter Features
Louver
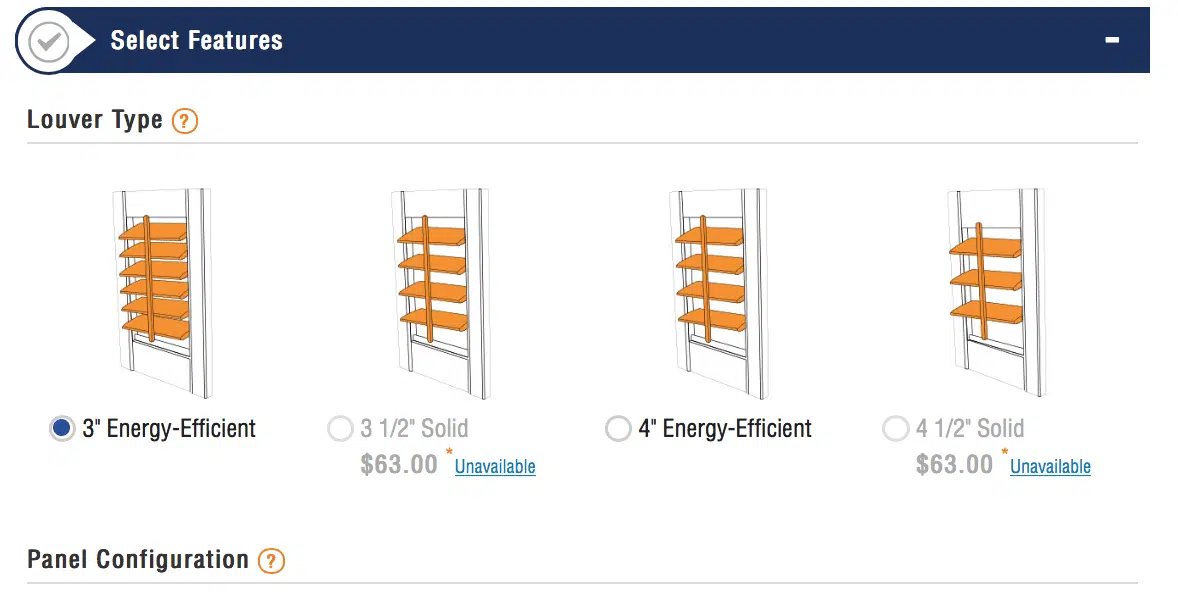
Next, you'll need to select the size and type of louvers (i.e. slats) in your blinds. Your window needs to be at least 2 ¾" deep (from front of frame to glass) for the 3 inch; for the 4 inch, it needs to be at least 3 ¼" deep.
We went with 3" energy efficient because of the depth of our window and cost savings; the solid wood louvers are thicker and provide more stability/insulation if you want to upgrade to those.
Panel
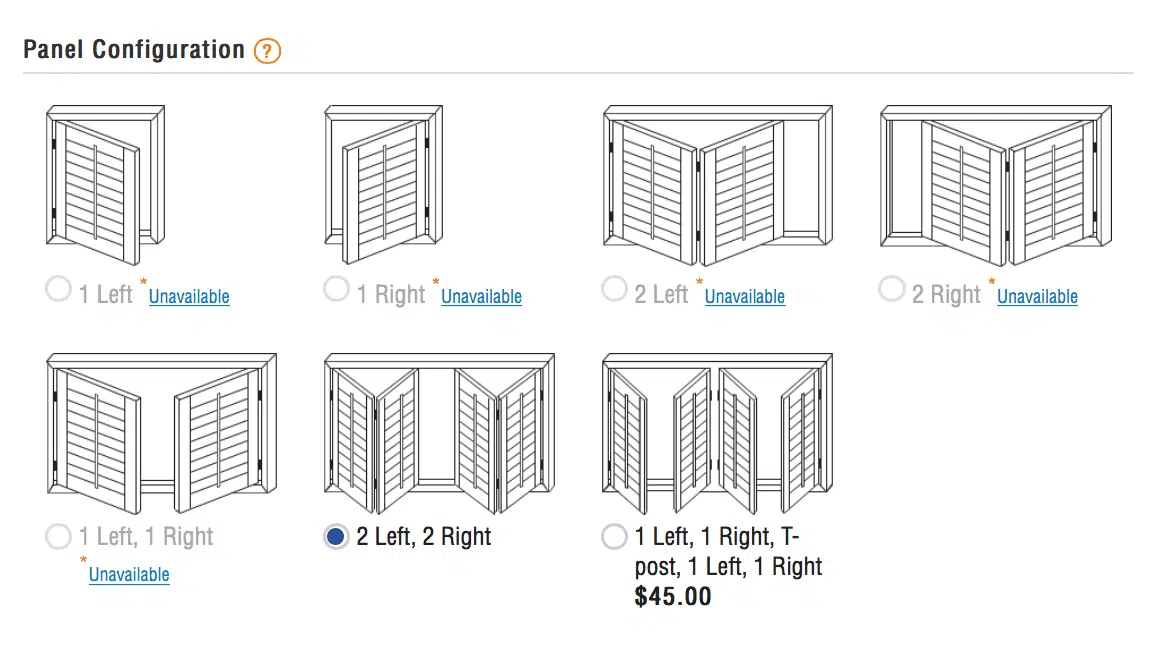
Next is panel configuration; this is totally personal preference. For our smaller windows, we went with the 1 left, 1 right option on the lower left. For our two bigger windows (one of which is in the office, which I'll show in this post), we went with 2 left, 2 right. This configuration still has a ton of stability; there are magnets that lock the panels into place, which I've loved so far!
You'll need to consider what's surrounding your window when selecting this; if you don't have a lot of clearance in front, it might be better to go with 4 total panels on a larger window.
Frame Sides
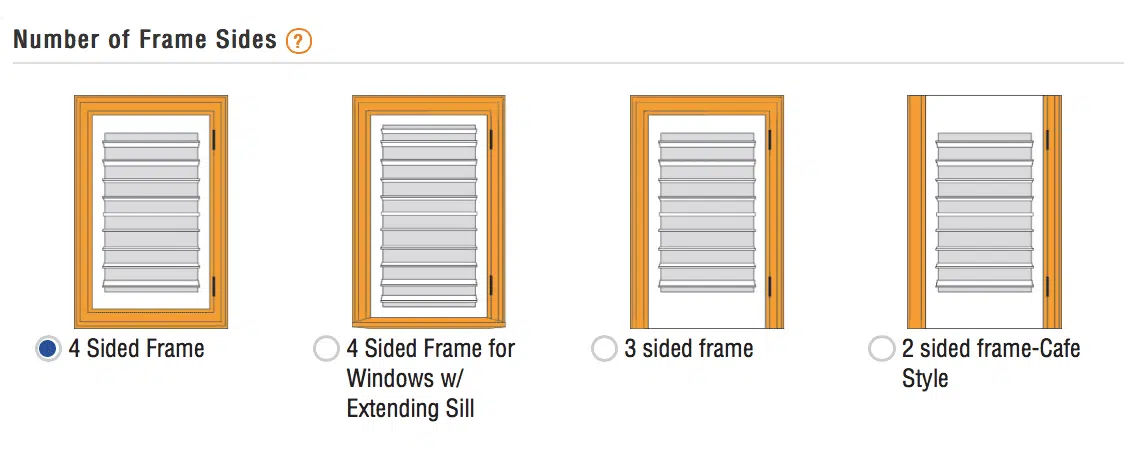
More than likely, you're going to choose 4 sided frame in the next option. If you have a crank or obstruction below your window, you might go with 3 sided; if you have cafe-style windows, you might need 2-sided.
Inside vs Outside Shutter Frame
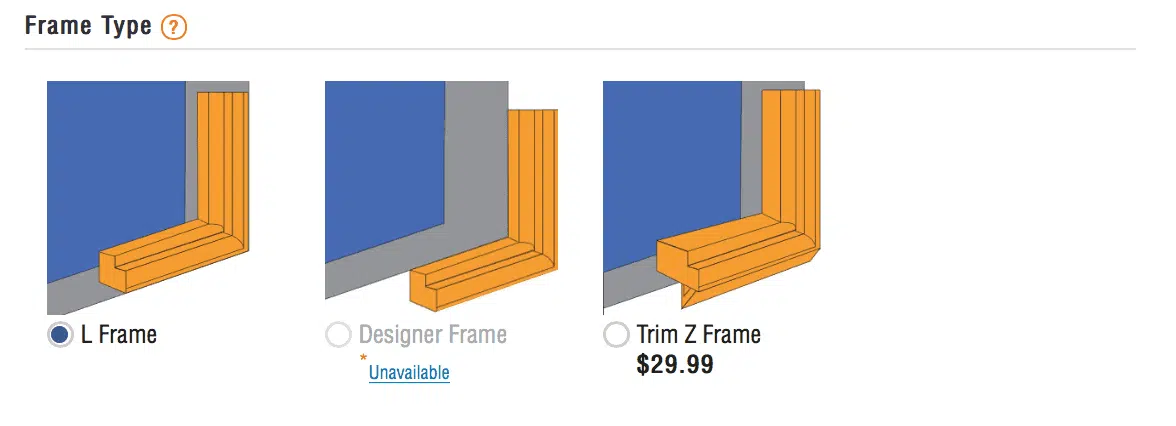
The frame type totally depends on your window. If you have an existing window frame, go with the L frame (this is what we chose). If you don't have a window frame already, choose the Trim Z Frame; this will block out light around the corners and give a "framed look" to frameless windows. When mounting on the outside, the designer frame is your best bet!
Tilt Type
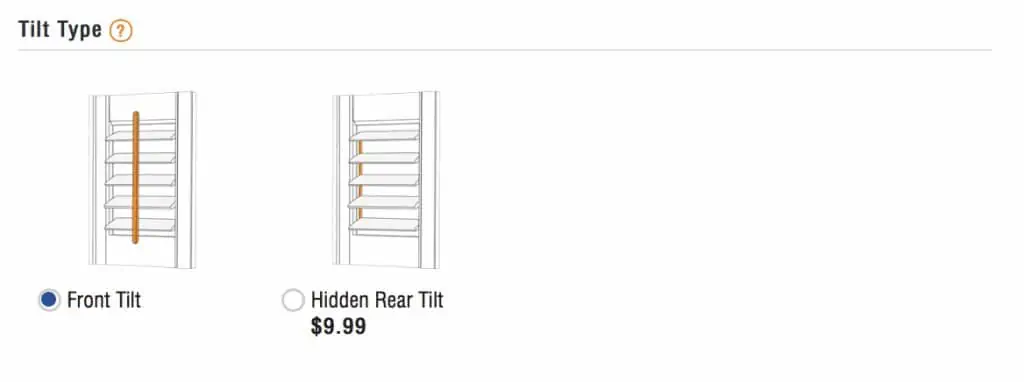
Tilt type is another personal preference. I love the look of the front tilt, but if you just want the louvers showing, hidden rear tilt is an option!
Dividing Rail
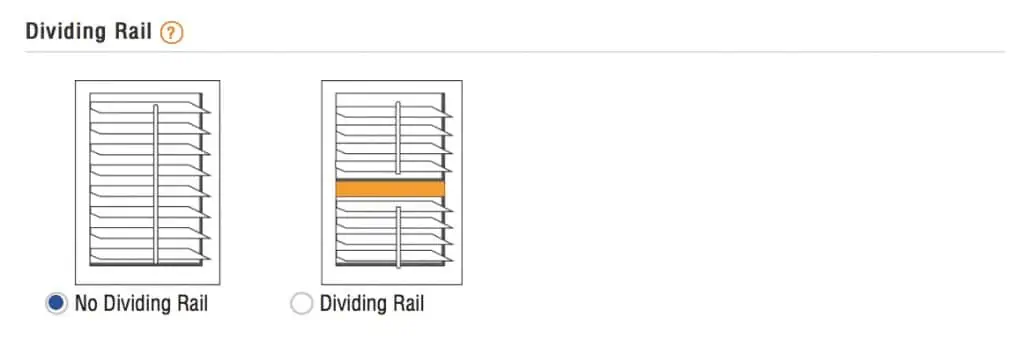
Having a dividing rail is nice if you have a larger window or want the option of opening half of the blinds at a time.
Hinge Color

You can select hinge color too…the "paint to match" option is perfect if you want seamless, hidden hinges.
Coordinating with other Plantation Shutters
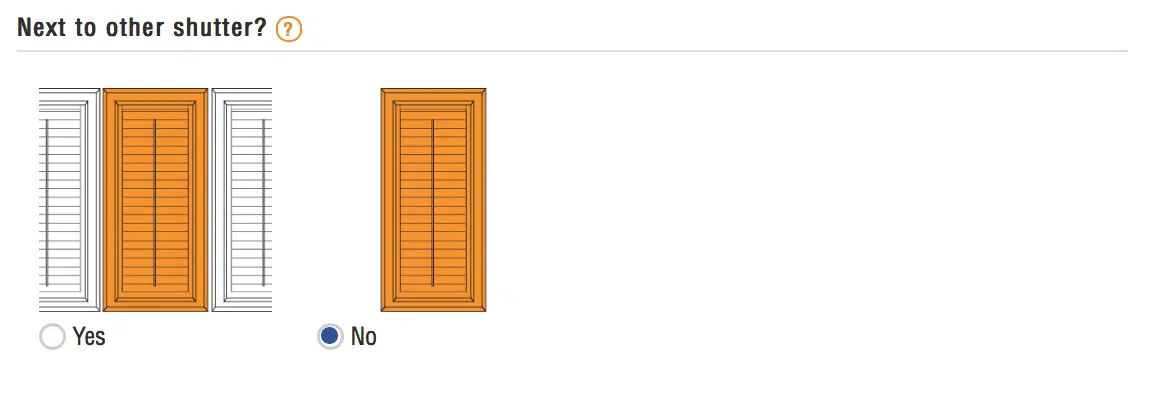
And, last but not least, let them know if you're planning on putting shutters in the same room. This is a cool feature - if you do have a set of shutters in the same room, Select Blinds will try their best to match the number of louvers and height of the dividing rail if you have one, so everything looks nice and congruent!
Once all of your many options are selected and your order is finalized, you'll have your blinds in a few weeks!
Once you receive your shutter shipment, it's time to dive into installation!
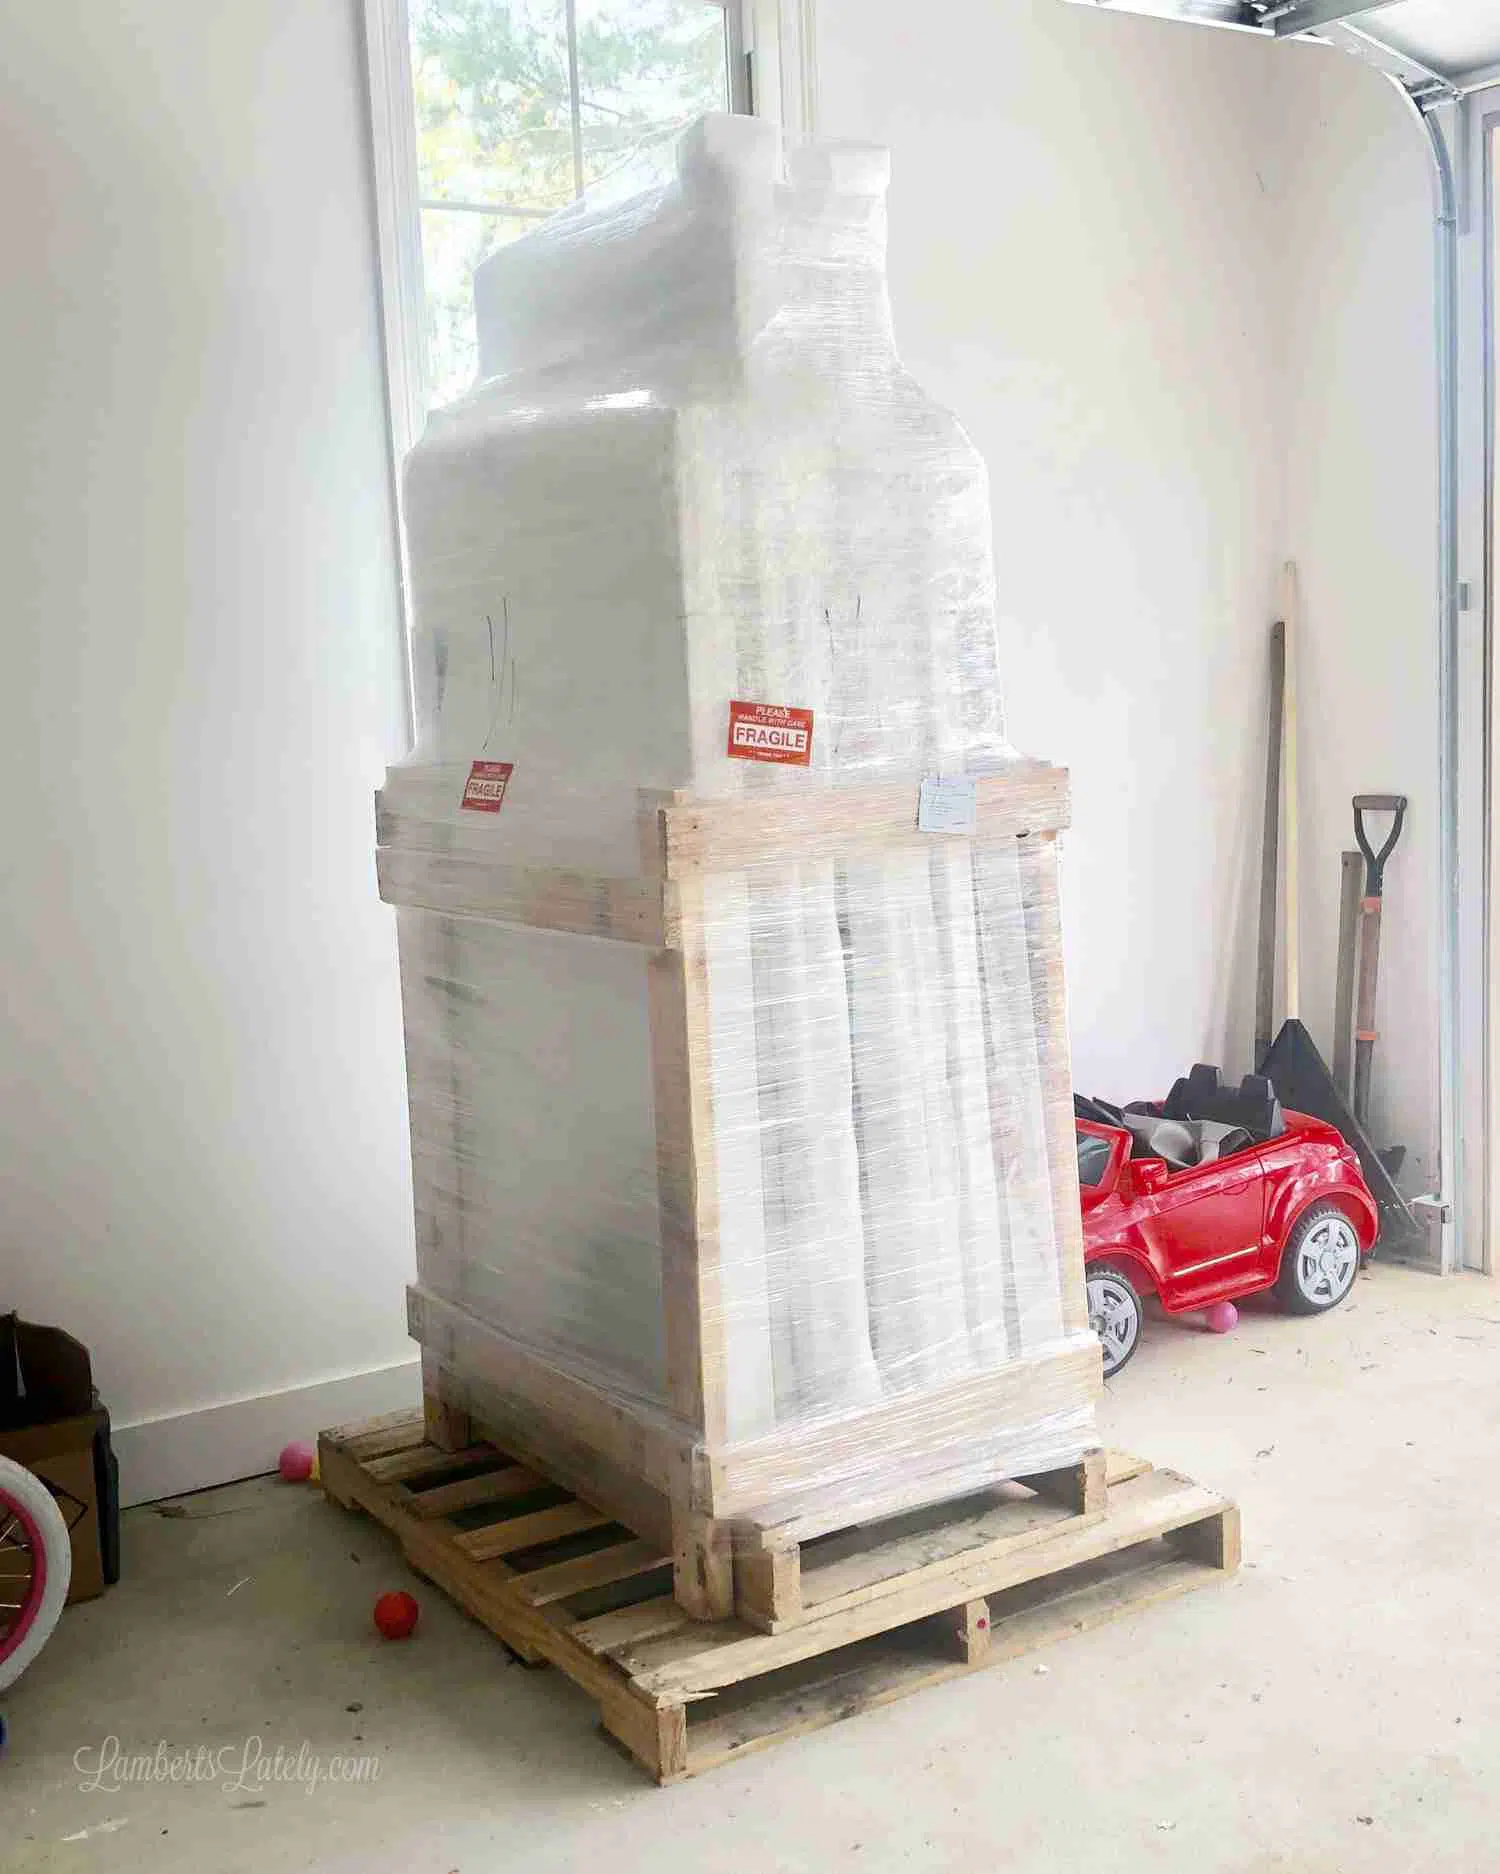
Step 2: Unpack and locate installation hardware.
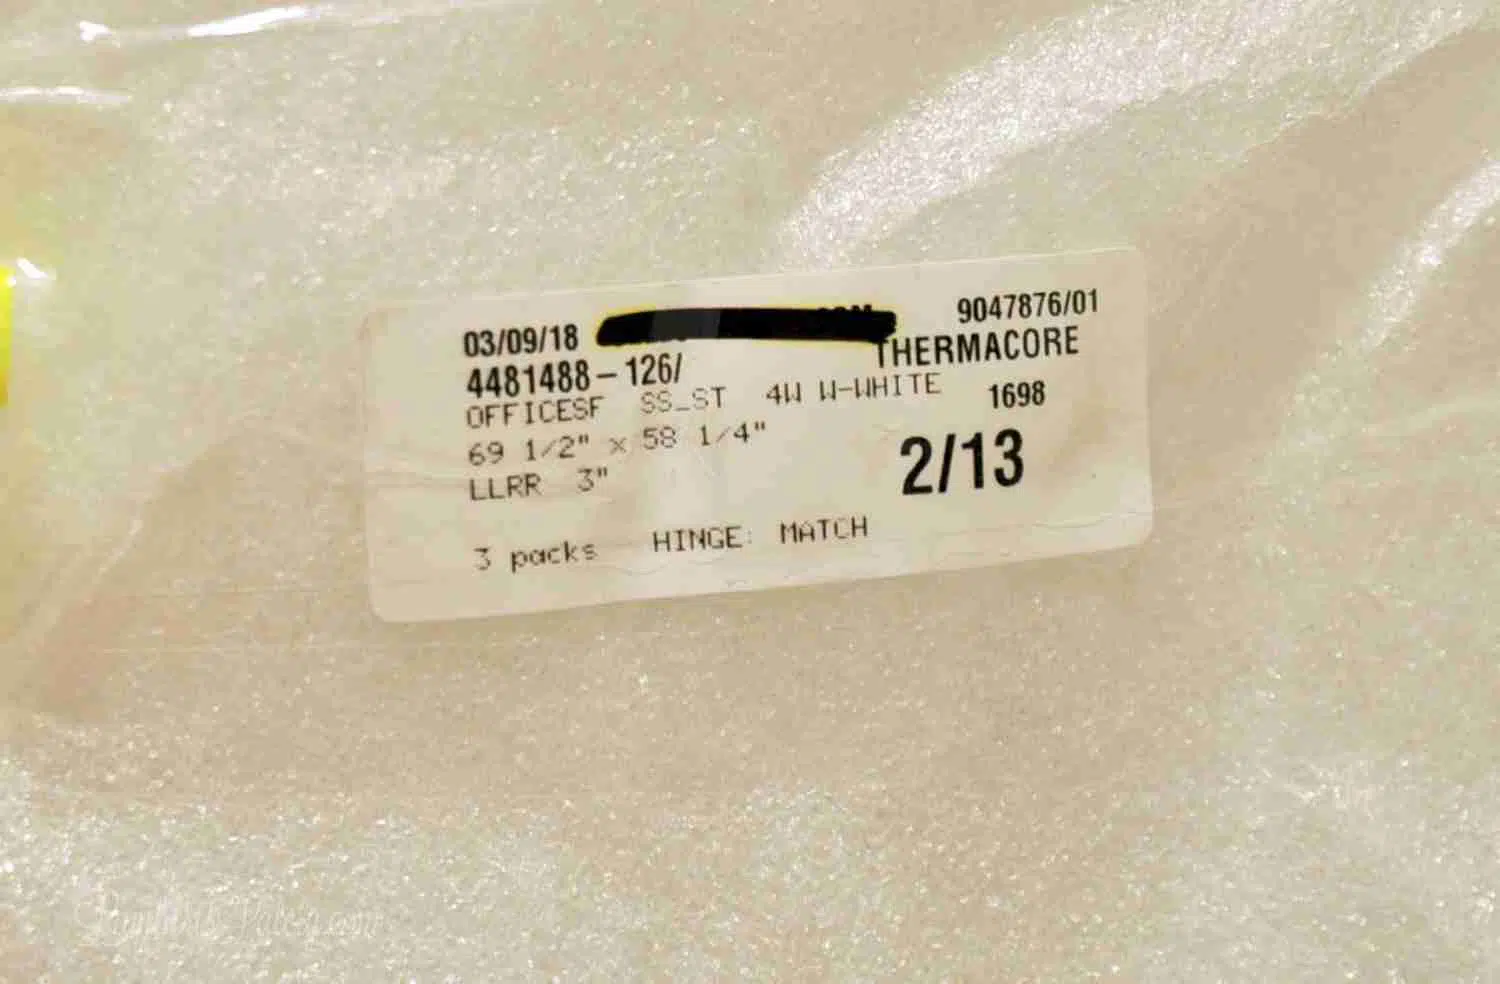
Our set of plantation shutters from Select Blinds came in packaged very securely. I loved that they were labeled by room (make sure you note that when you order and they'll put it on each set of shutters!).
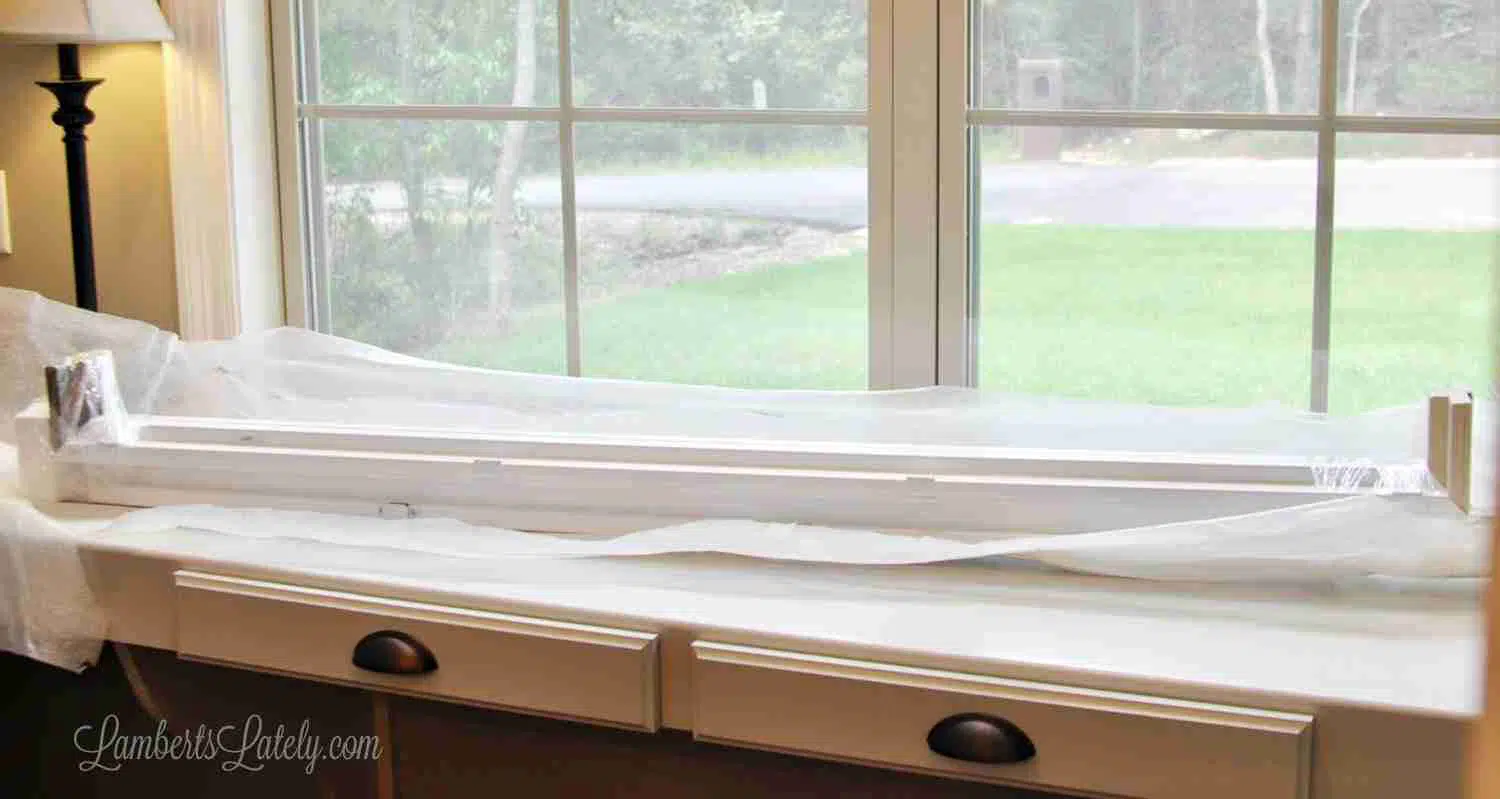
Go on and take off/discard all of the bubble wrap...there's a lot, so it helps to get it out of the way first.
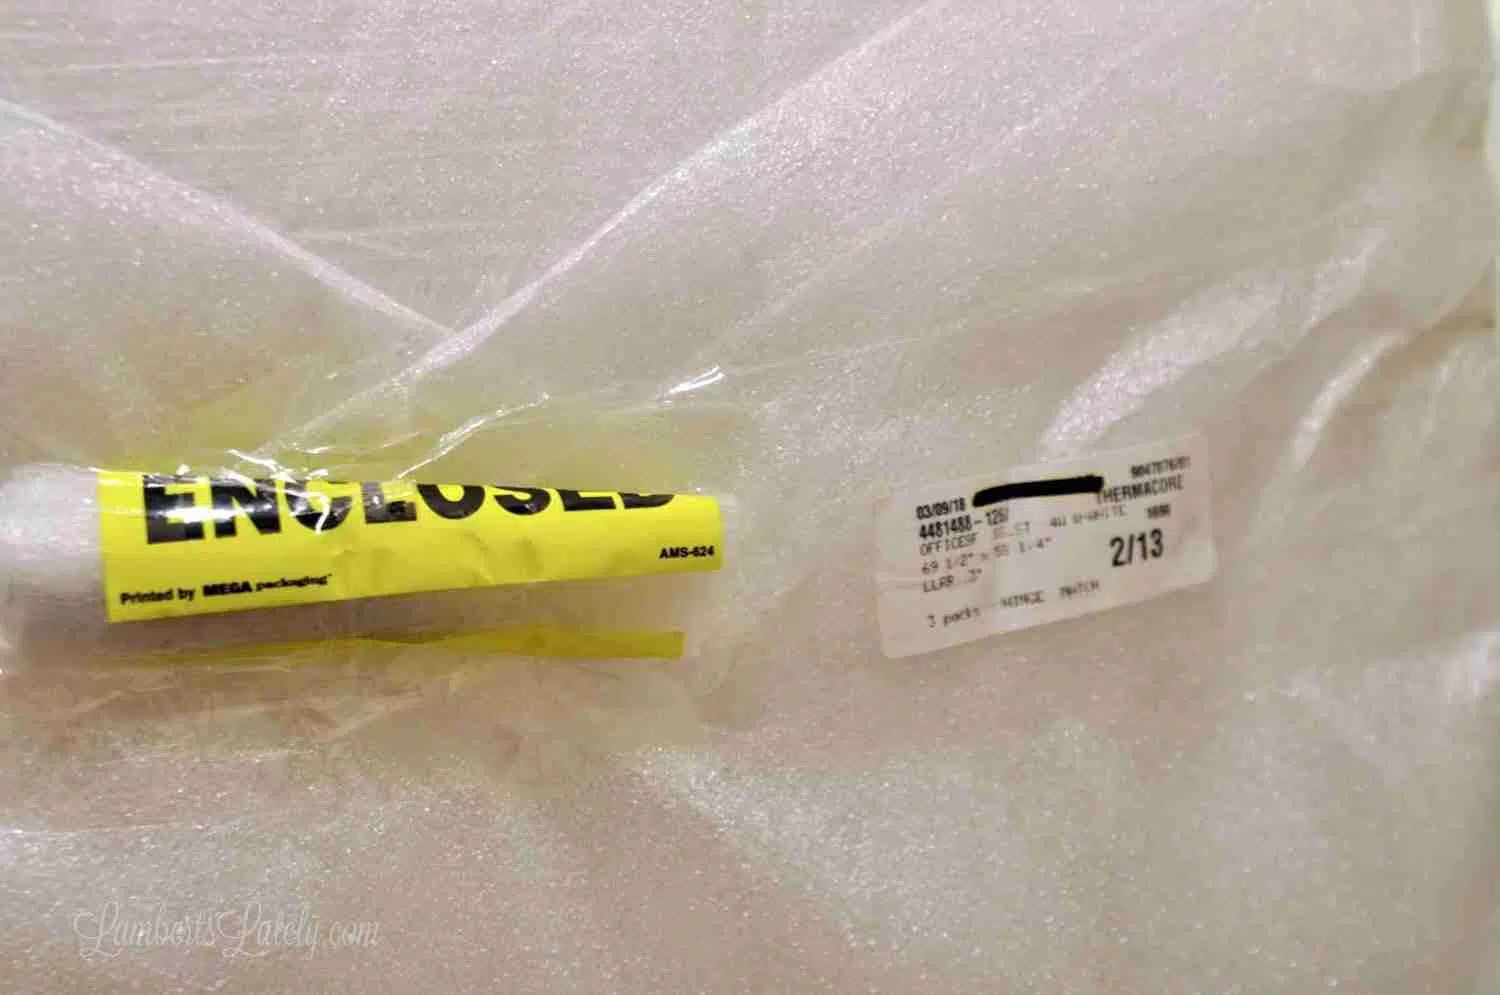
You'll also find all of the hardware you need attached to each set of blinds. Make sure to take that off first and set it aside! It was bright yellow on our package, so you couldn't miss it.
Now - the process of installing plantation shutters might sound overwhelming, but it's so not. It's as easy as putting a few screws in the wall!
Step 3: Assemble frame
Some of our smaller sets of shutters were already completely assembled. If you open your blinds and the outside frame is already attached to the actual shutter panels, you can skip to the next step.
If you have a separate frame (should be a longer package) and individual shutter pieces, you'll need to assemble the frame and attach the shutter to the hinges. It's just an extra couple of steps...nothing to be intimidated by!

Lay your frame pieces out on a flat surface and pop the pieces into each other.
Once your pieces are positioned into place, you'll see two screw holes at the top of the frame and two at the bottom. Put the smaller screws in your hardware set in these four holes; this is what will hold the frame together.
Step 4: Reinforce pilot holes
You won't find this in the plantation shutter installation steps from Select Blinds, but it's a simple step that we found really helped in the long run.
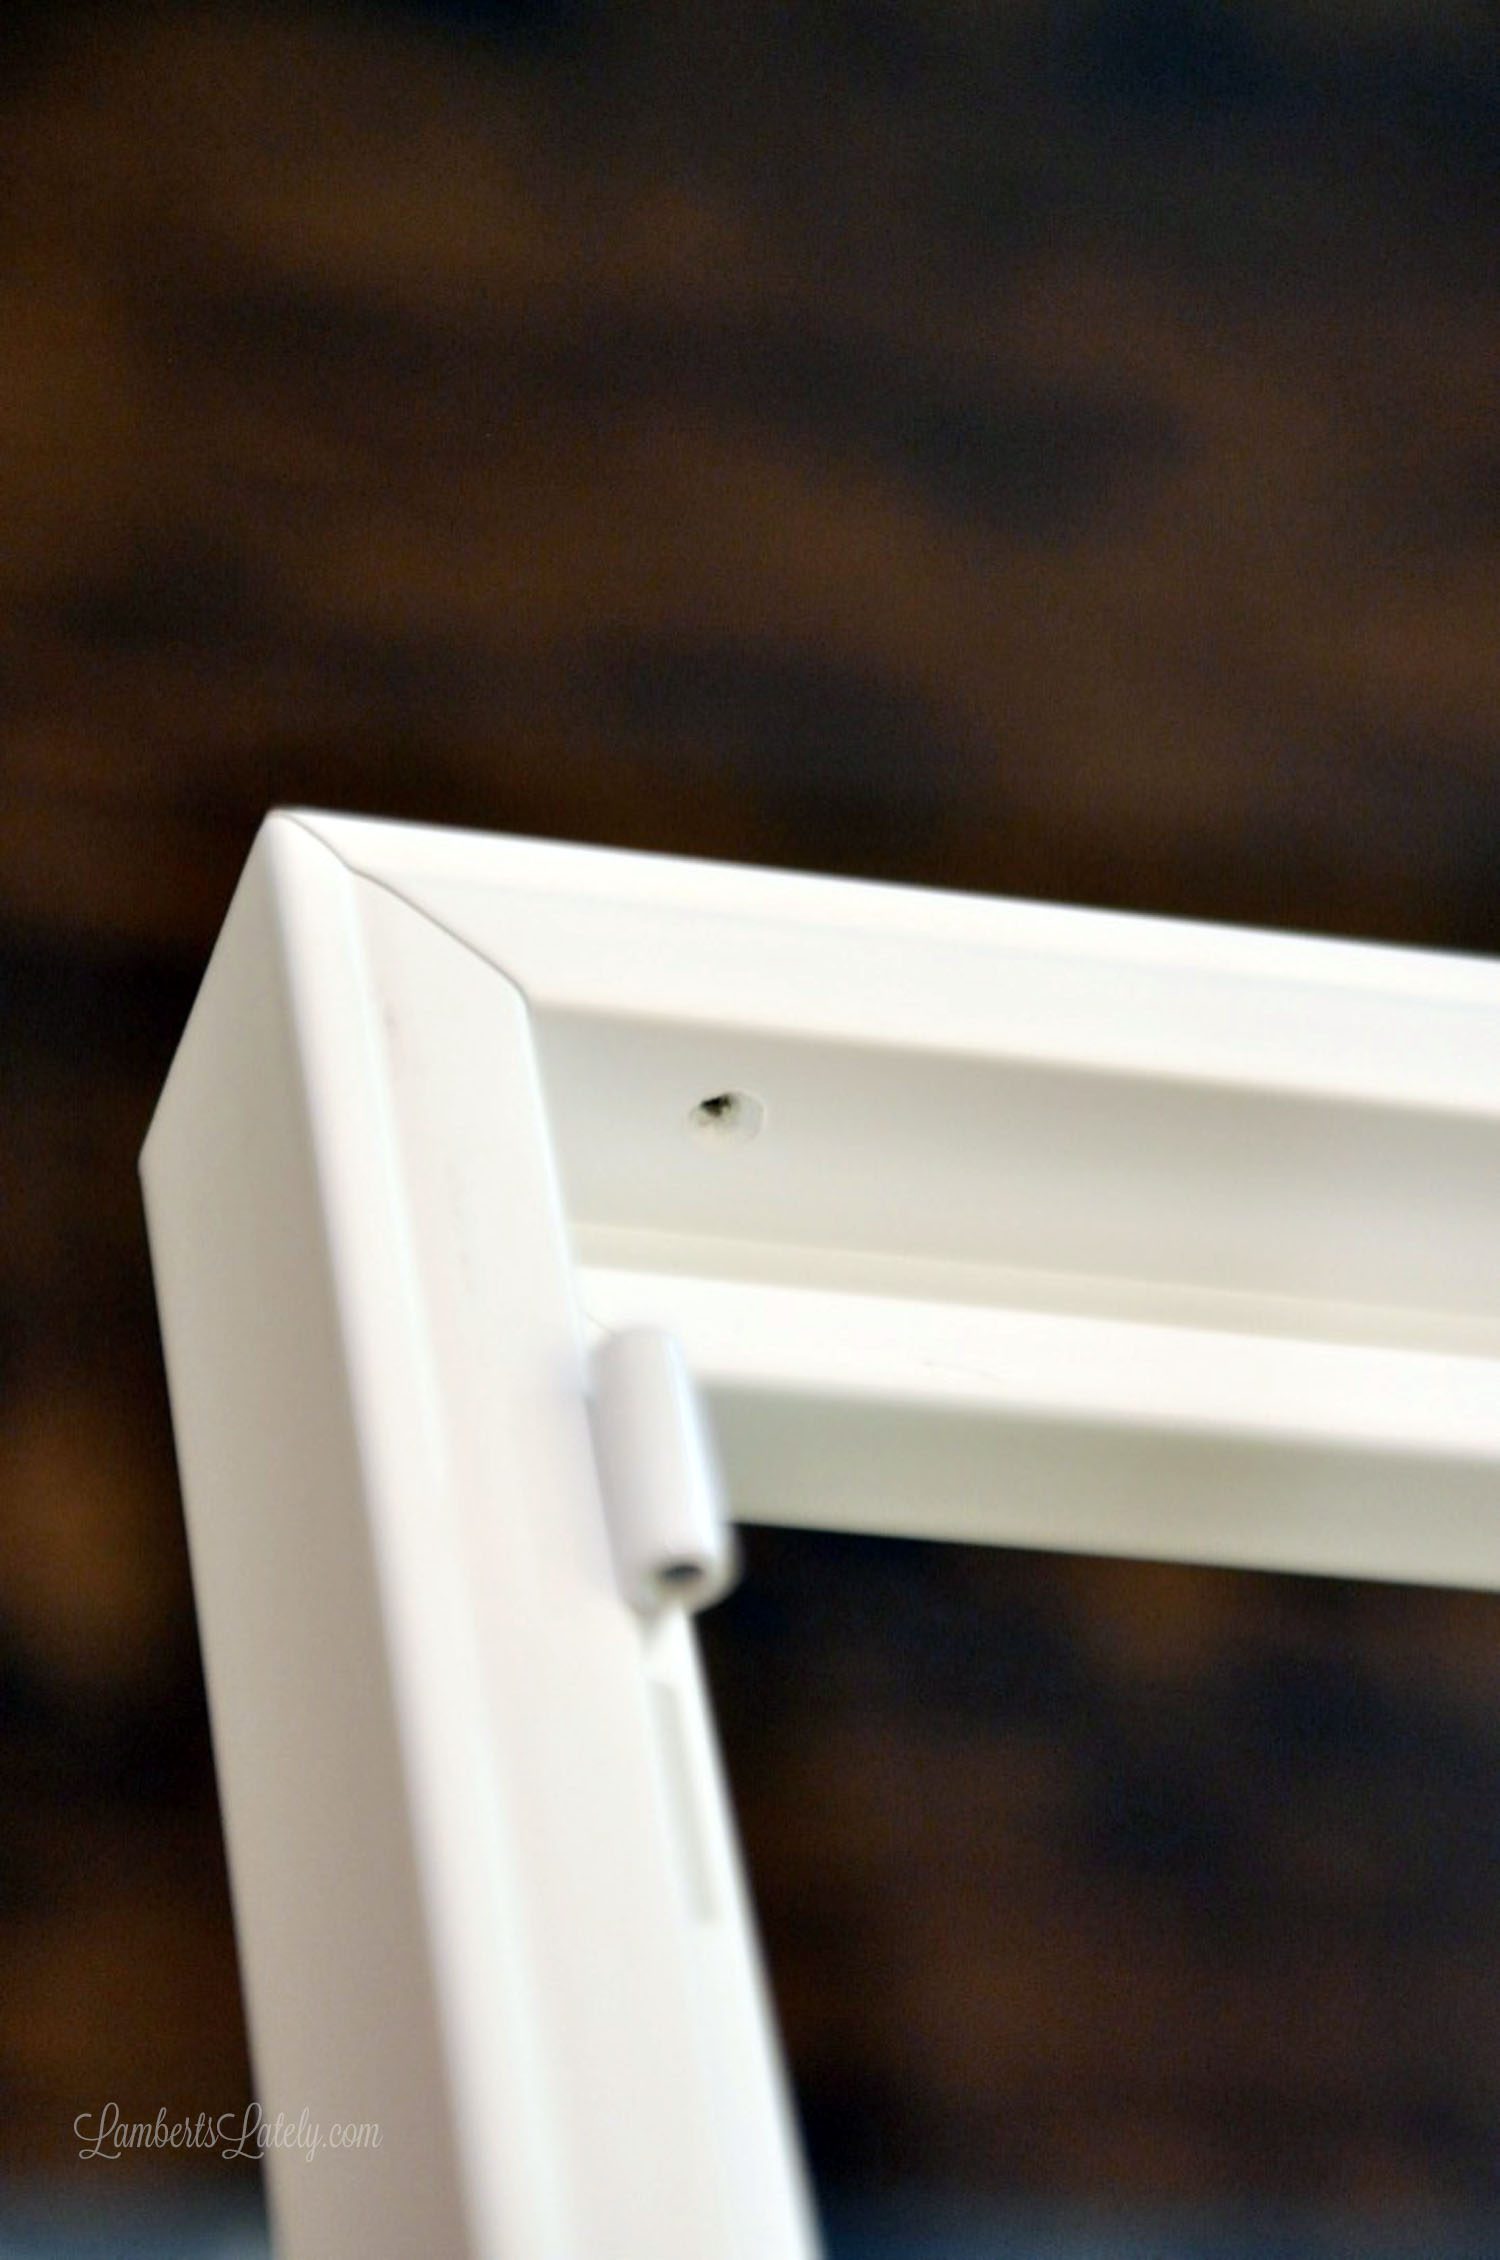
In the left and right panels of your frame, you should see four pre-drilled holes. We found that the pilot holes weren't great and sometimes weren't straight, so we chose to drill our own holes, using the original ones as a guide.

While you still have the frame laying down, use a 1/16" drill bit and drill into the pre-drilled holes as straight as possible, all the way through as deep as you can go.
(And, as a side note, I highly recommend you have a smaller cordless drill for this project. We tried our bigger drill at first and it was such a hassle!)
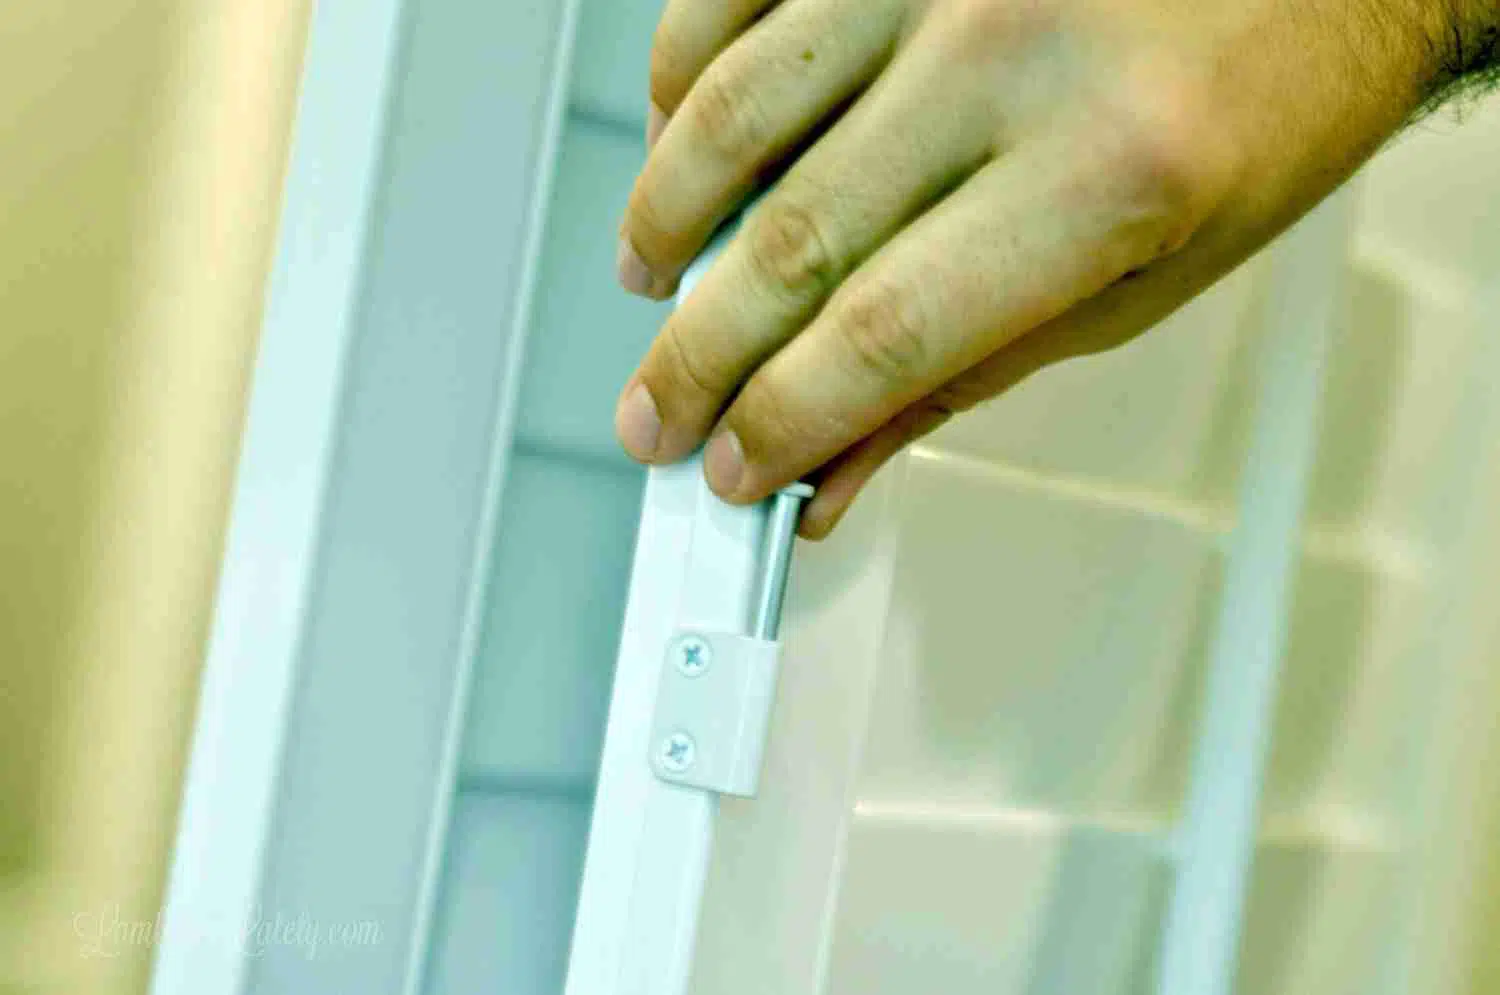
Step 5: Stand the frame up and pre-drill screws
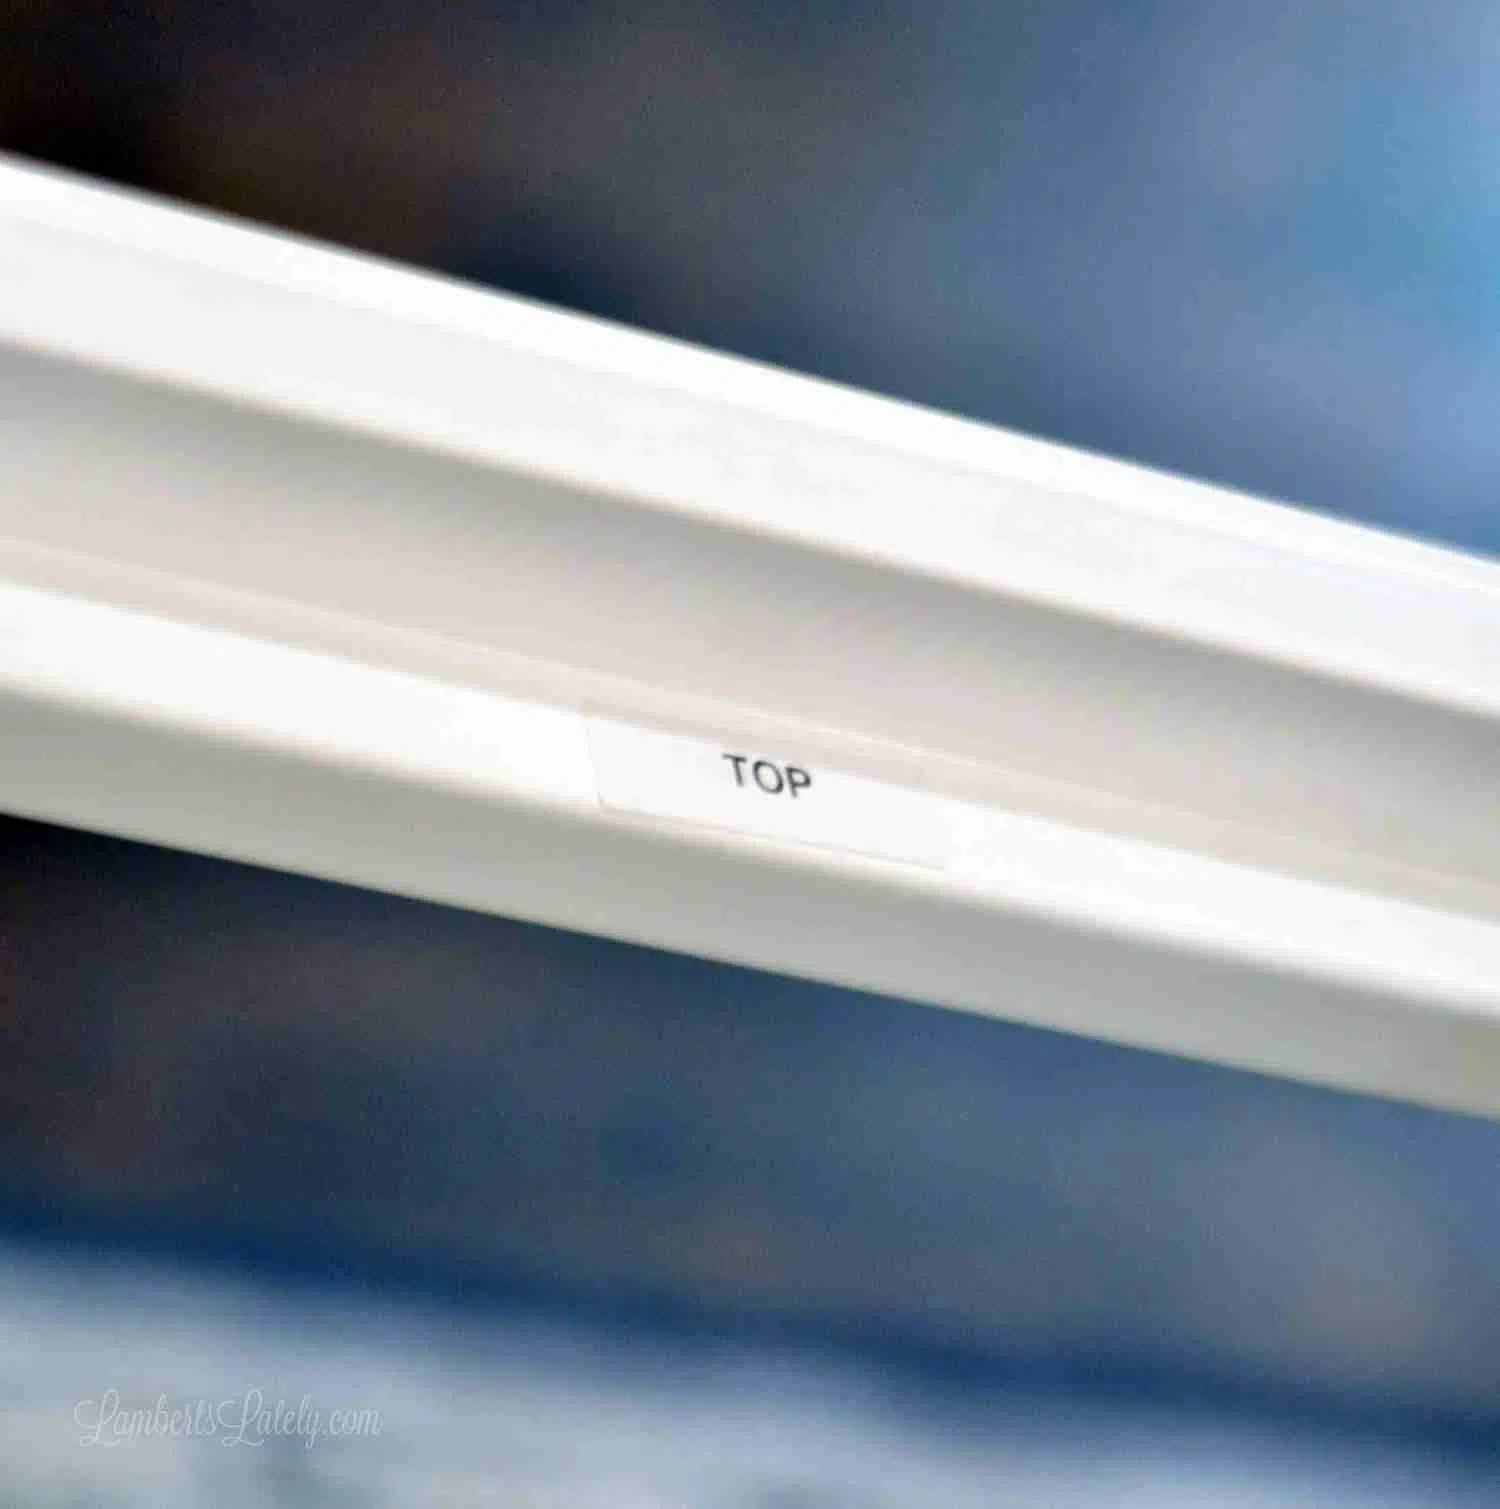
Now, you can go on and stand the frame upright, making sure the label that says "top" is at the top and the one that says "left" is on your left side. We also found that it helped to go on and secure the screws into the pre-drilled holes before actually placing the frame in your window.
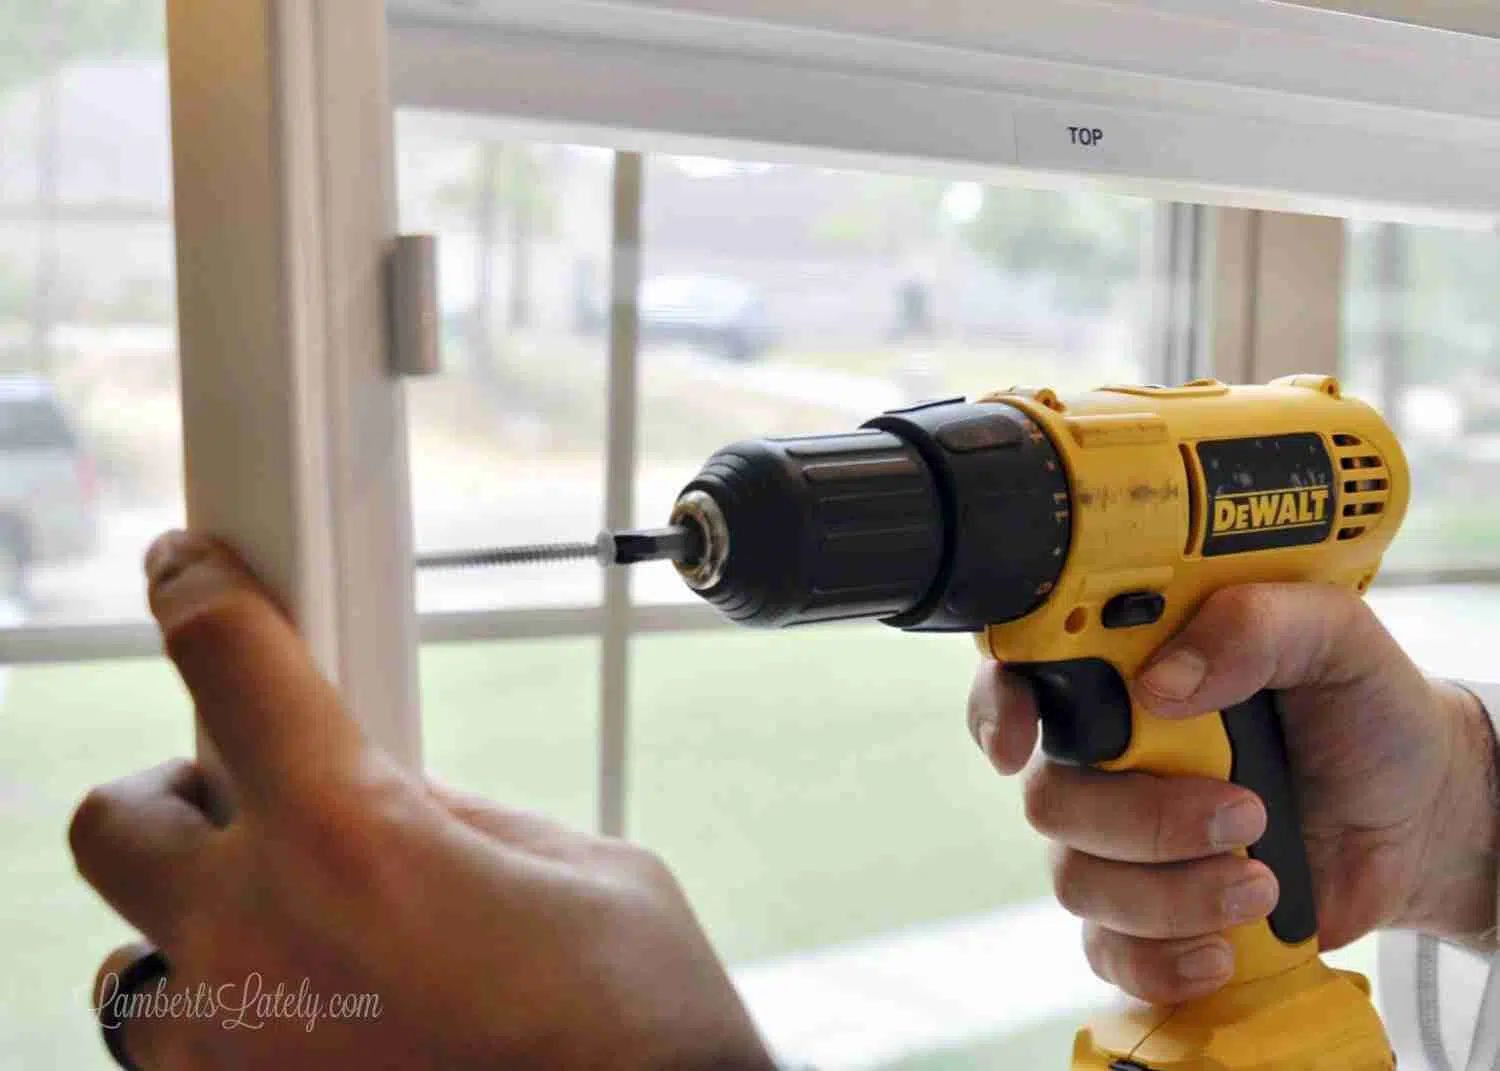
Go on and put the longer set of screws in the hardware pack in the four holes on the left and right side of your frame. Don't put them all the way through; just enough to keep them secure while you place the frame in your window.
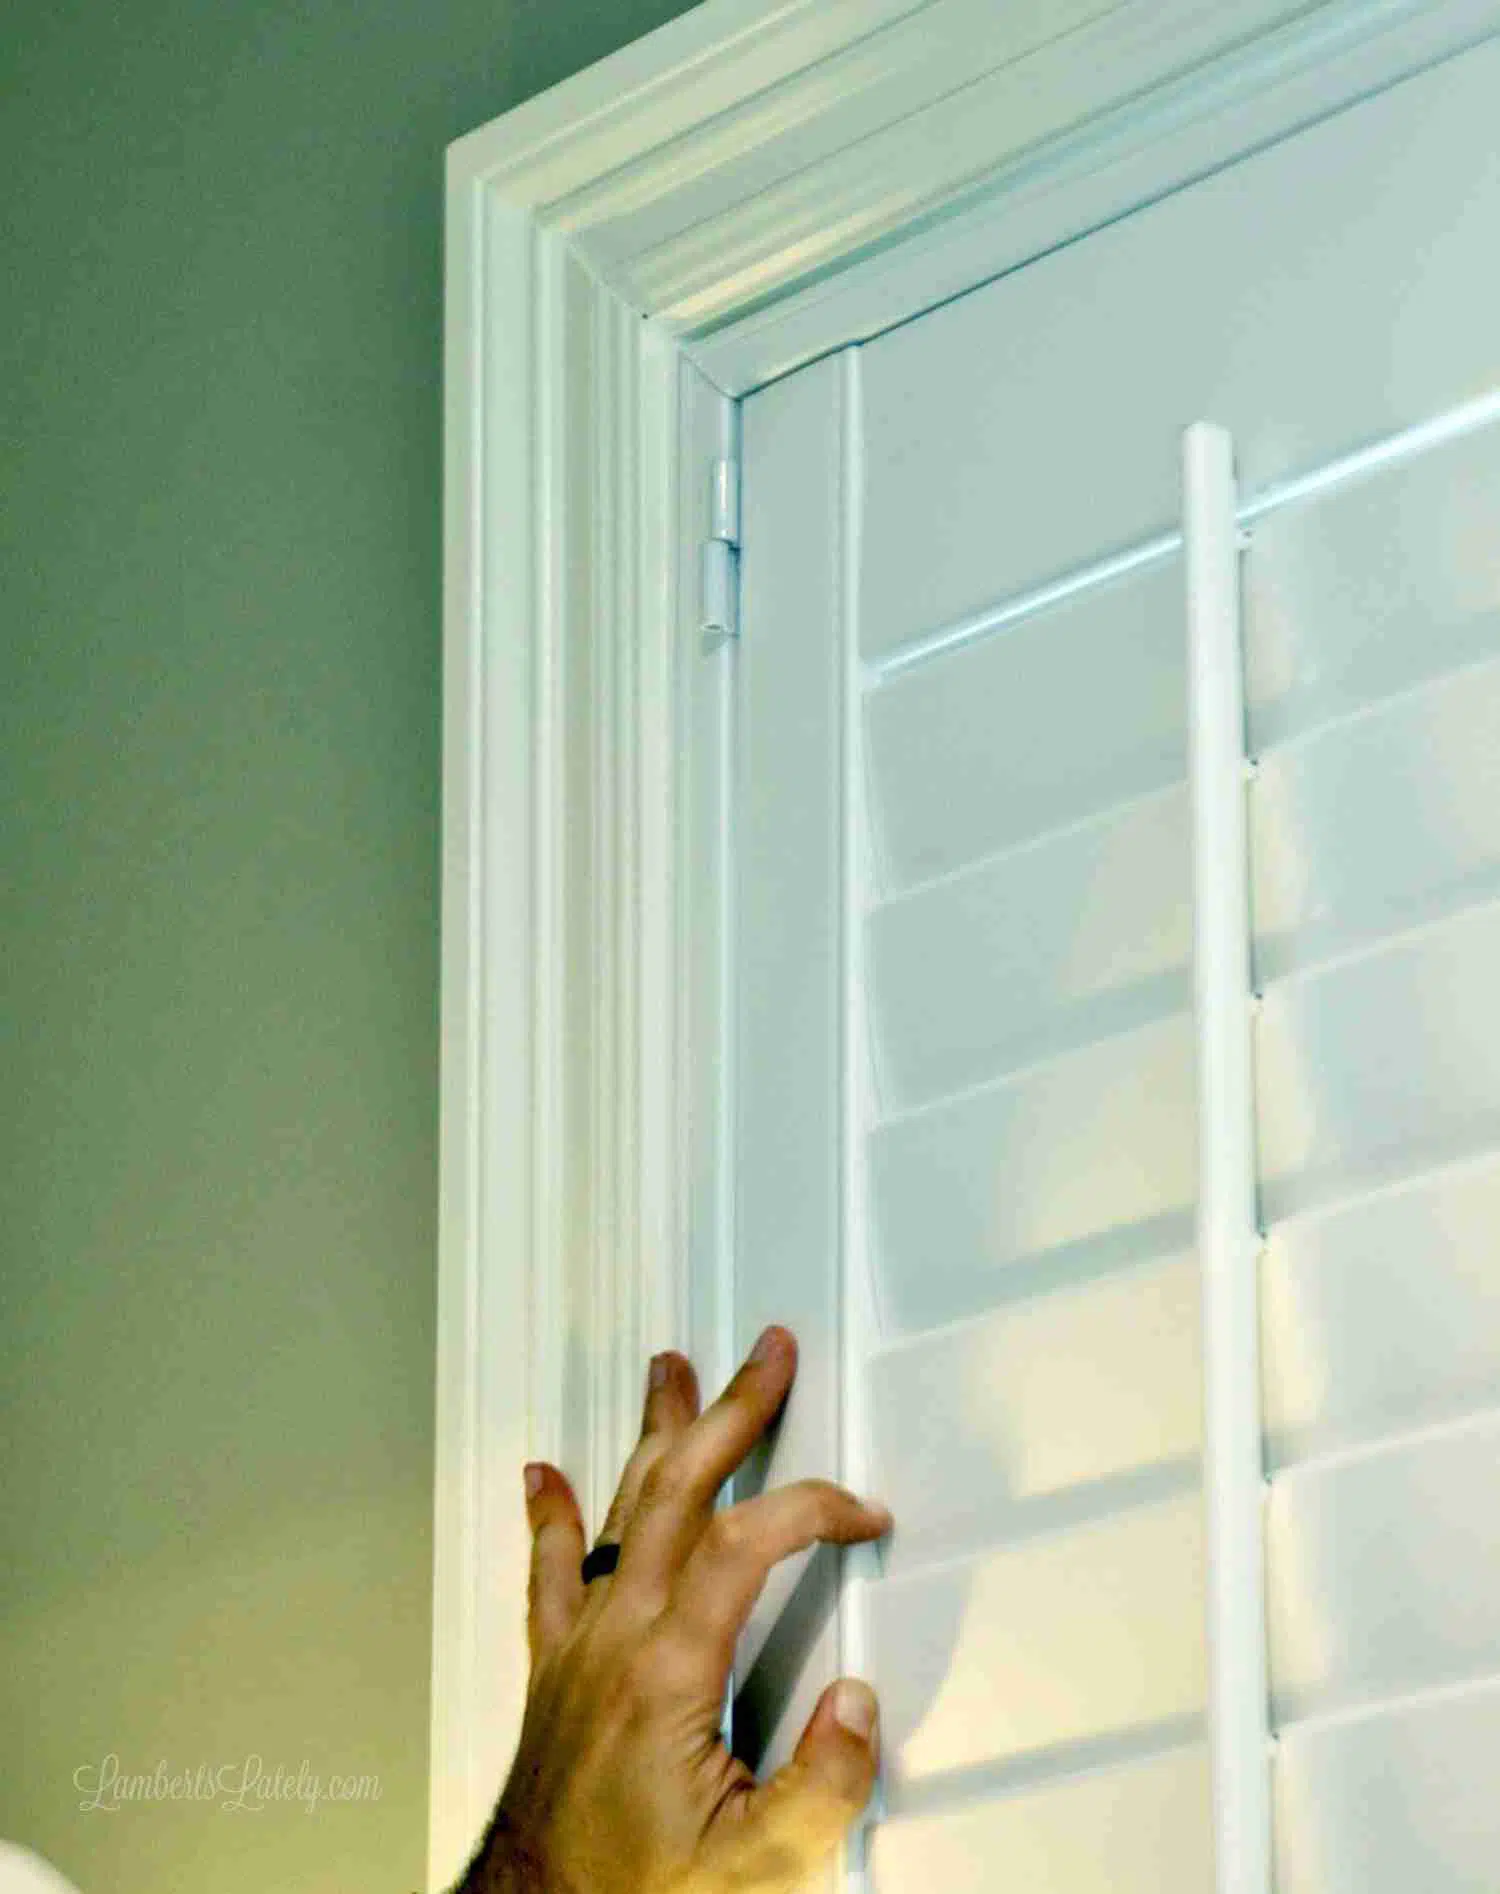
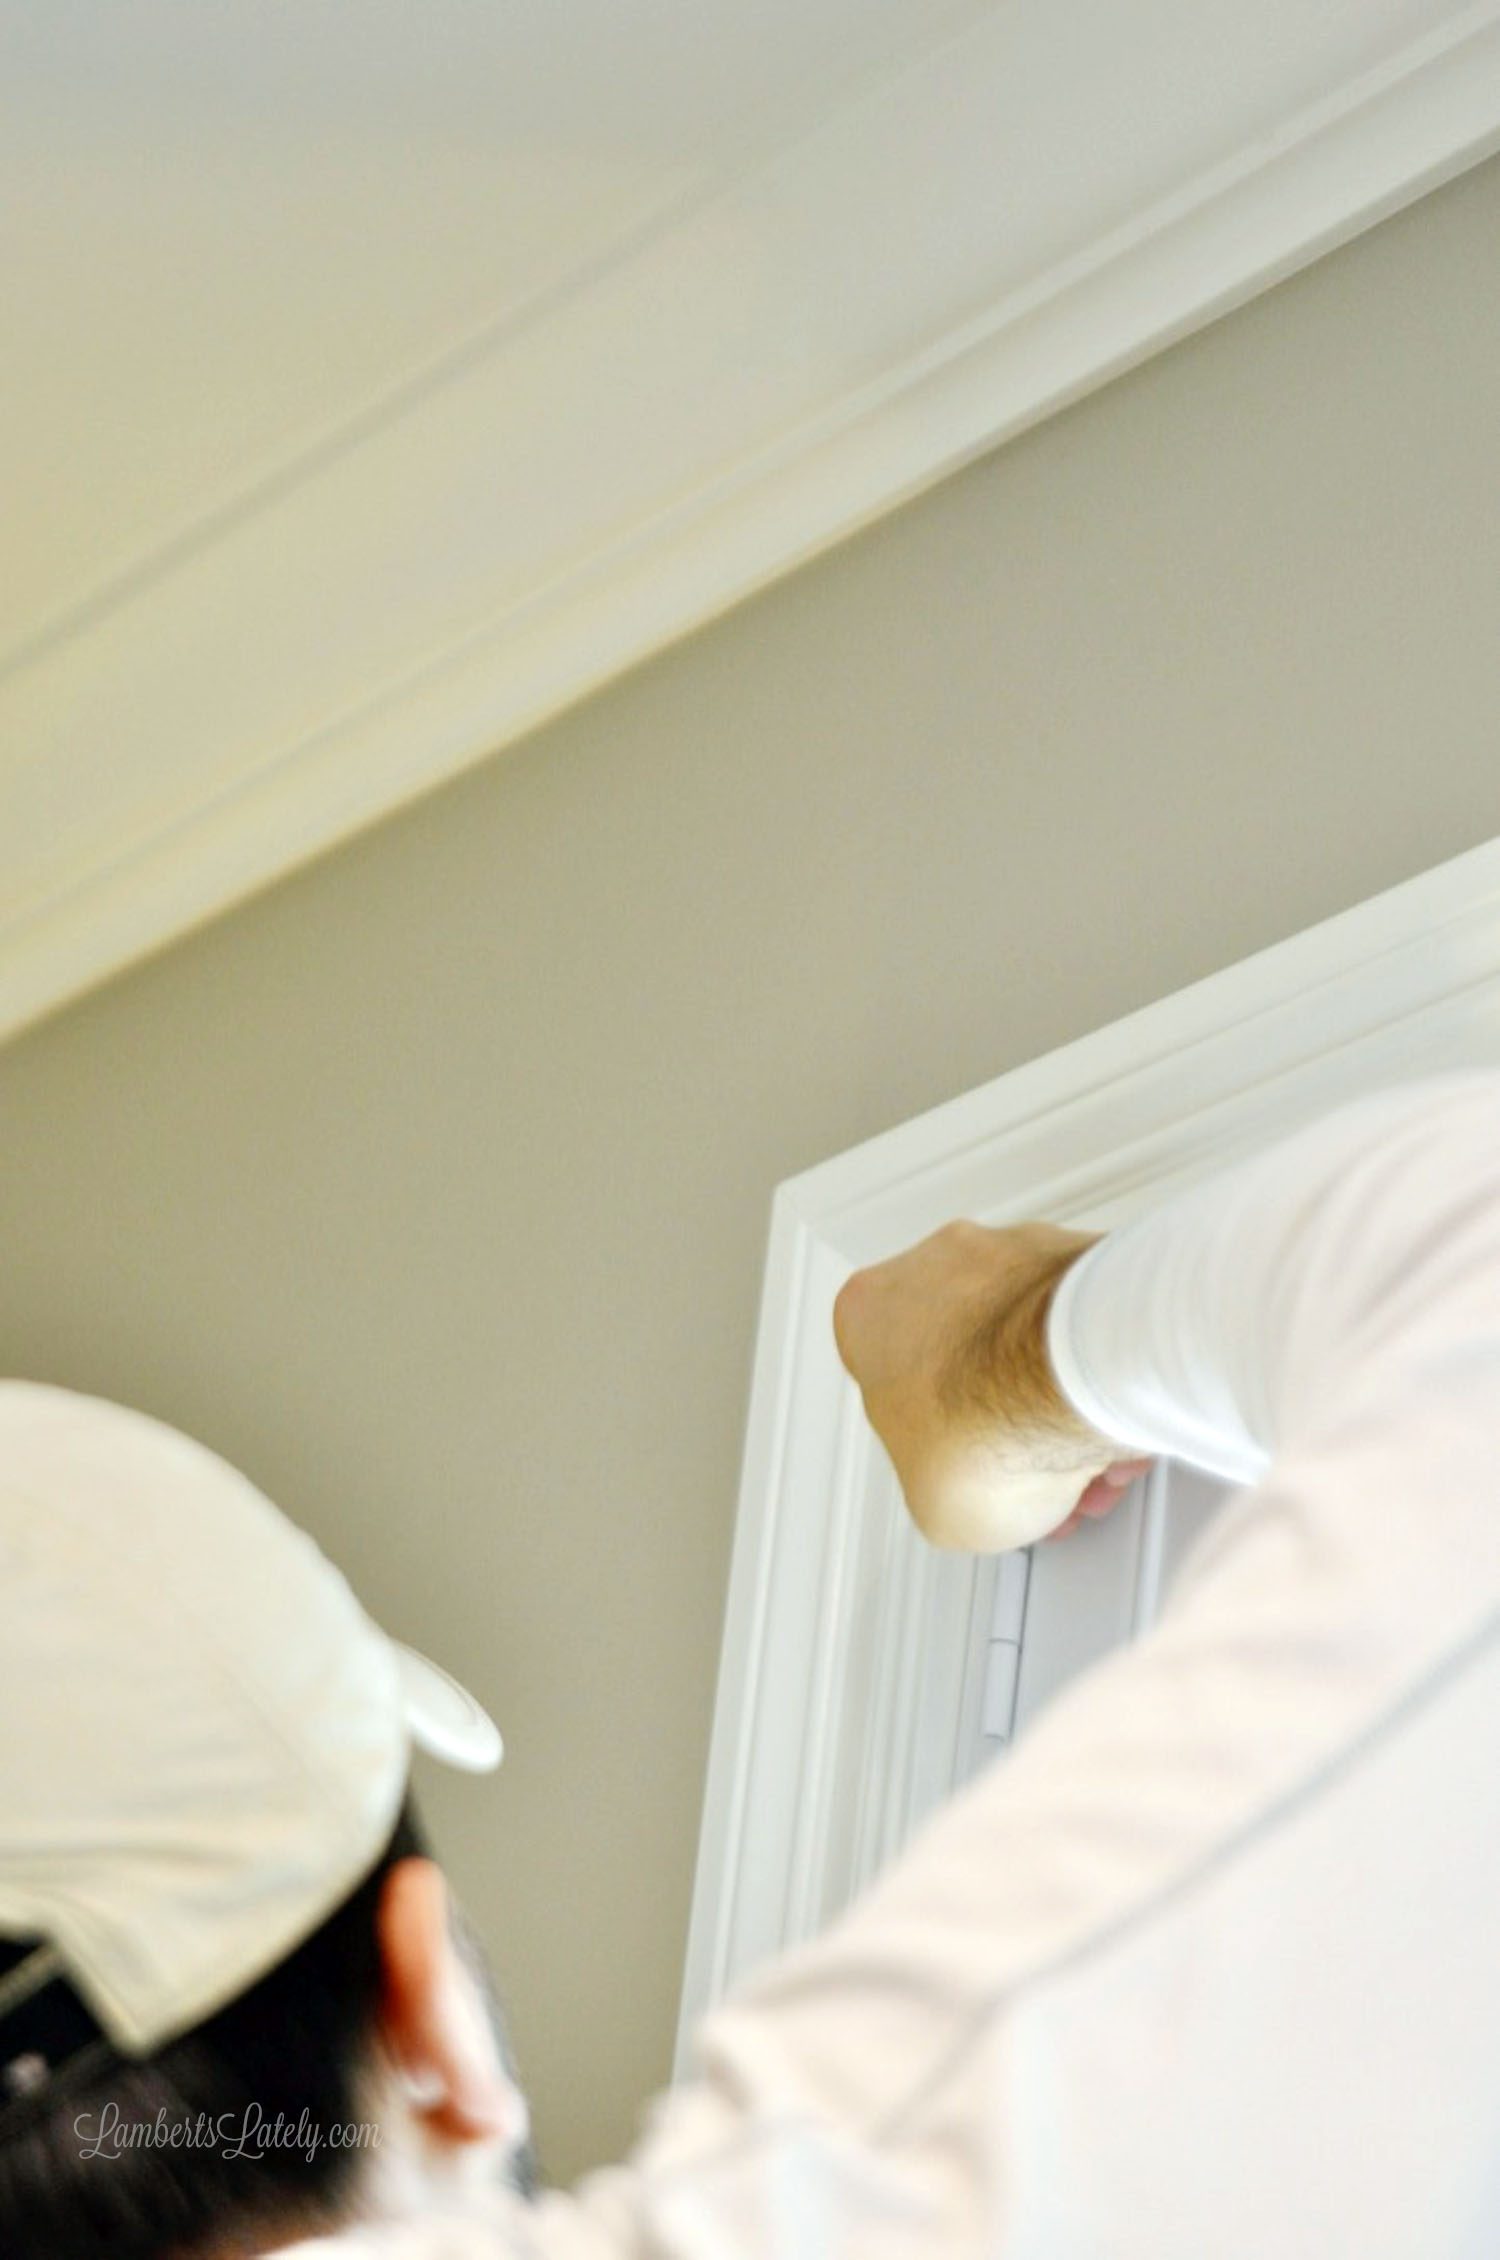
Step 6: Secure frame to the window
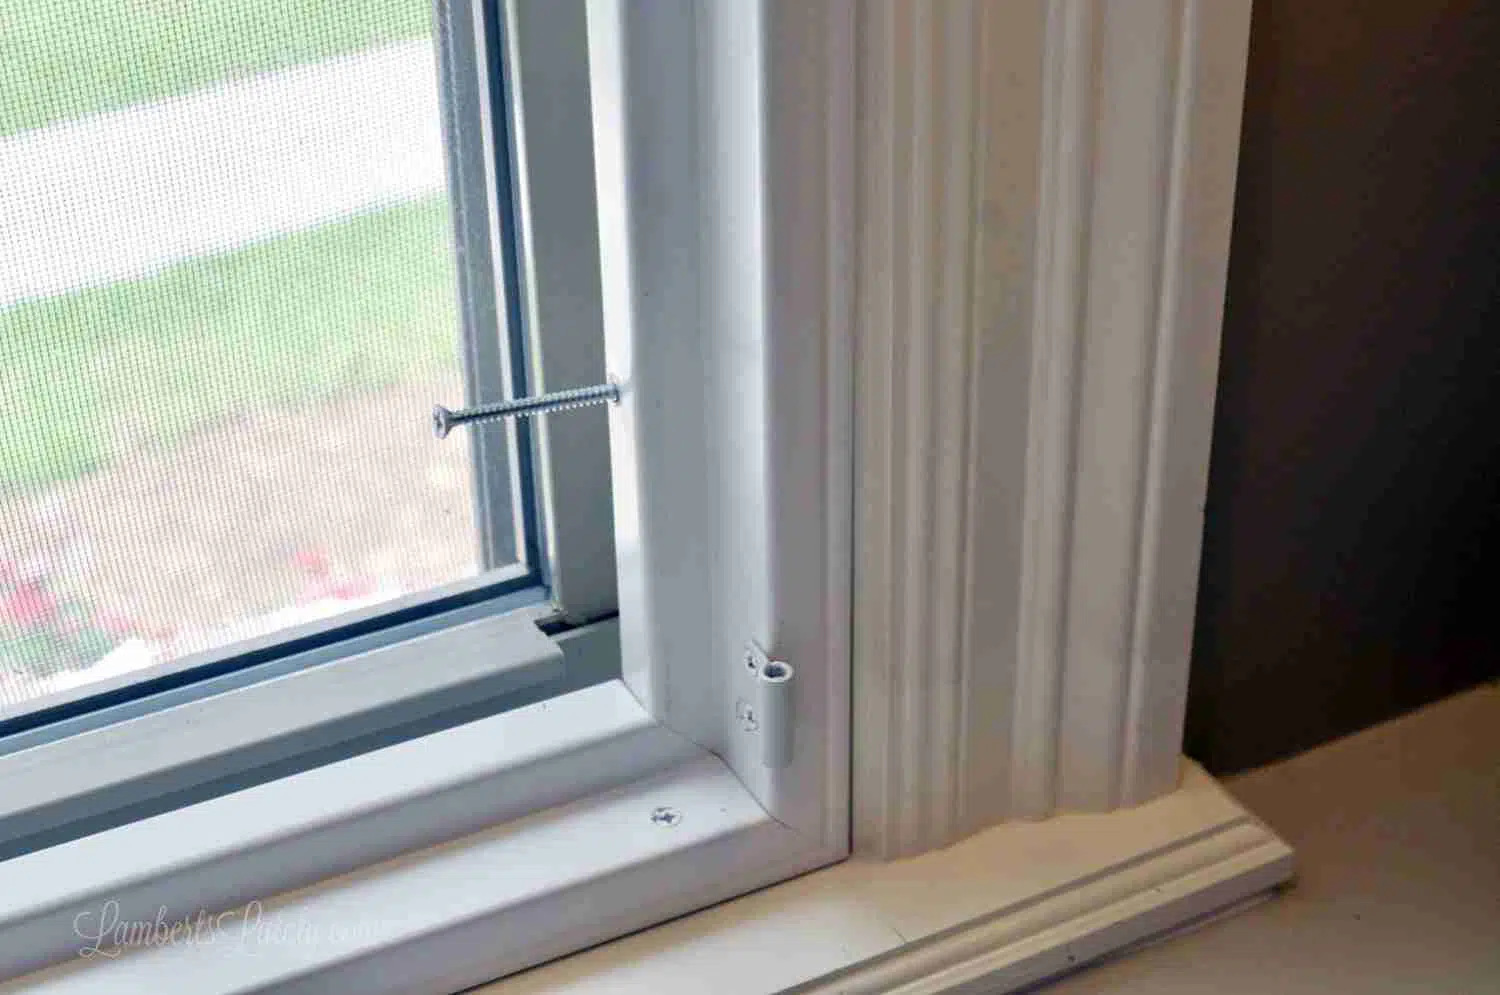
Next, all you'll need to do is actually screw the longer screws into your existing window frame! Line your shutter frame up with the very front of your window frame so they are flush.
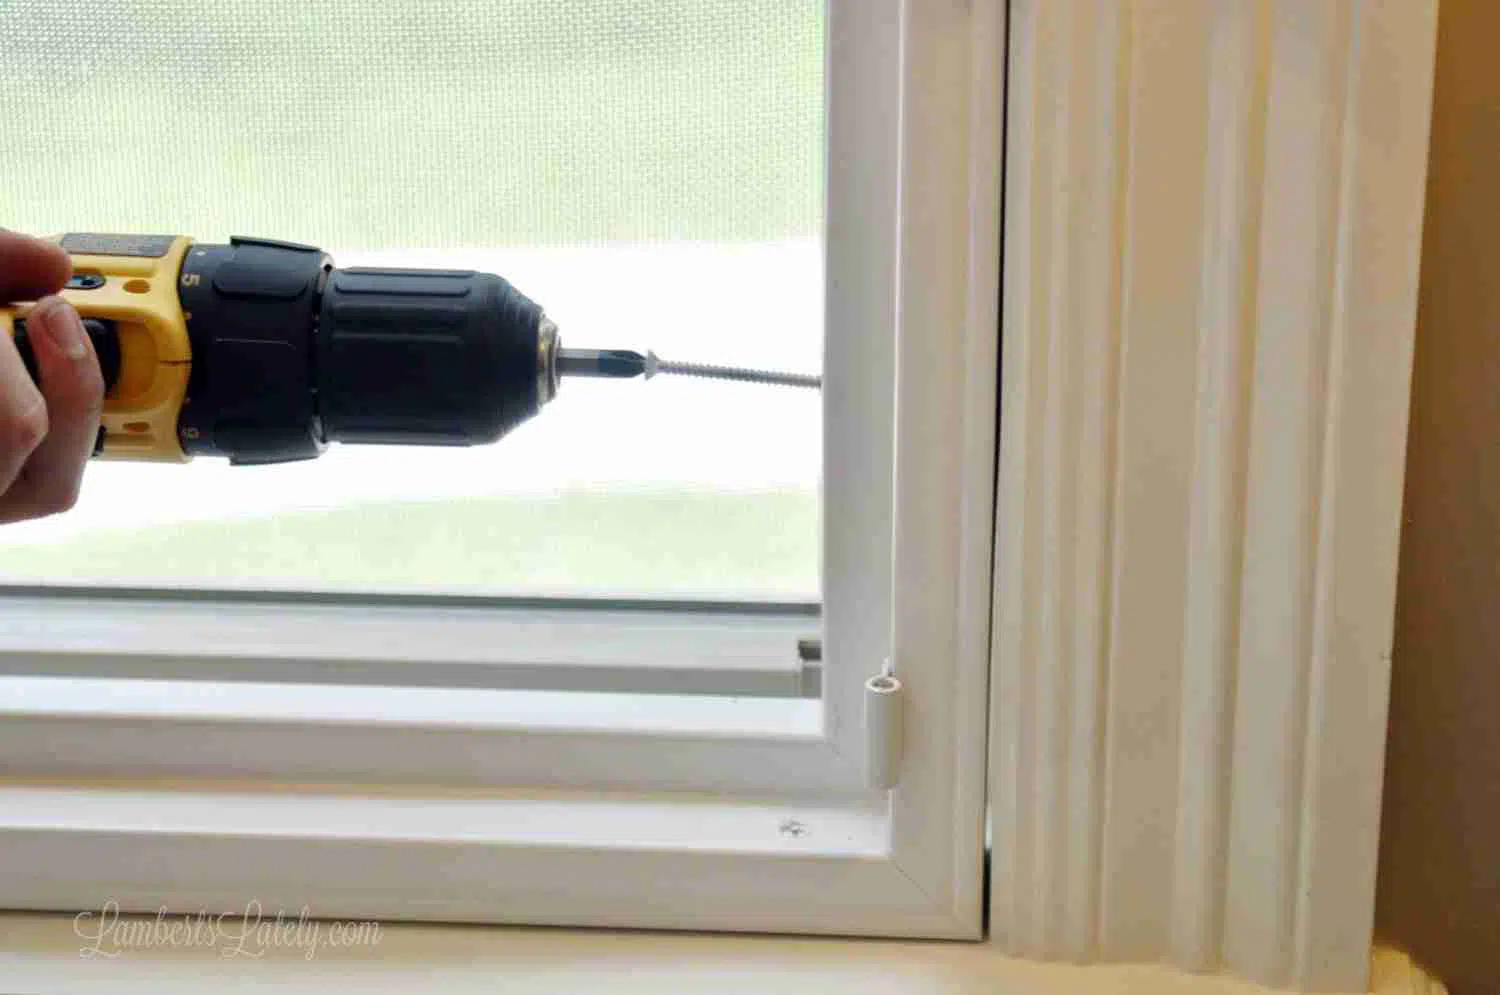
Again, make sure these go in as straight as possible, using your pre-drilled hole as a guide. If they don't go in perfectly straight, it isn't a big deal. Your panels will hide them for the most part. But it does ensure that the shutters are super secure to your existing frame.
Step 7: Attach shutter panels
If your frame and panels were attached for shipping, you can also skip this step. For larger windows, the panels don't come attached to the frame...you'll need to do that now.
Simply pop the plastic cap off of the end of the hinge pin, take the pin out of each panel (there should be three per panel), and set them aside.
Line your hinges up, using the magnets that will hold your panels closed for help in securing it in place. Then, put the pin back in to secure them together! Easy peasy.
Step 8: Finish your frame with caulk.
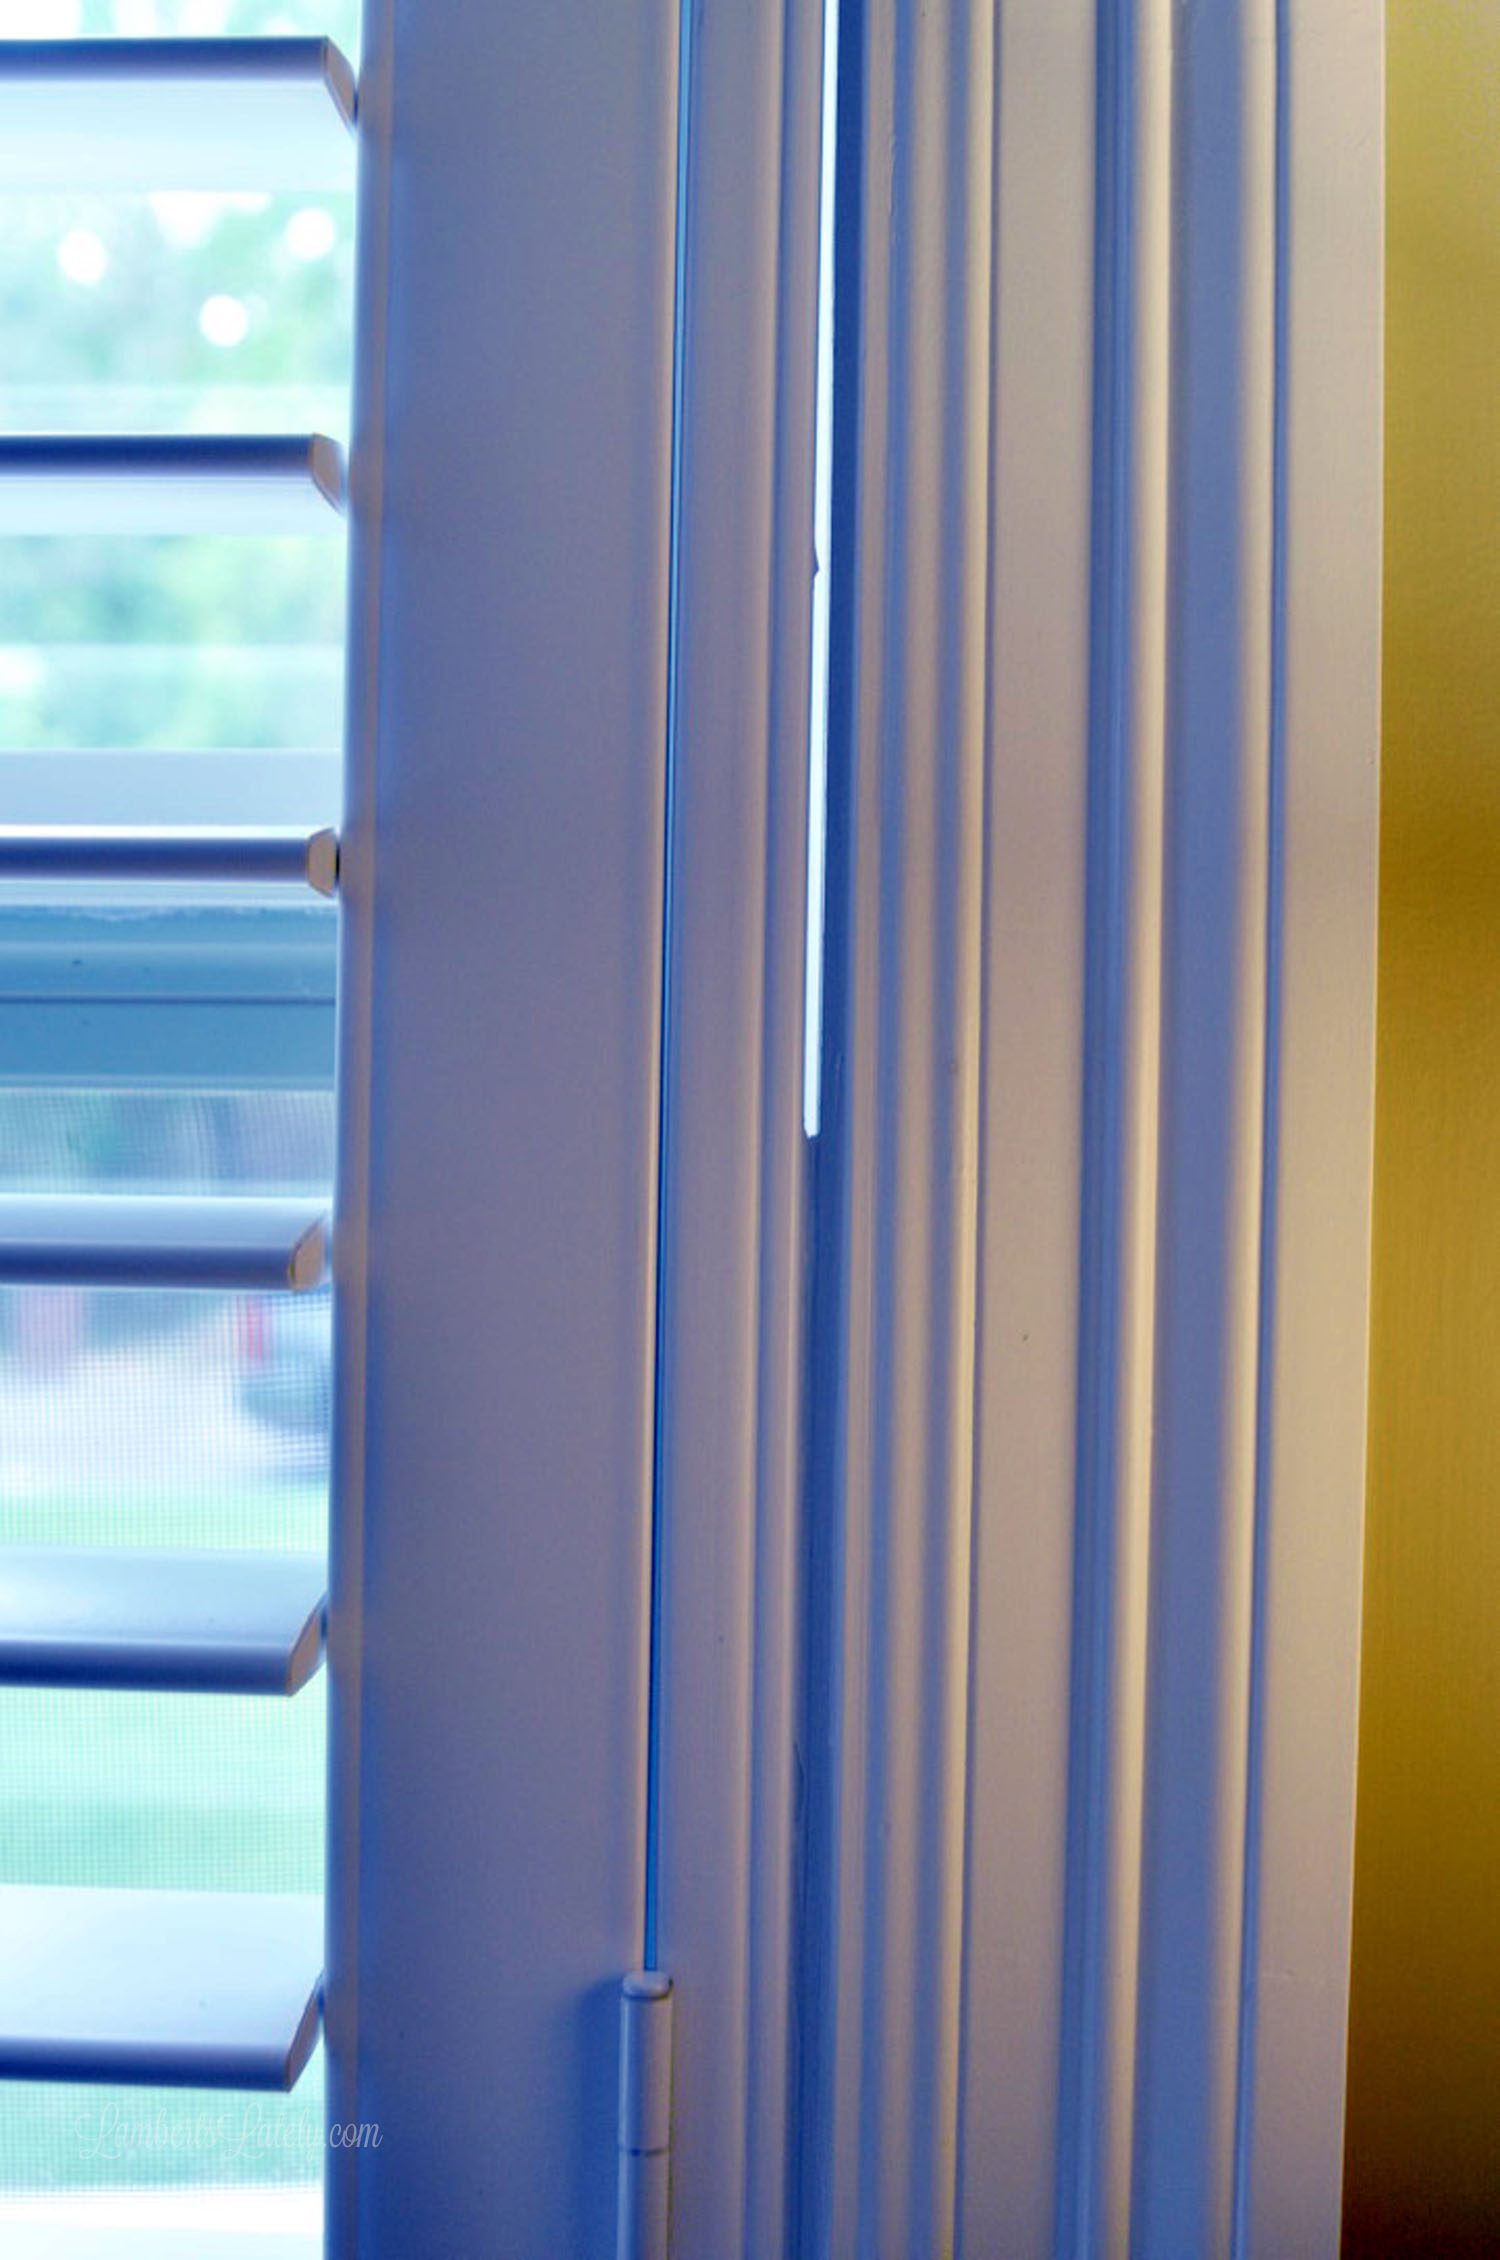
This is also not something you'll see in the guide from Select Blinds, but it made a world of difference in the look of our final product. Depending on the fit of your frame, this step might be optional; if it's perfect, you can skip this!

As you can see, there was a small gap after we installed our shutters. Unless your measurements are absolutely perfect, this is probably going to happen to you too. Not a big deal though - it's an easy fix!
This is why I recommended in the ordering section that, when in doubt, round down to the nearest ⅛" on your measurements. It's easy to caulk a gap; not as easy to fit a too-big frame into a too-small window.
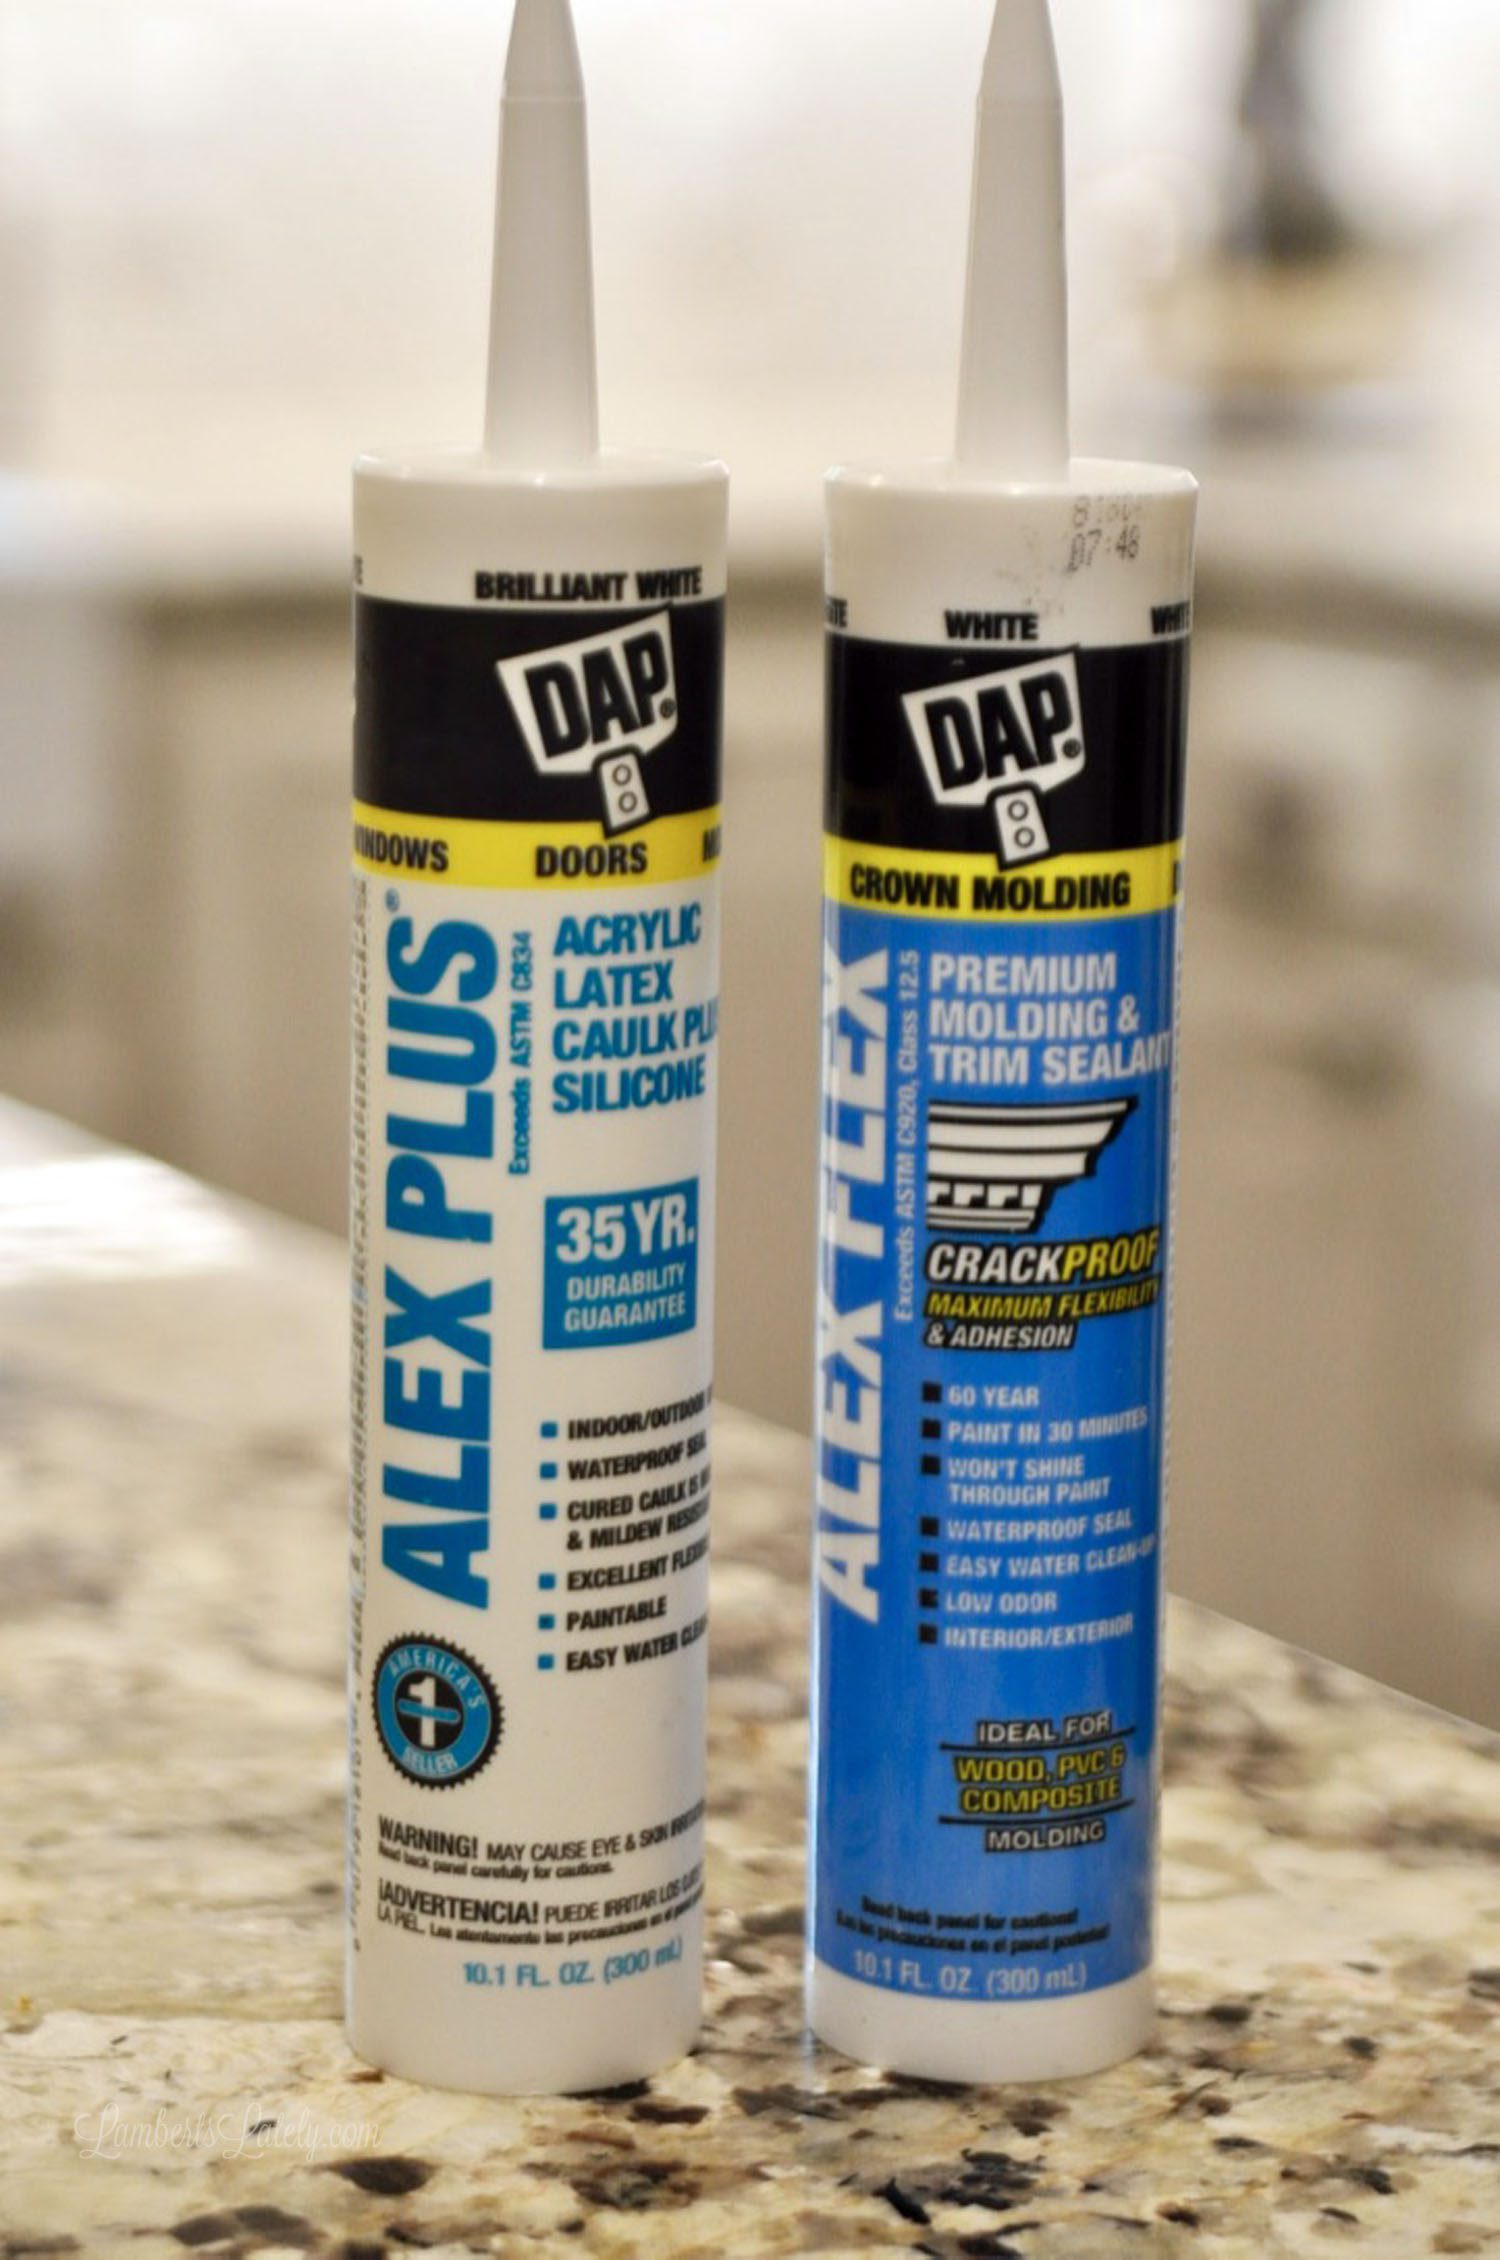
Filling the Gaps
Most any caulk will work. I used Alex brand (I had the one of the left already, and the one on the right was the closest I could find at the store; I couldn't tell the difference between the two).
Just grab one that lists that it can be used for molding. I went through almost four bottles for 2 large windows and 3 smaller windows.
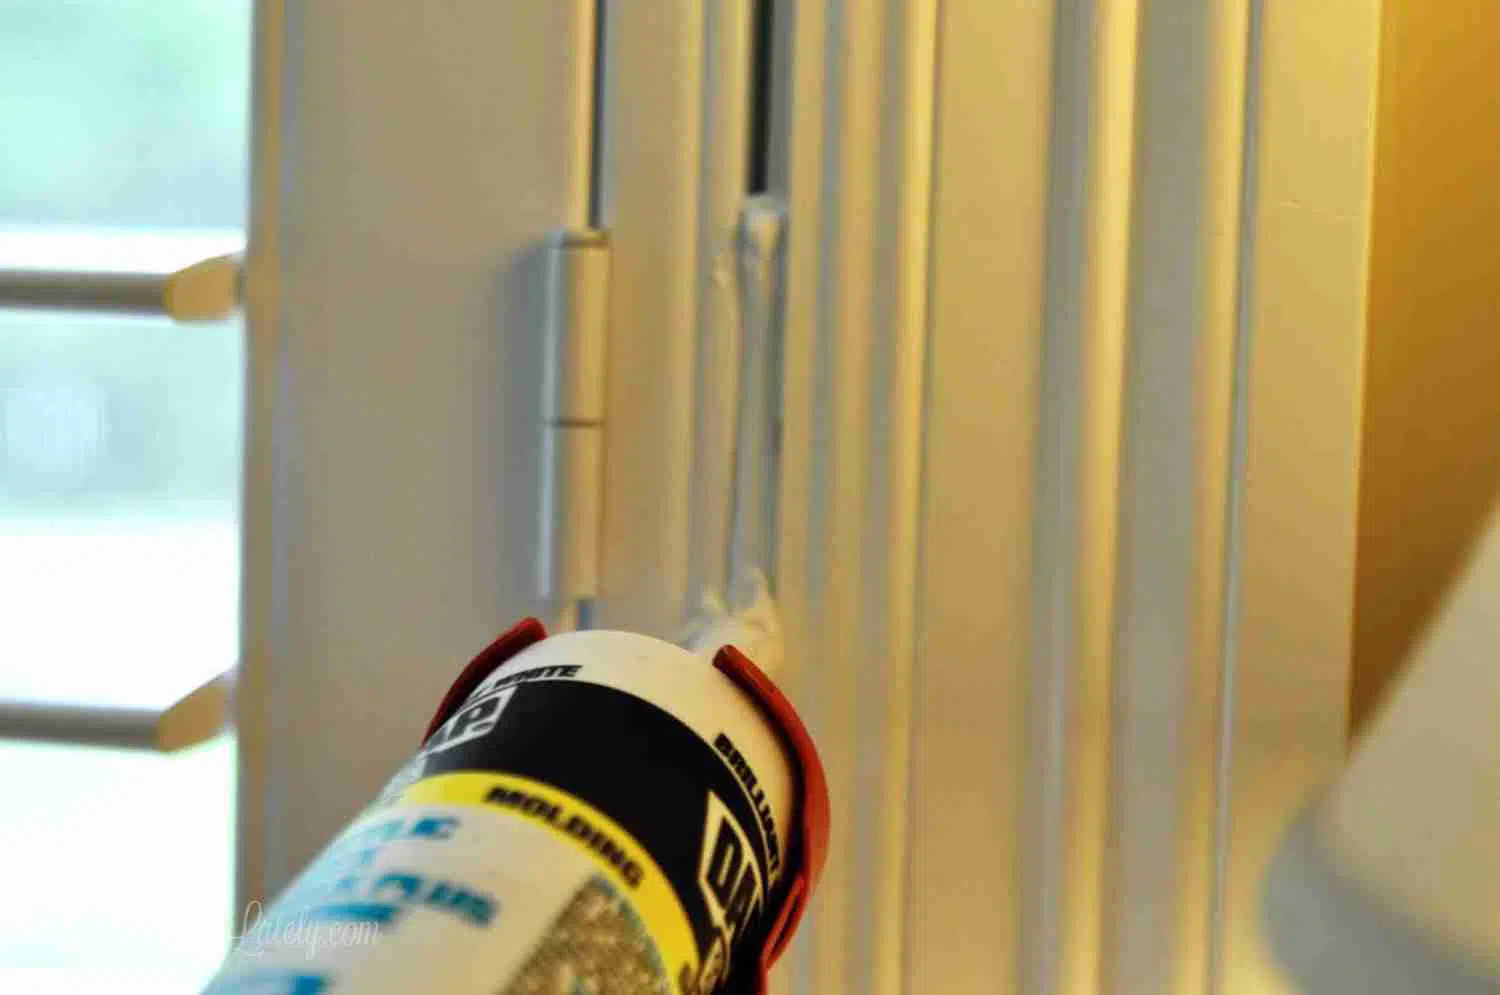
Put a bead to completely fill the gap in a foot or two at a time. It might look a little rough...that's ok!

If you put a little too much in, simply wipe some away with your finger.
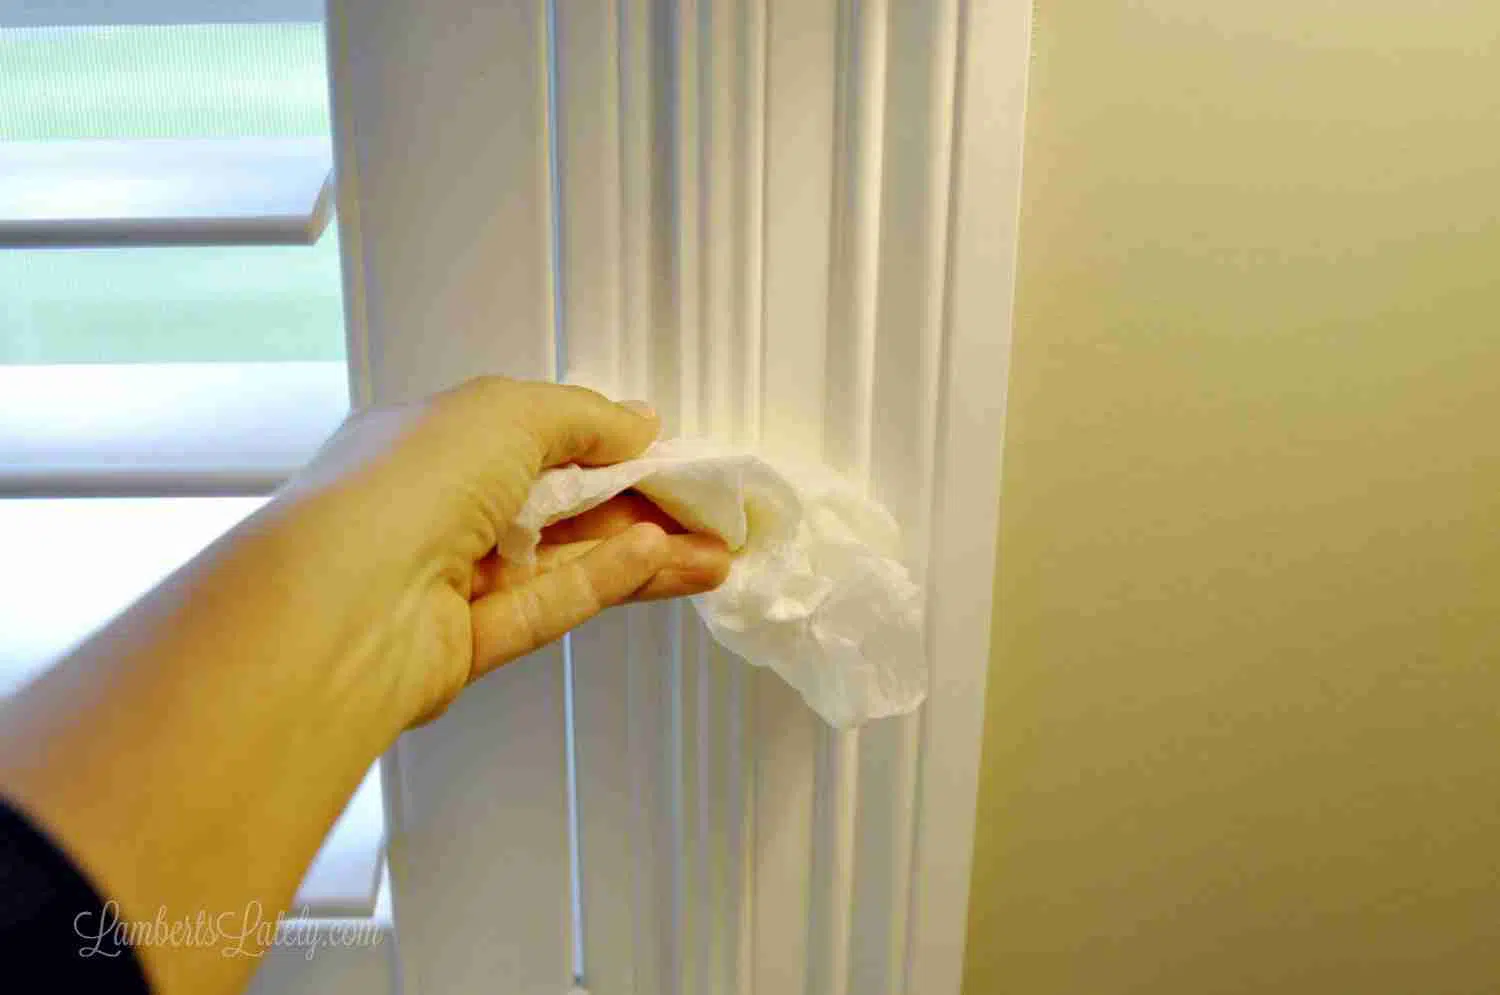
Then, take a wet paper towel and wipe it down the length of the gap. Not only will this wipe the extra off of the outside, but it gives the bead of caulk a nice, smooth finish. I only caulked three sides of the frame; the bottom of the frame was so close to the original window frame that it wasn't necessary.
This filled in the gap perfectly...it now looks like the shutters are a perfect fit!
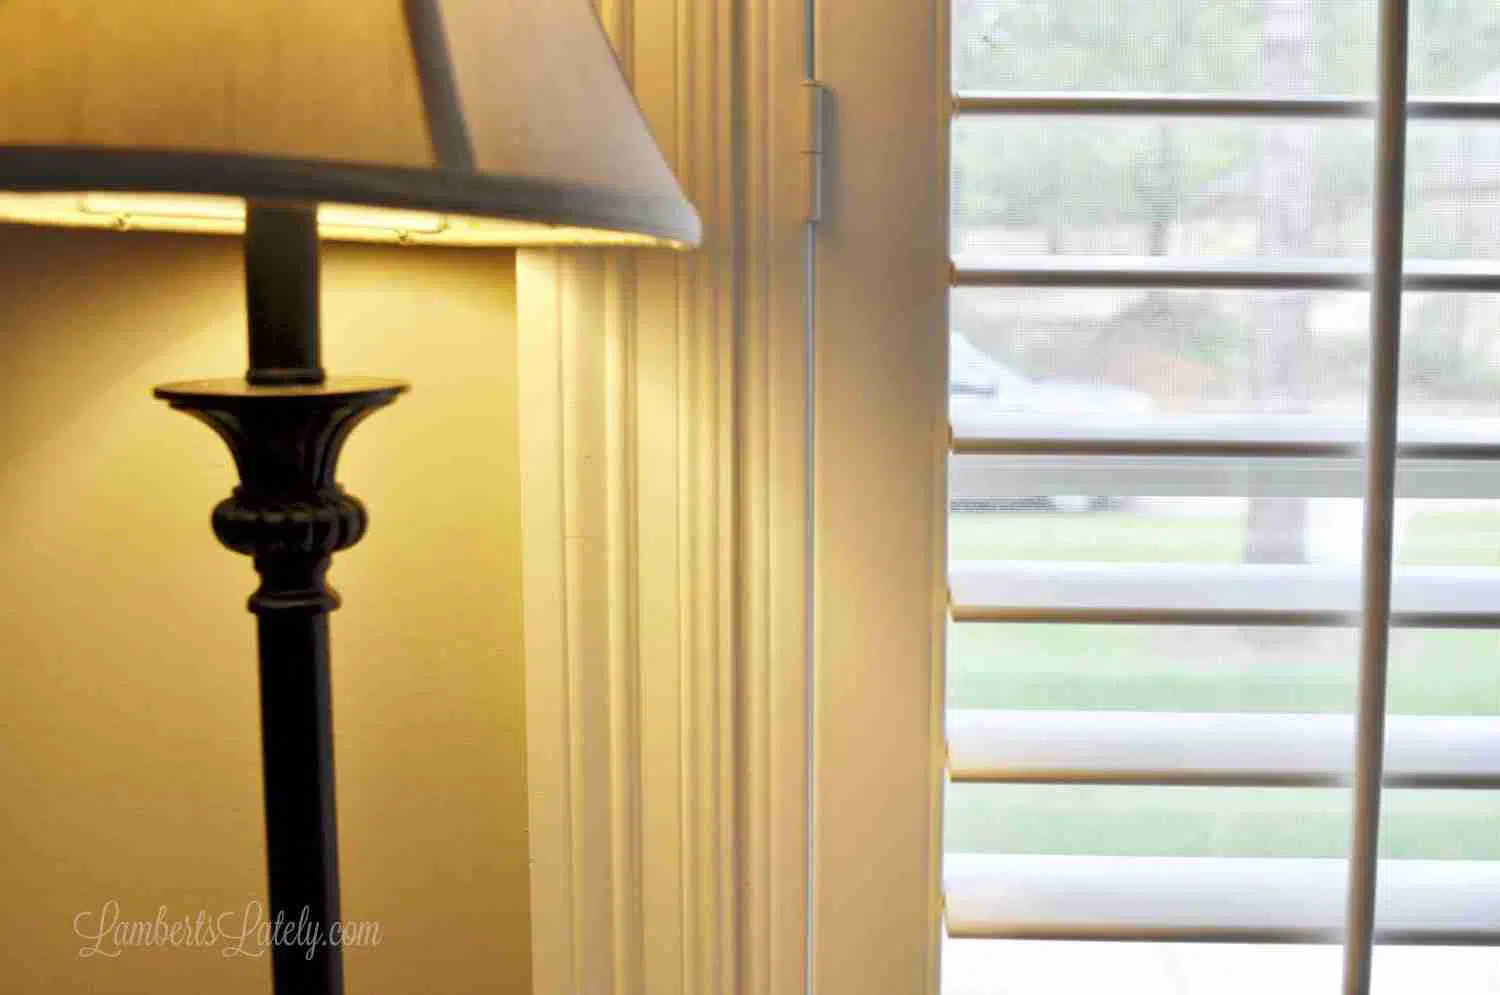
Plantation Shutter Installation: Before and After
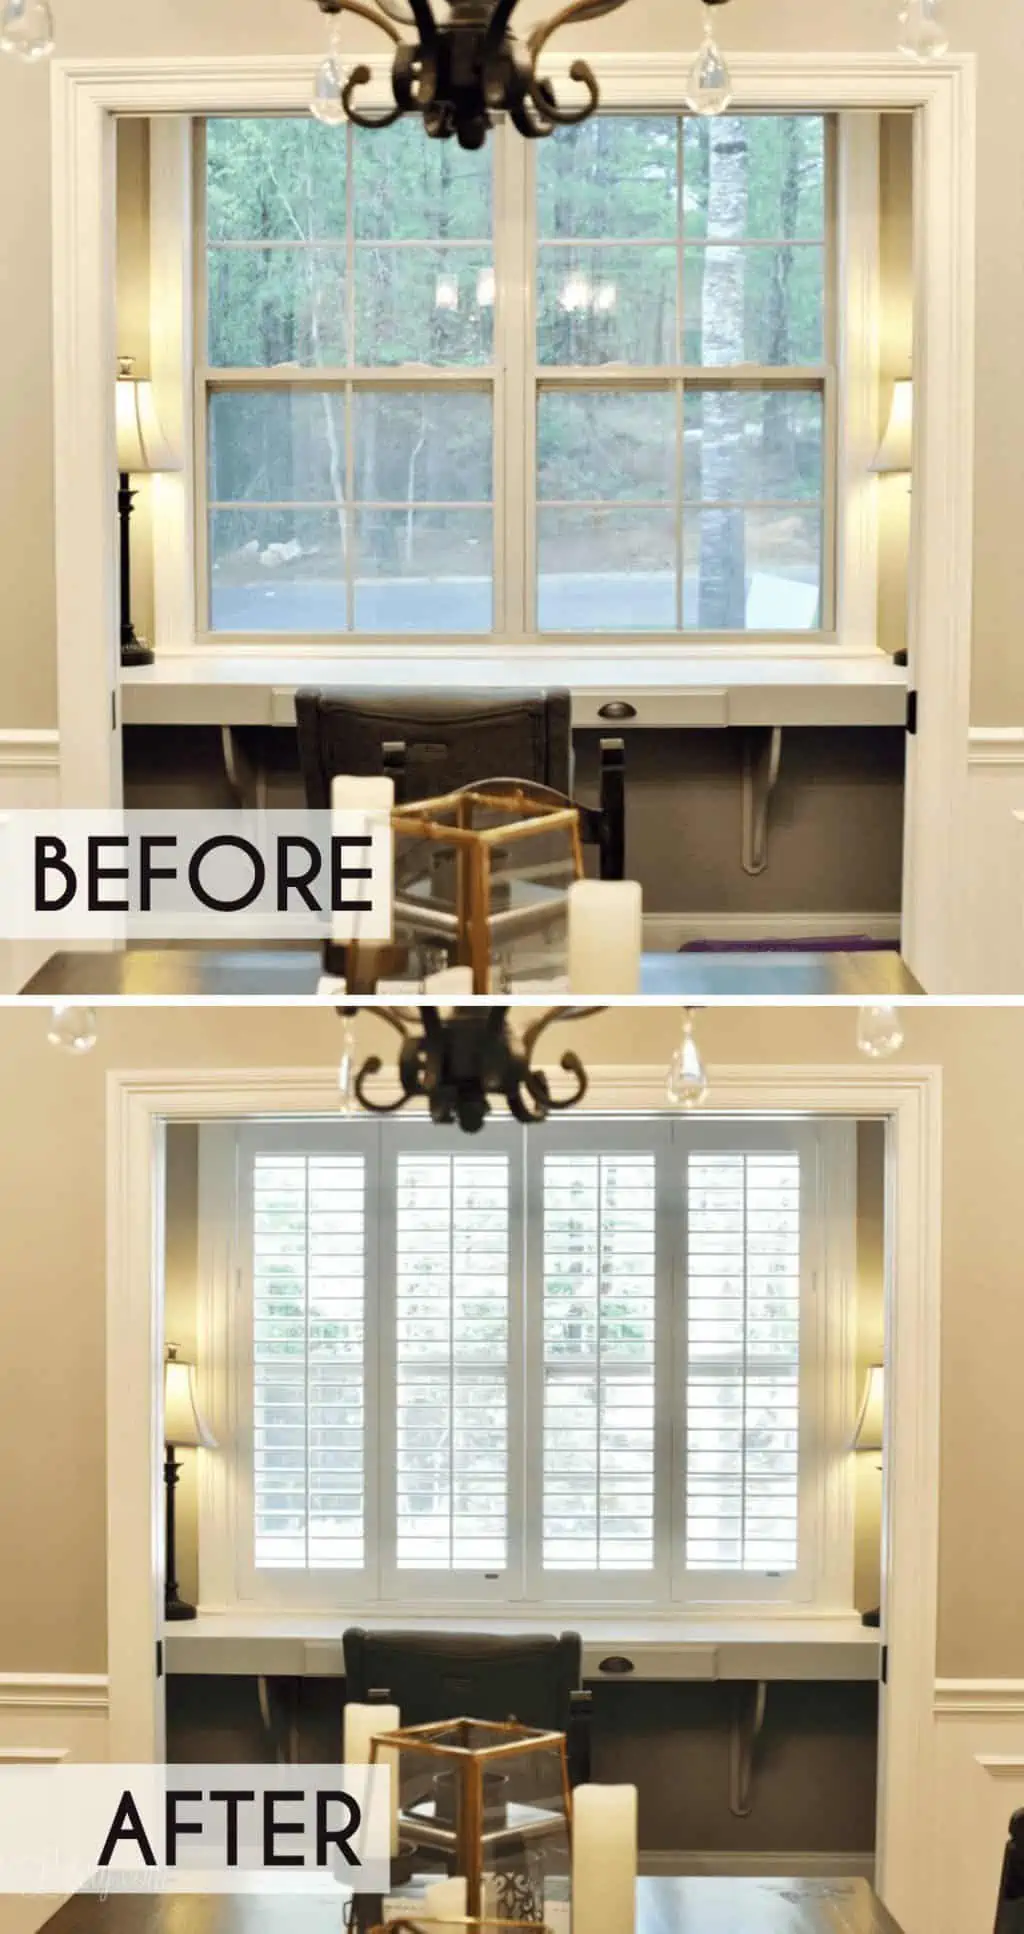
Guys, I could not be more thrilled with the result of this little weekend project. In just a few days, we completed plantation shutter installation in every front window in our home!
It has completely changed the look of the windows, both from the interior and the exterior. It's really exactly what we needed on these windows and is the perfect finishing touch for the look we wanted.
FAQs
Thanks for stopping by! Check out more of my DIY posts below...
More DIY Projects


Where can I buy just the frames for the shutters so I can do it myself
Hi Kim! Not sure if Select Blinds offers just the outer frames.