
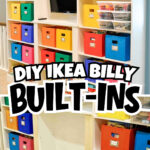
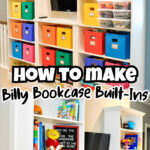
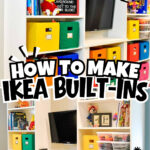
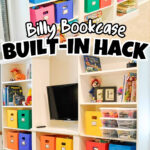
This is the ultimate DIY Ikea built-in hack: use Billy Bookcases to install custom cabinets! This is a budget-friendly storage solution for shelves in a playroom, bedroom, or office.
Paid links used in this post. Read more about my link usage policies.
Before Installing Built-Ins
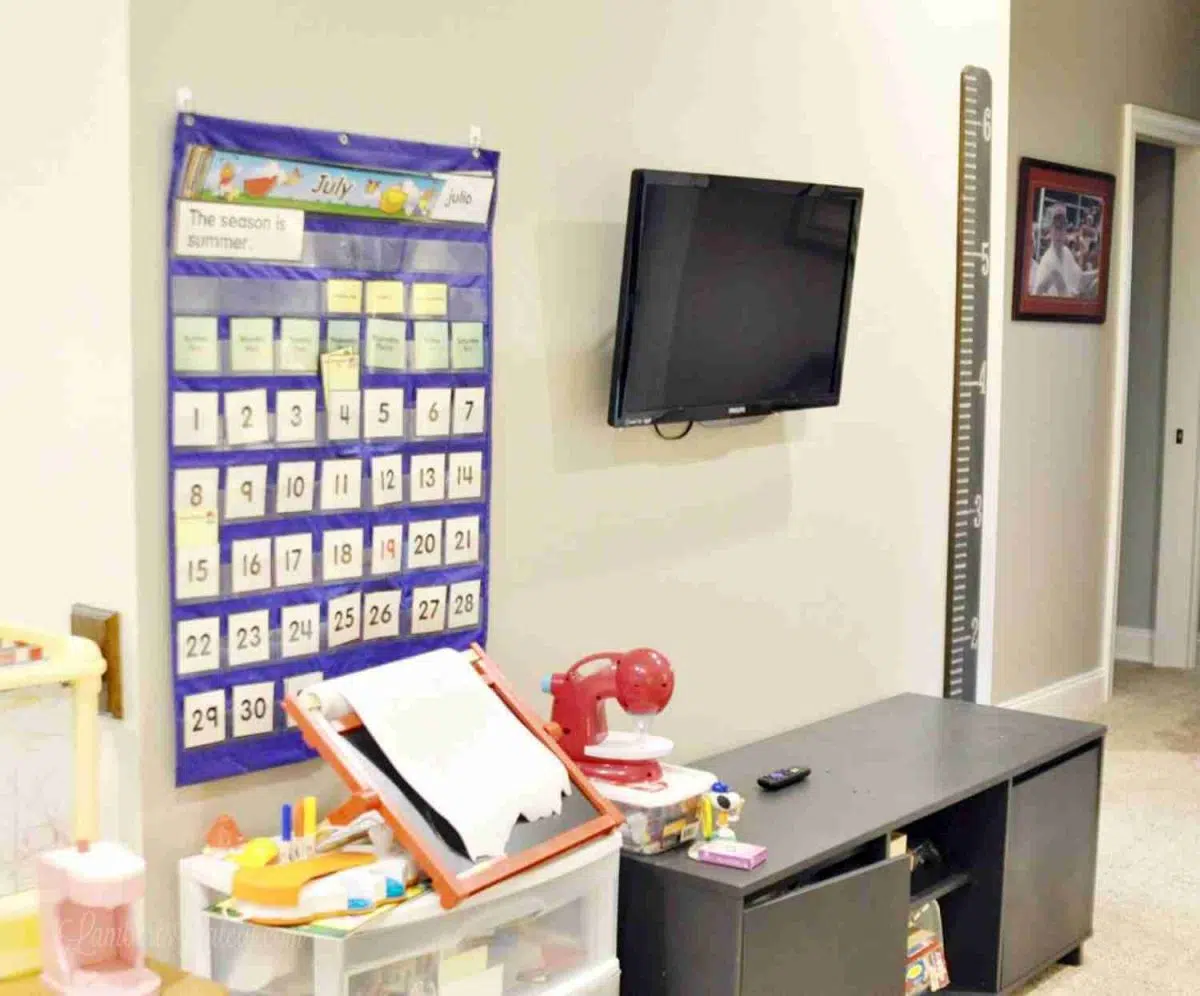
When we moved into our home in 2017, I knew that we were going to have to do something about the storage in the playroom. It's on the smaller side (one of my regrets...I wish we had made this space bigger), so finding functional storage space can be a little bit of a challenge.
One of my favorite organizational tips is to go vertical with your organization. You aren't limited to just floor space when trying to corral toys, books, and art supplies.
We ran into the problem of having a ton of wall space to fill with very little storage space on the floor. The perfect solution would be to take the storage vertical on this (very unorganized) tv wall.
We didn't want to shell out a ton of money for something custom, but still needed a lasting piece that would be both pretty and give us the functional storage that this space had to have.
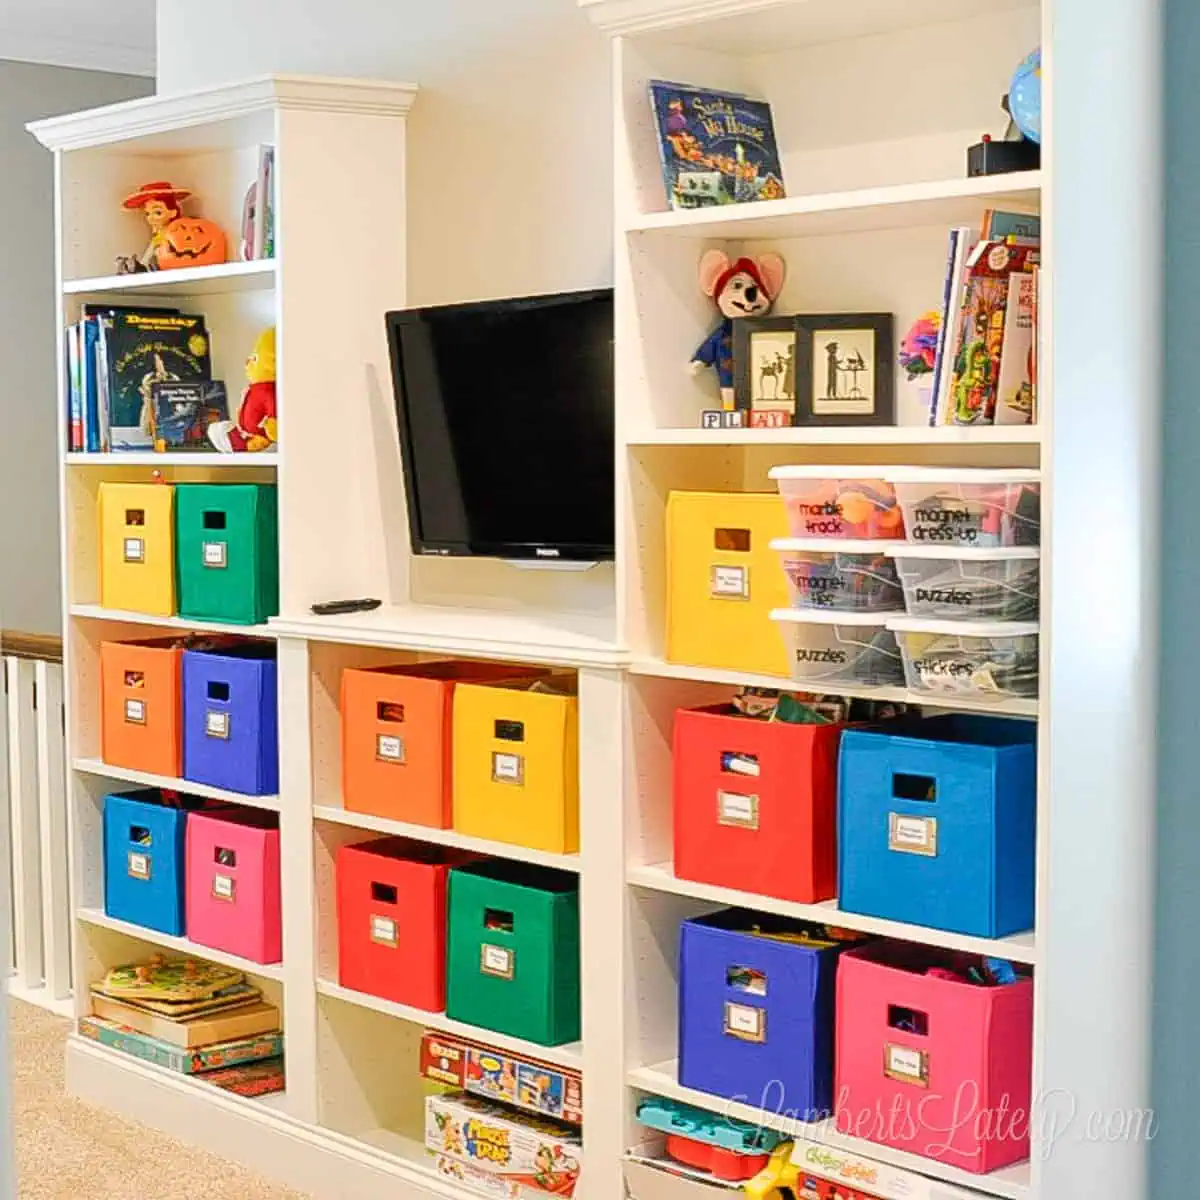
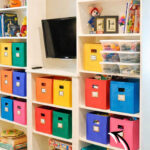
After a few weekends of work, we were able to convert this mostly unusable space into a set of built-in cabinets that turned out better than I could have ever imagined! I am in love with the result of this Ikea hack. I think it absolutely frames the room and, in addition to giving the space a high-end look, gave us some much-needed storage space.
Here's how we put it all together...
Supplies Needed
- Ikea Billy Bookcases (see step 1 below for specifications)
- Drill (for building shelves and securing brackets to the wall)
- Miter saw
- 1" white finishing nails
- Nail punch
- at least 8' of crown molding - we used 3.265" tall molding. Plan on making a few mistakes when cutting this!
- Depending on whether or not you can reuse your baseboards after removing from the wall, enough baseboard to cover the entire front and sides of the shelves
- Caulk
- Wood Filler
- Sandpaper
- Particle Board
- 1" Chair Rail Moulding
- Semi-Gloss or Gloss White Paint
Total Project Cost
We completed this project in 2018, so prices have gone up a little bit. To the best I can estimate, you're looking at about $400 for this project, not including bigger tools.
Step 1: Measure your available wall space and plan, plan, plan.
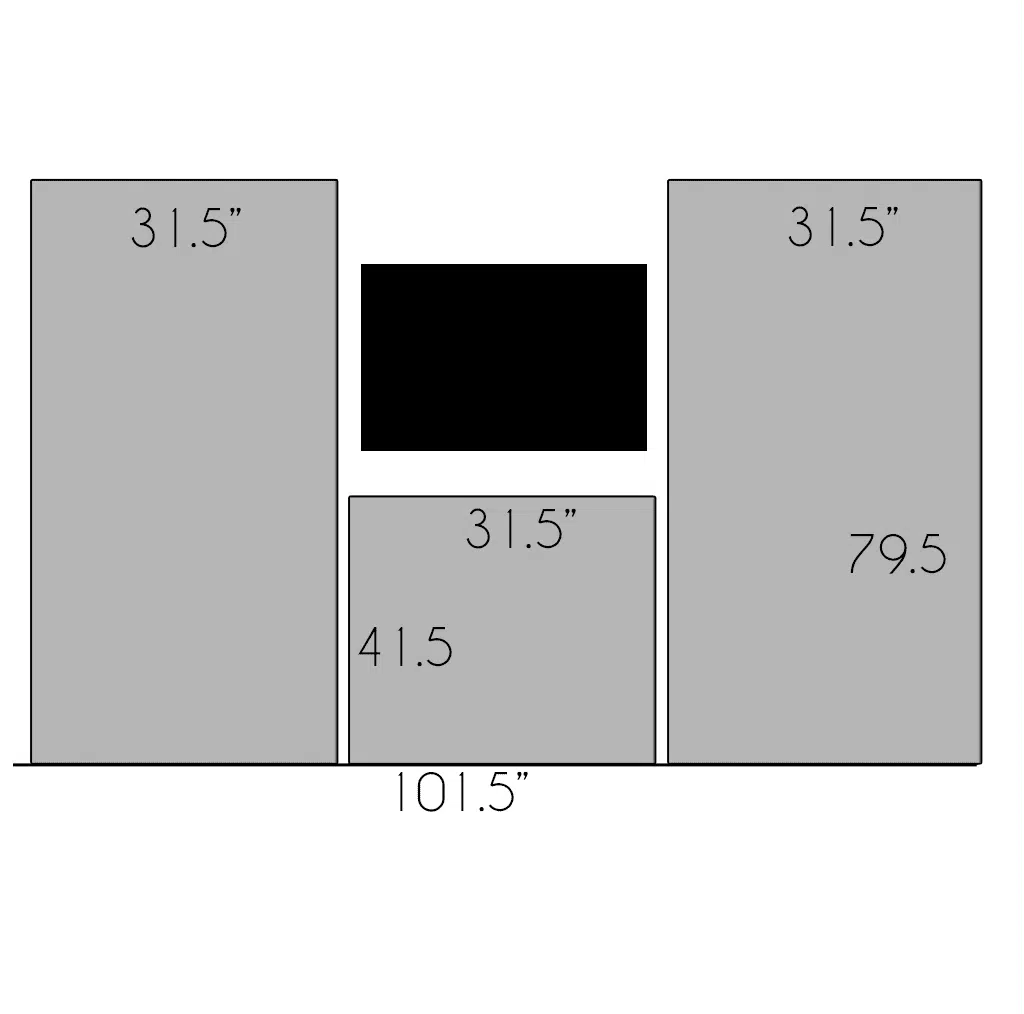
Start by measuring both the width and the height of your available wall space, noting any items you might have to work around (like TVs). This simple little graphic above is what I put together when we were planning this space. For our plans, we had 101.5" of width to work with on our built-ins and 9' ceilings.
The two taller side Billy bookcases are 31.5x79.5" and the bookcase in the middle is 31.5x41.5". I was quickly able to fit them into the wall by measuring the total width of the wall space we had and plotting everything out.
We had to put our bookcases a couple of inches apart to give us enough room to see and maneuver our flat-screen TV. You might not have to worry about that, but if you're using the layout we used and have a TV that's 26" or more, you'll definitely need to consider this. It's easy to cover those gaps if needed though - I'll address that later in the post.
Cabinet Height Tip
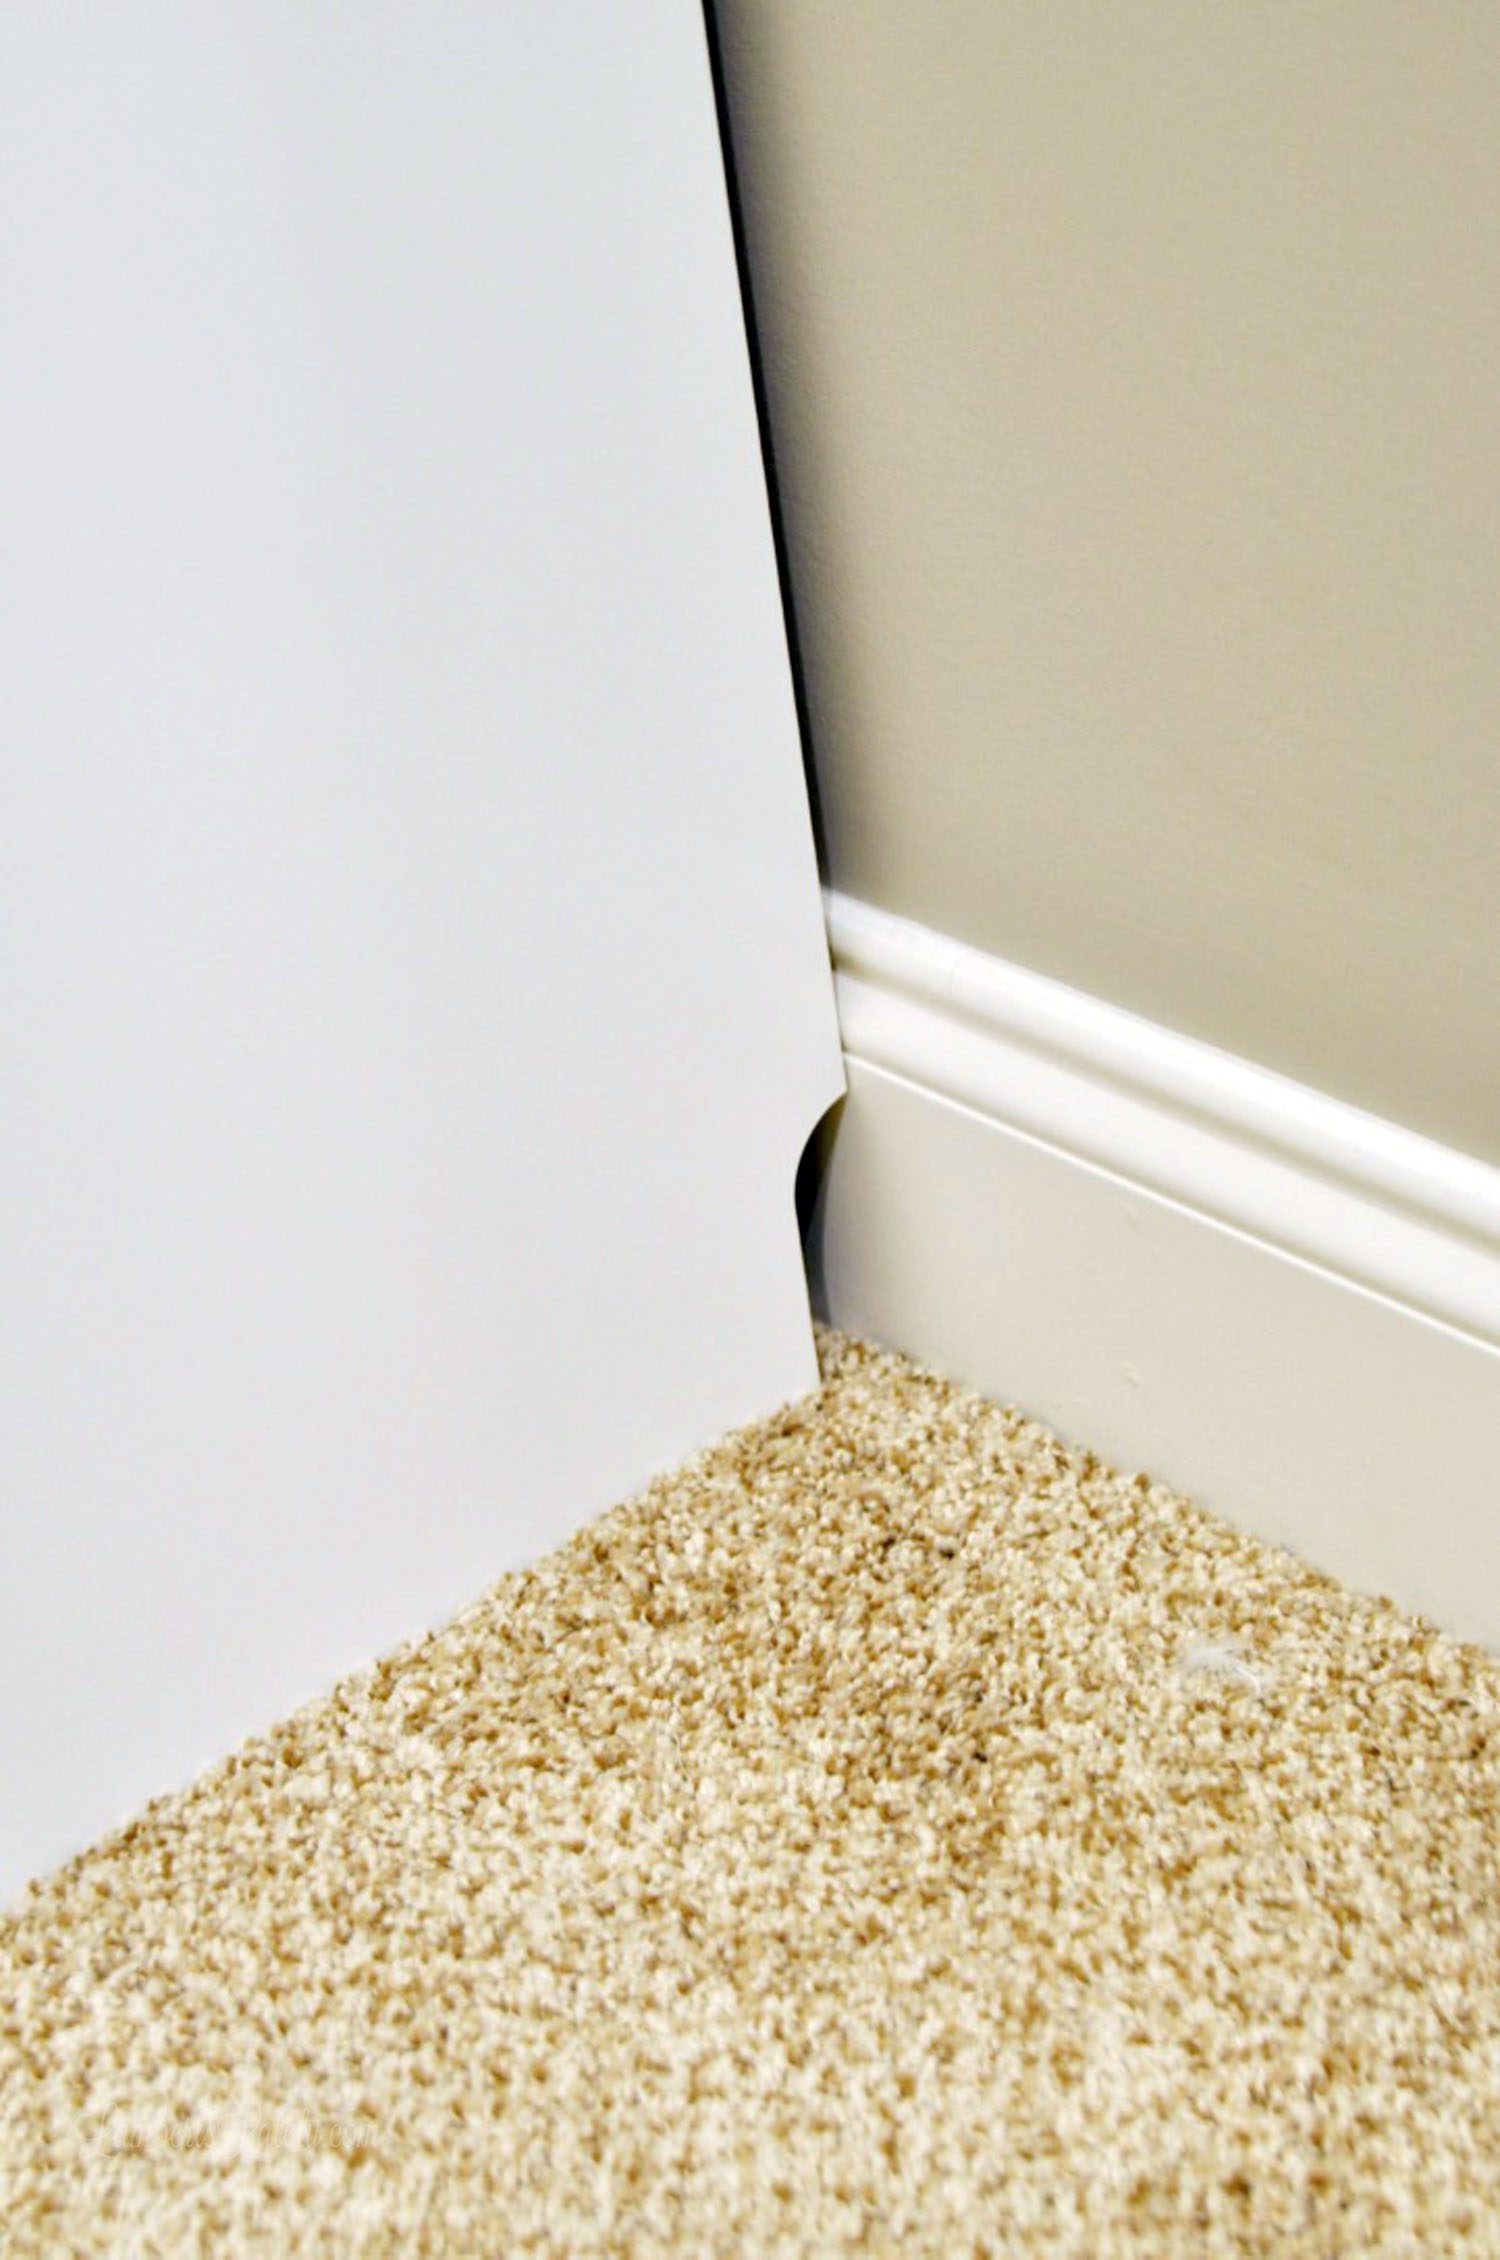
One thing that we wished we had done after the fact was to raise the total height of the bookcases by 2-3 inches.
The baseboards we installed later overlapped the lower shelves and created a little bit of a lip. Adding height extenders by placing a couple of pieces of plywood under the cabinets before securing them to the wall would solve that issue.
When we did a similar project in our craft room for our Murphy Bed construction, we placed a couple of pieces of wood under each cabinet before mounting them to the wall. Voila - no gap!
Step 2: Build the Billy bookcases.
This process is pretty straightforward - I mean, who hasn't had to build cheap Ikea furniture at one time or another, right? The Billy bookcases are no different - really simple to put together.
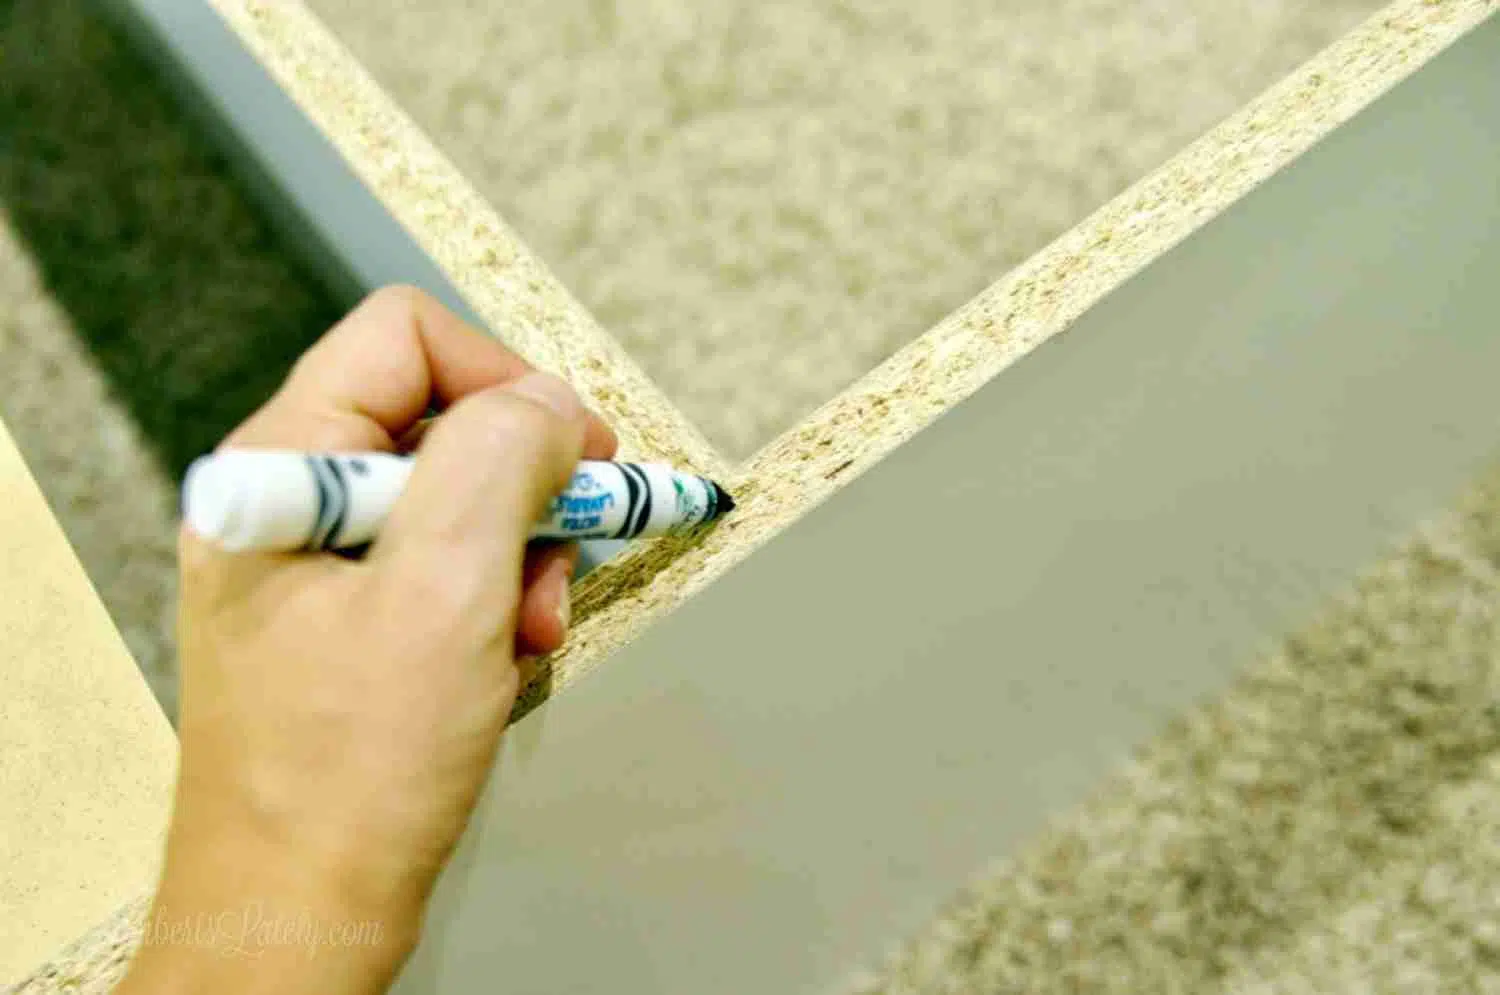
I will give one quick suggestion: when you're building the bookshelves, mark the location of the middle shelf on the back of your bookcase (before you put the solid white back panel in).
You'll need to nail this back panel into place to secure it, and by marking the level of your shelf, you ensure that you'll get your nails into that middle shelf and that they won't be exposed.
(We learned this one the hard way.)
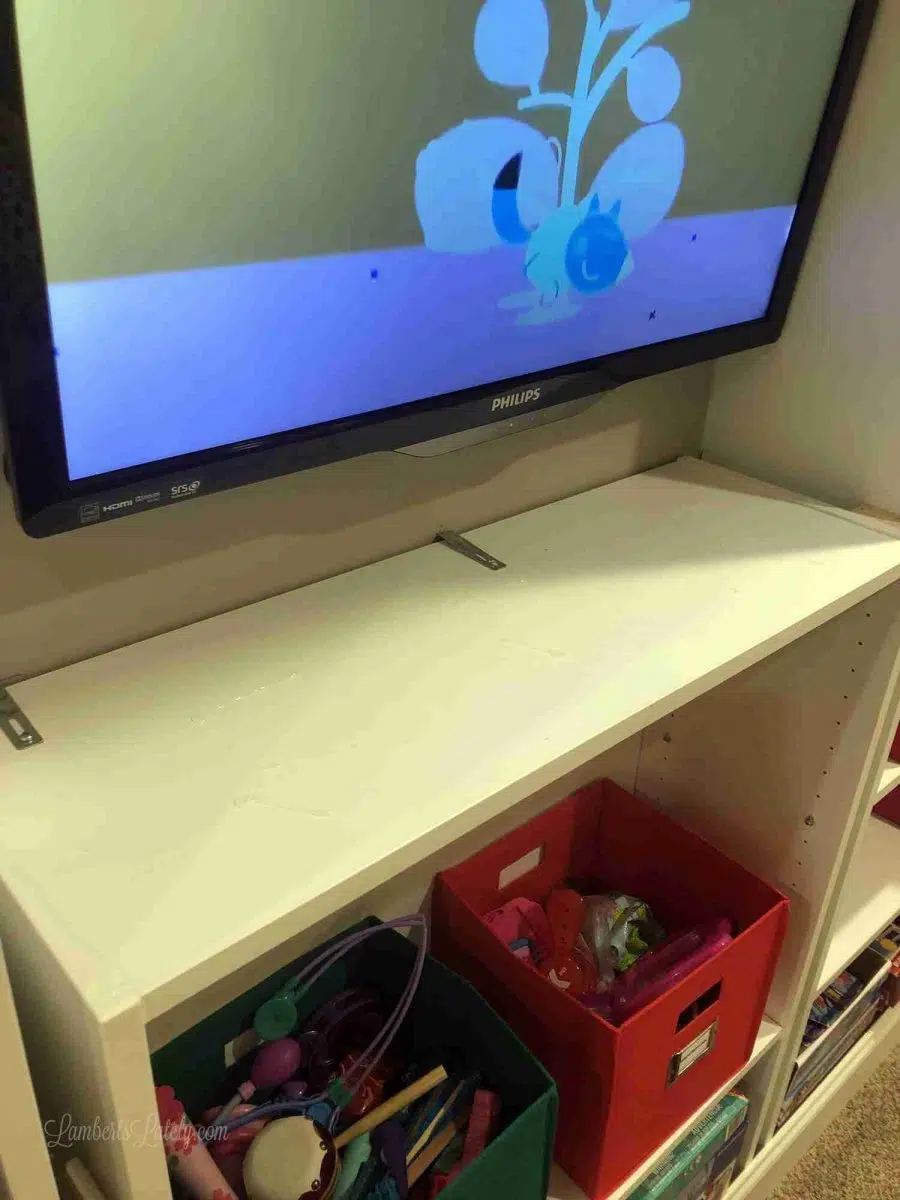
Step 3: Eyeball how the shelves look against the wall.
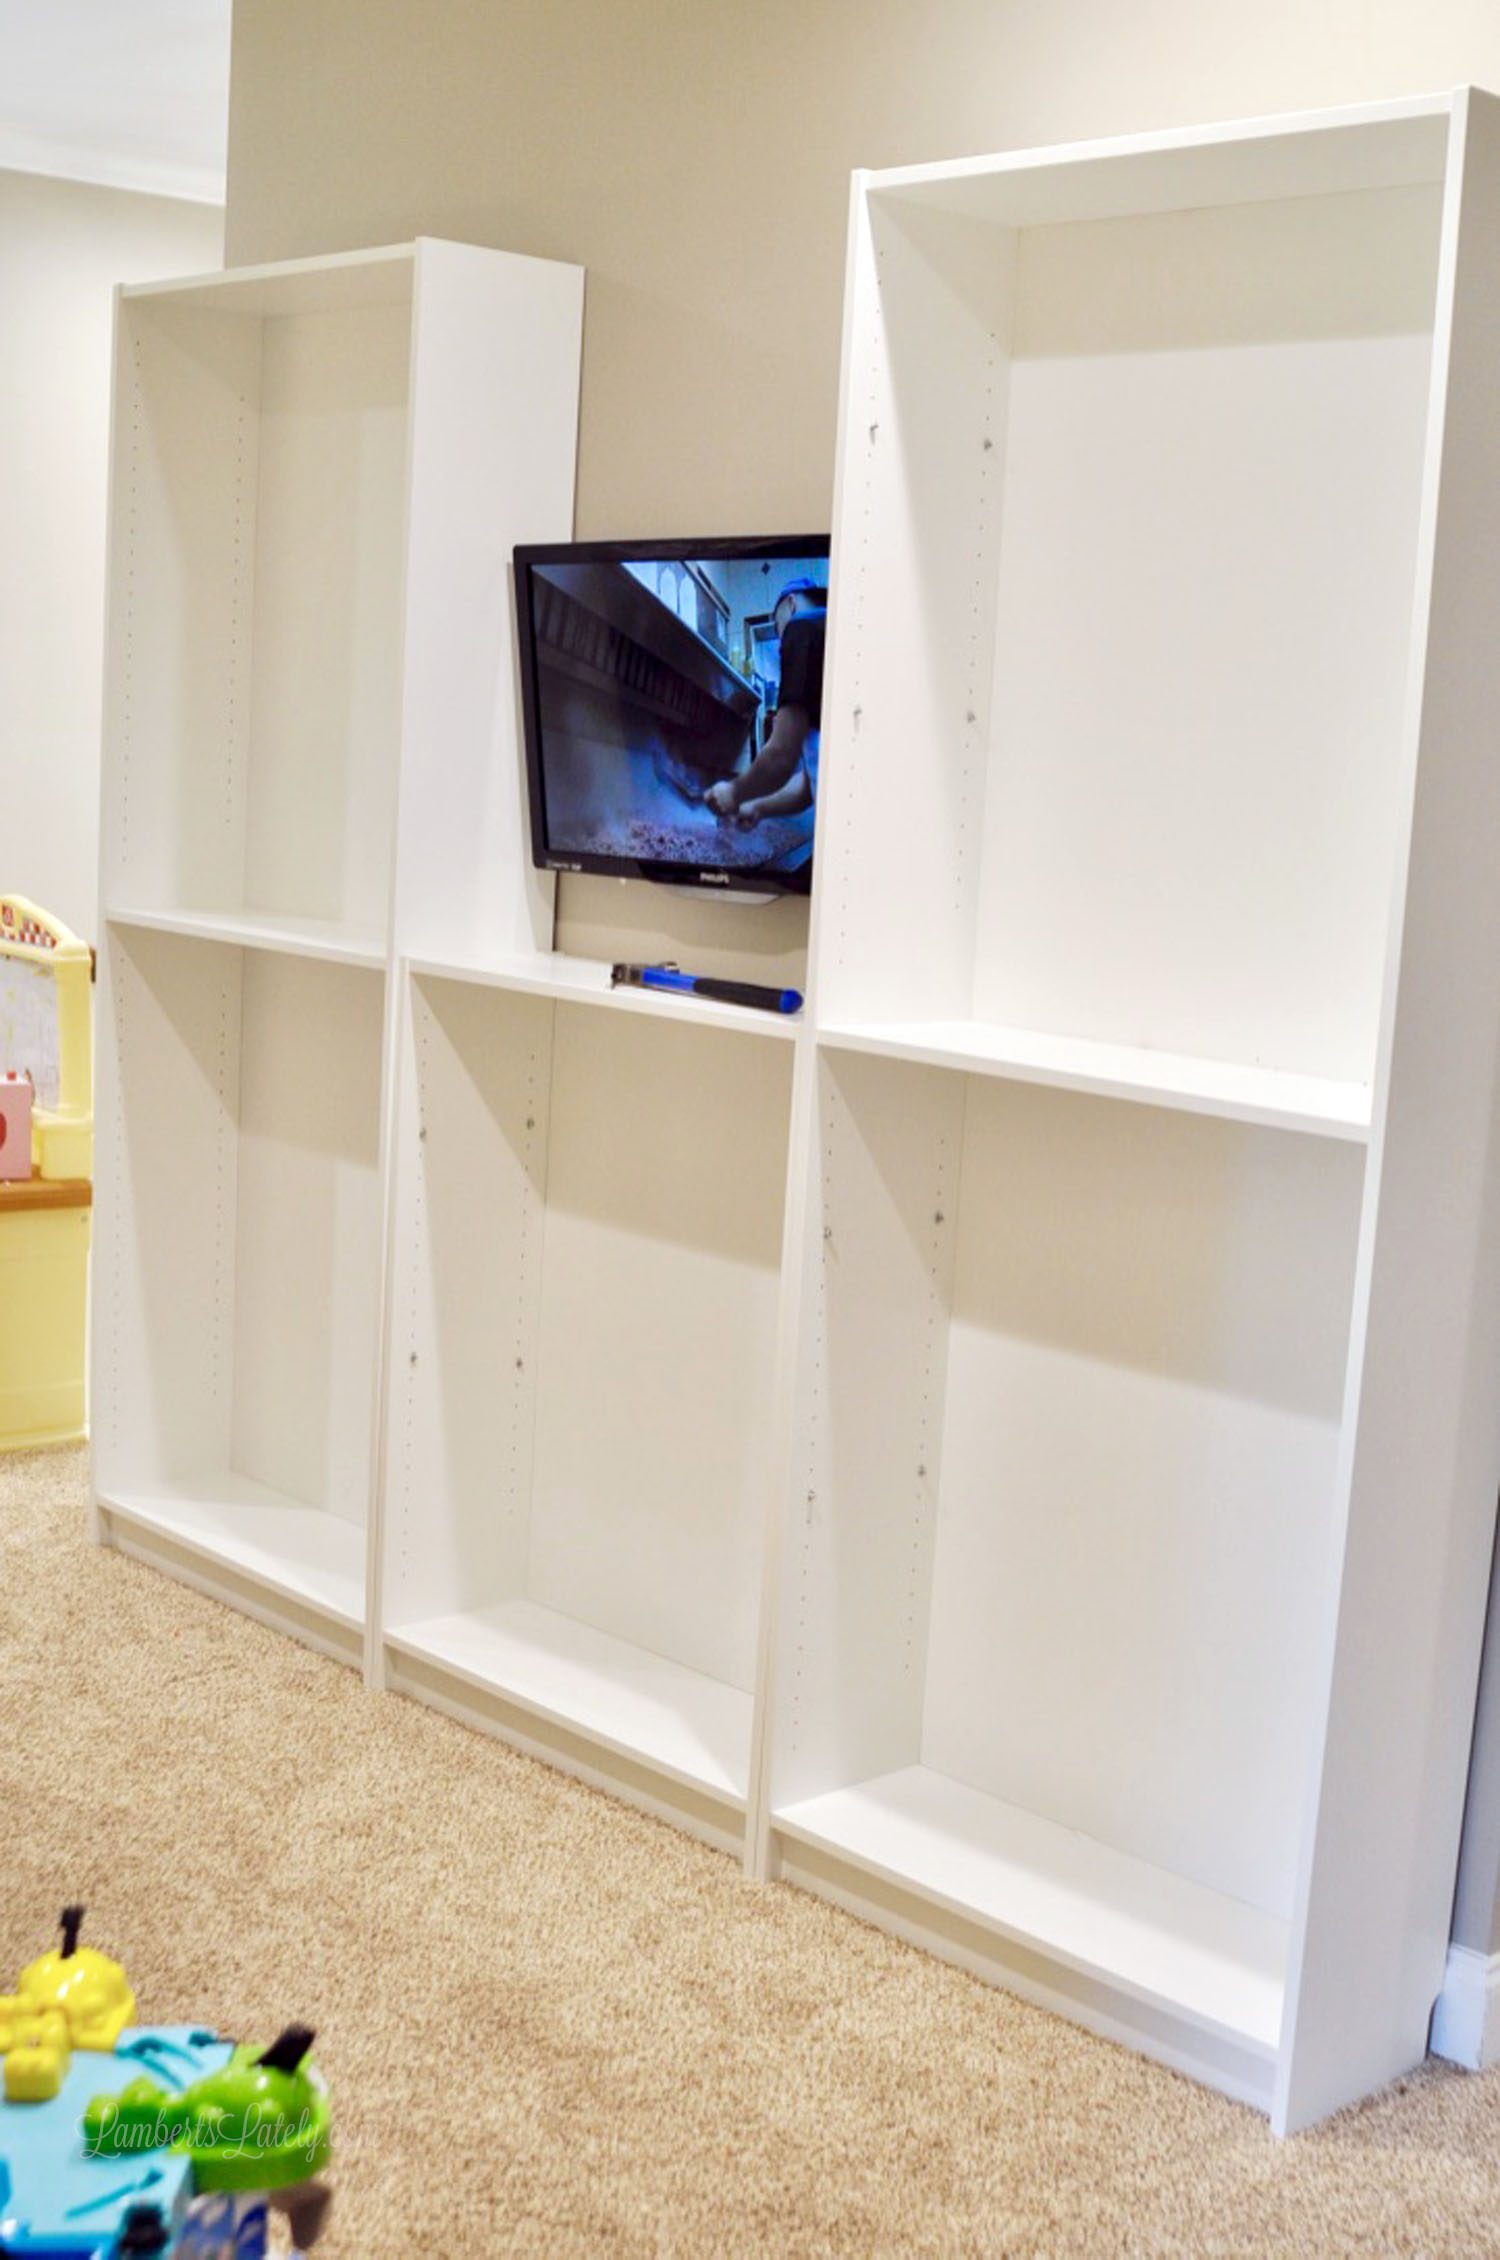
Then, one of the fun parts - position your shelves on the wall!
At this point, you can see whether your base molding will fit into these handy dandy little cut-outs Ikea puts in the back of the Billy bookcases. If it does, lucky you - you can skip the next step!
Ours obviously doesn't.
Love building furniture? You might want to check out this DIY sofa table!
Step 4: Remove baseboards if needed.
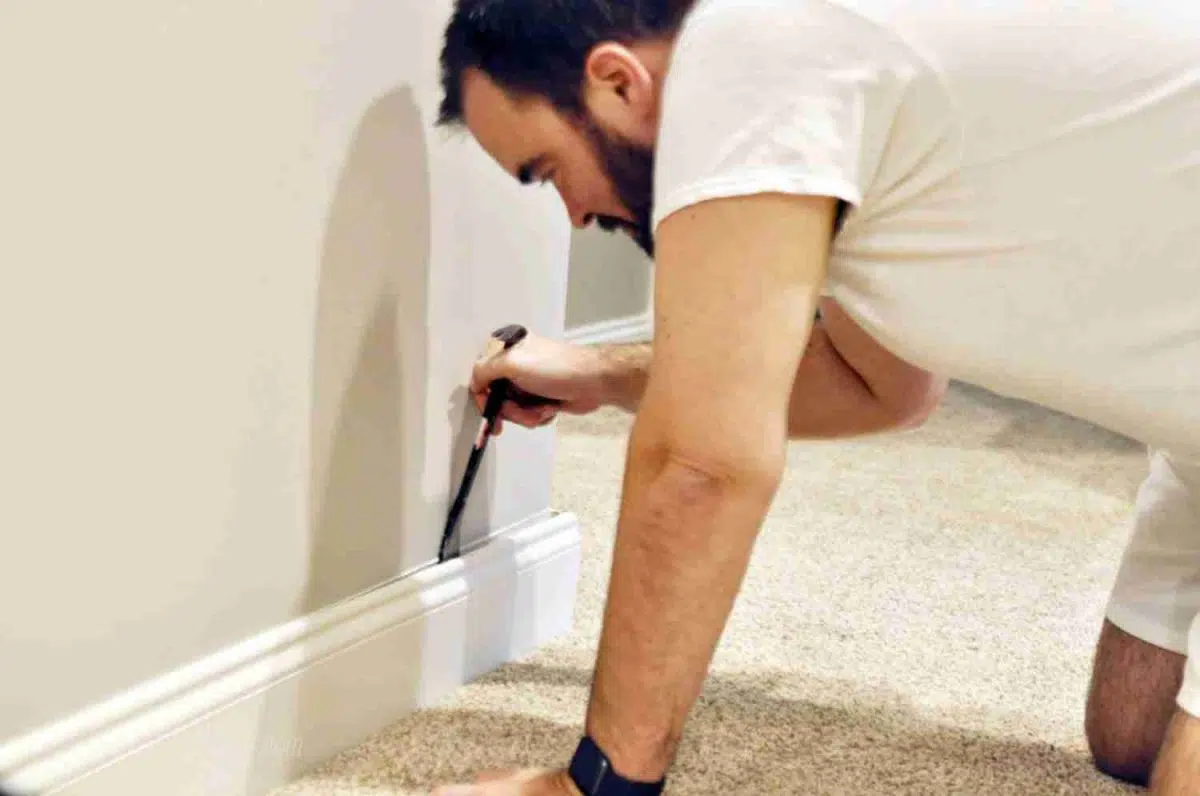
If your trim didn't fit in the bottom notch, move the shelves out of the way and very, very carefully pry the base molding off of the wall.
We were able to reuse this molding on the front of the shelves because it didn't break when we carefully removed it.

You'll probably need to remove nails from the wall before moving on too - we had a ton sticking out.
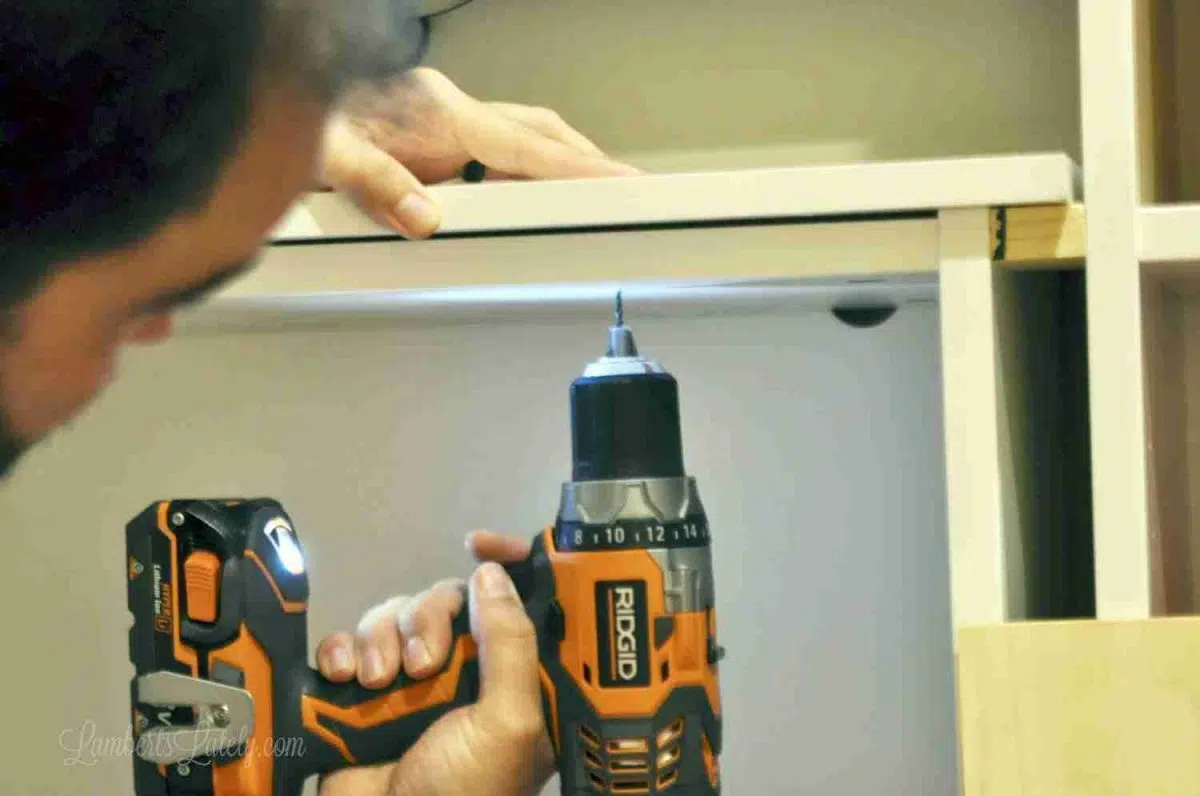
Step 5: Secure Ikea bookcases to the wall.
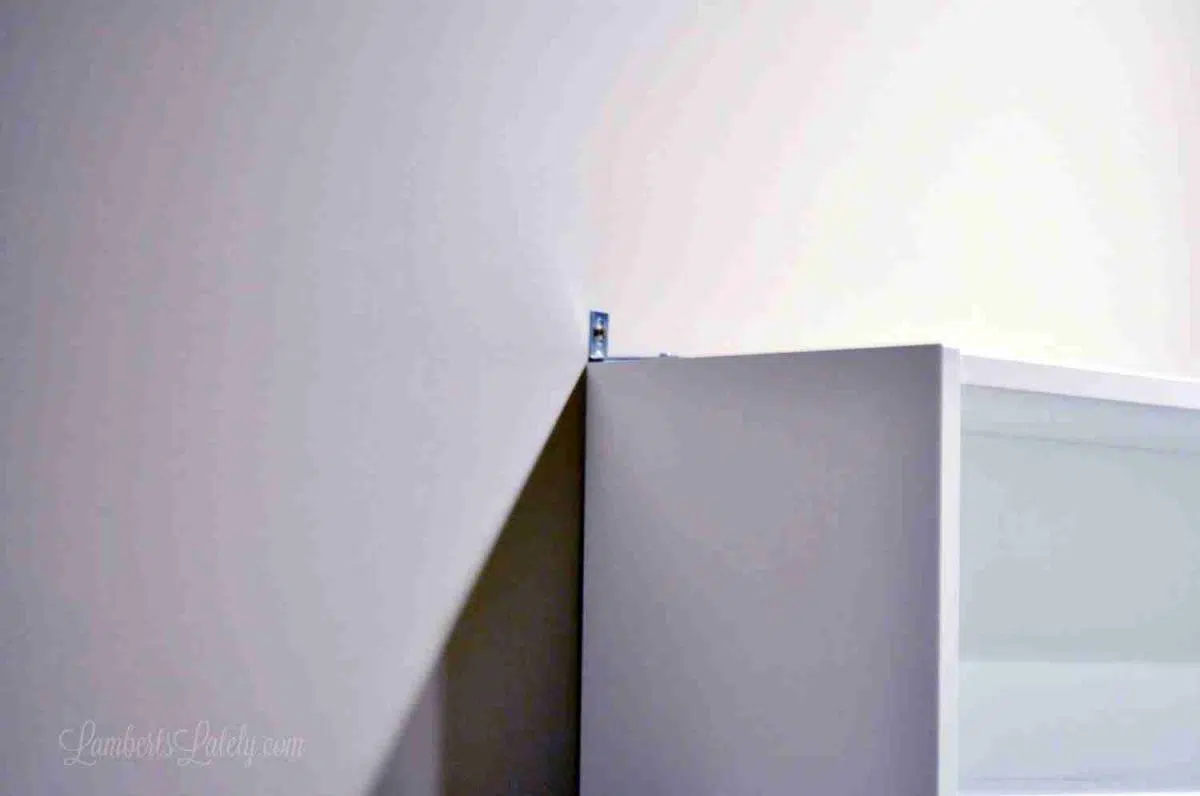
Ikea's Billy Bookcases come with l brackets to attach your bookcases to the wall. Just make sure these are screwed into a stud to make them extra secure. It doesn't matter if the brackets are showing like this - you'll use crown molding later to cover these up.
This is an important step; don't skip it! Your shelves need to be secure to the wall for both safety and a built-in look.
We secured the center bookshelf with brackets like this. We knew we would be covering up the top of this center cabinet with a piece of MDF board, so it didn't matter what the top looked like at this point.
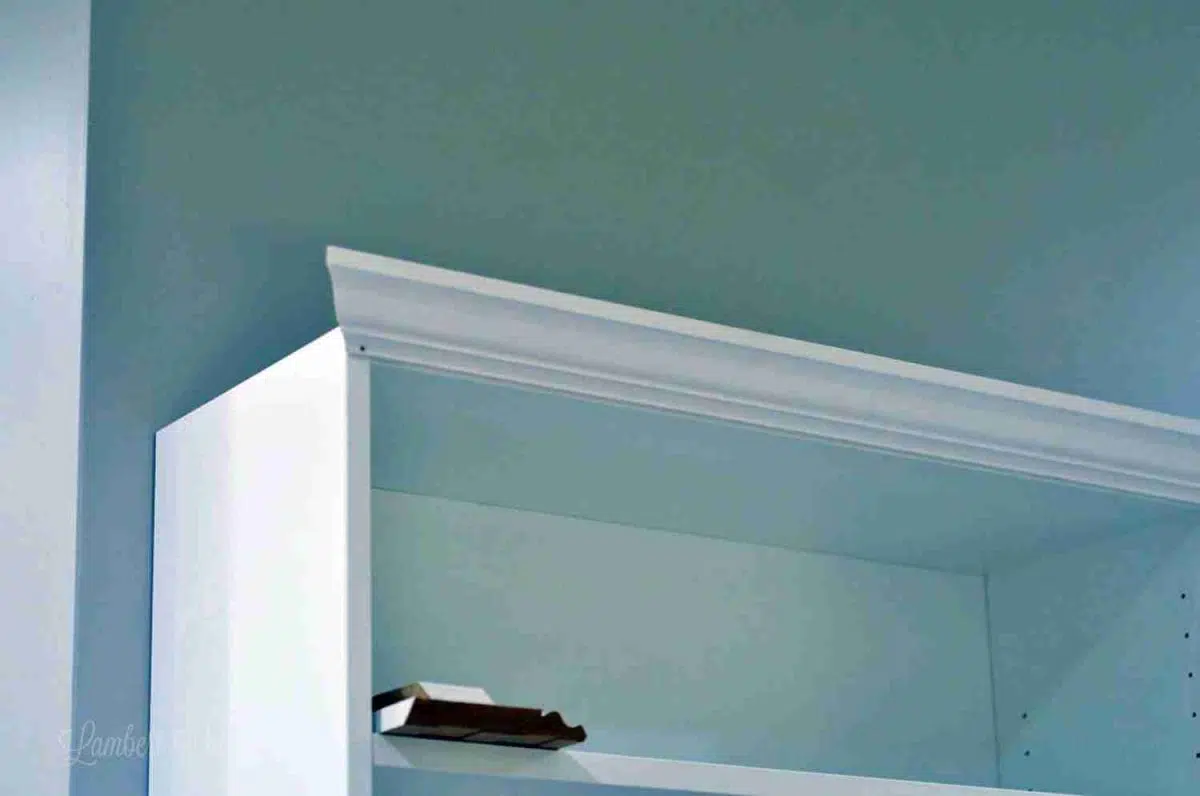
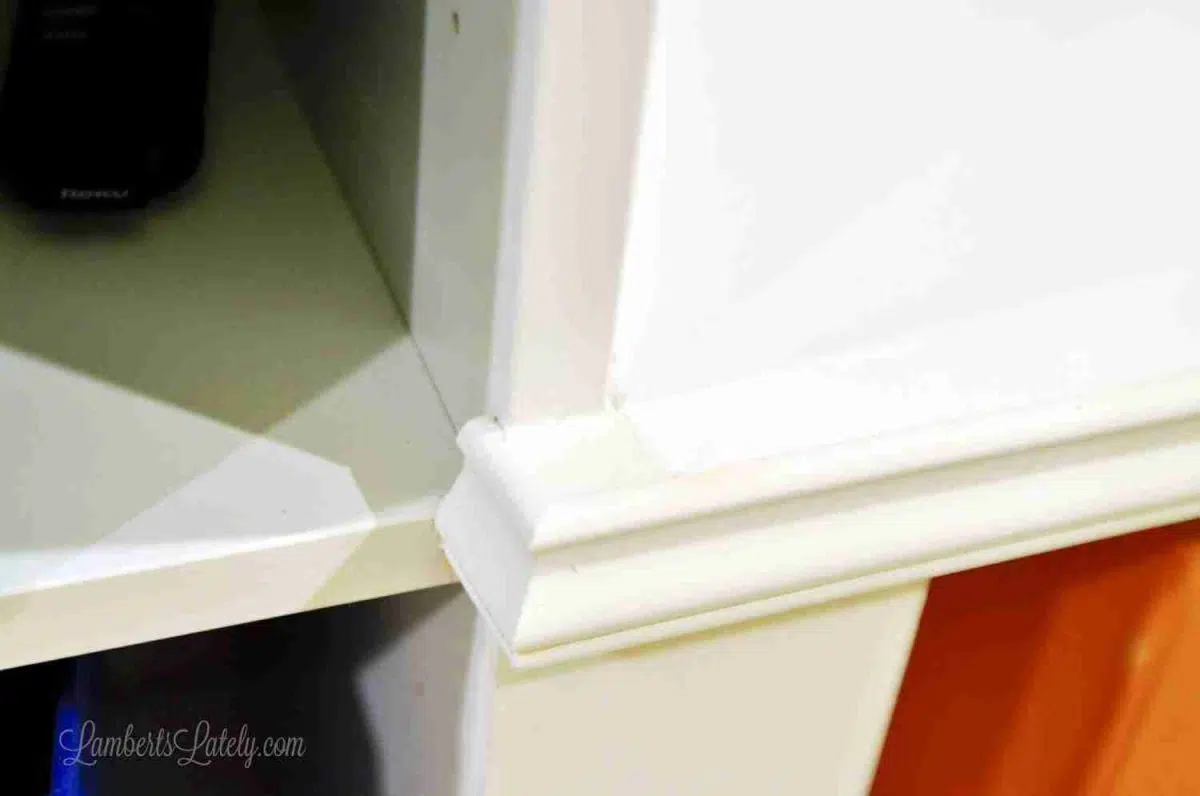
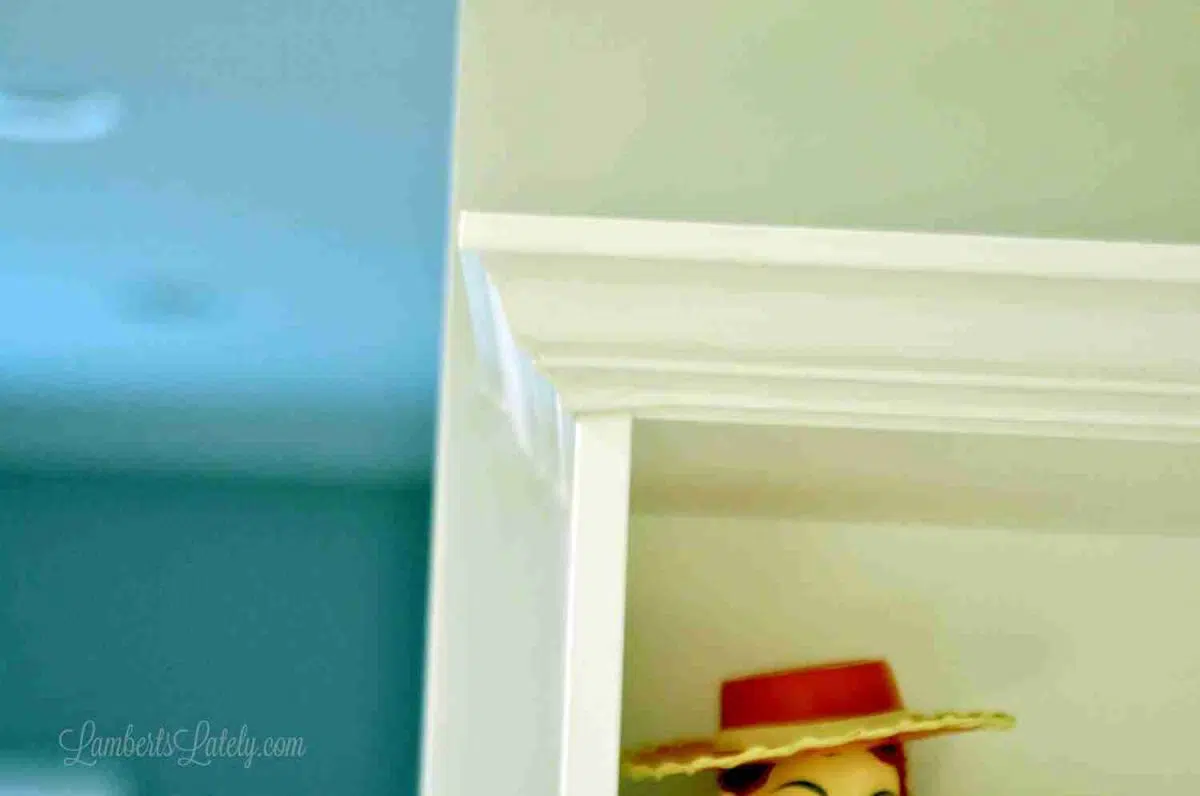
Step 6: Attach crown and base trim.
Now that the bookshelves are secure to the wall, let's make them look custom!
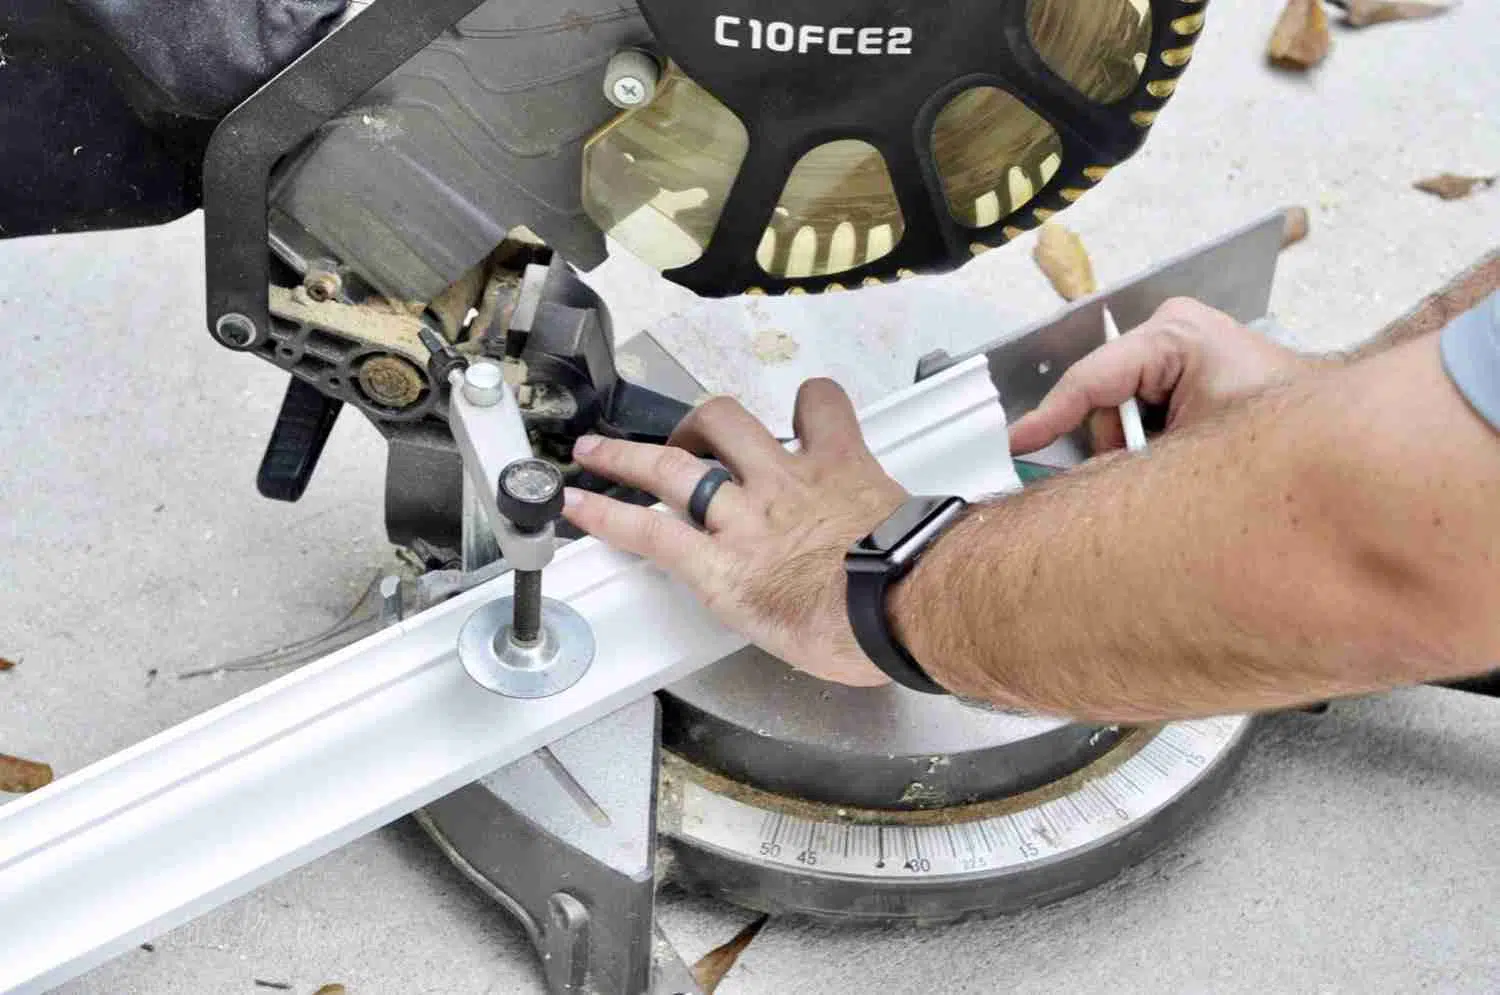
I'll admit - I. hate. working. with. crown. molding. It is such a pain to cut. I just don't have the mind to think about multiple angles and cuts at once.
But, if you have a miter saw (which is kind of a must for this part), position your crown molding upside down. There should be a flat part on the back of the molding that you can place on the vertical bar of the saw to kind of help you with the cut.
This is the part that will eventually be connected to the shelves.
Once your molding is positioned the correct way on the saw, you'll cut 45-degree angles for each corner.
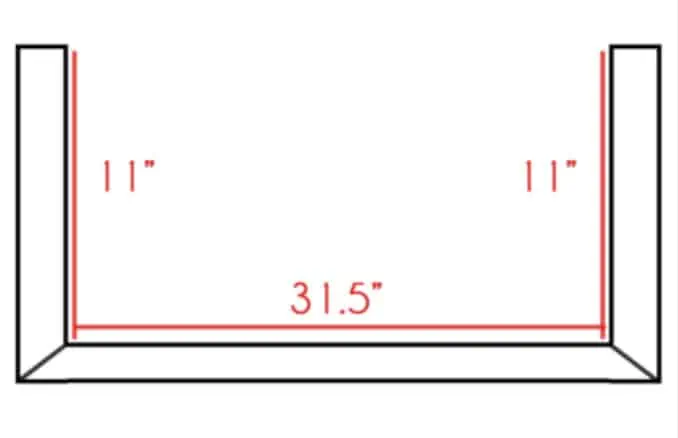
You should need the pieces on the sides of the shelves to be a smidge over 11" from the flat part that touches the wall to the inside of the 45-degree angle on the back...but definitely measure this, as it varies a little from shelf to shelf and you need it to be pretty much perfect.
The piece on the front should be around 31.5" from end to end on the back. Keep in mind that the front will be longer - always measure the back, since that is what will sit against the cabinet.
Again, the measurements varied a little bit on ours, so measure a few times to make sure it's right!
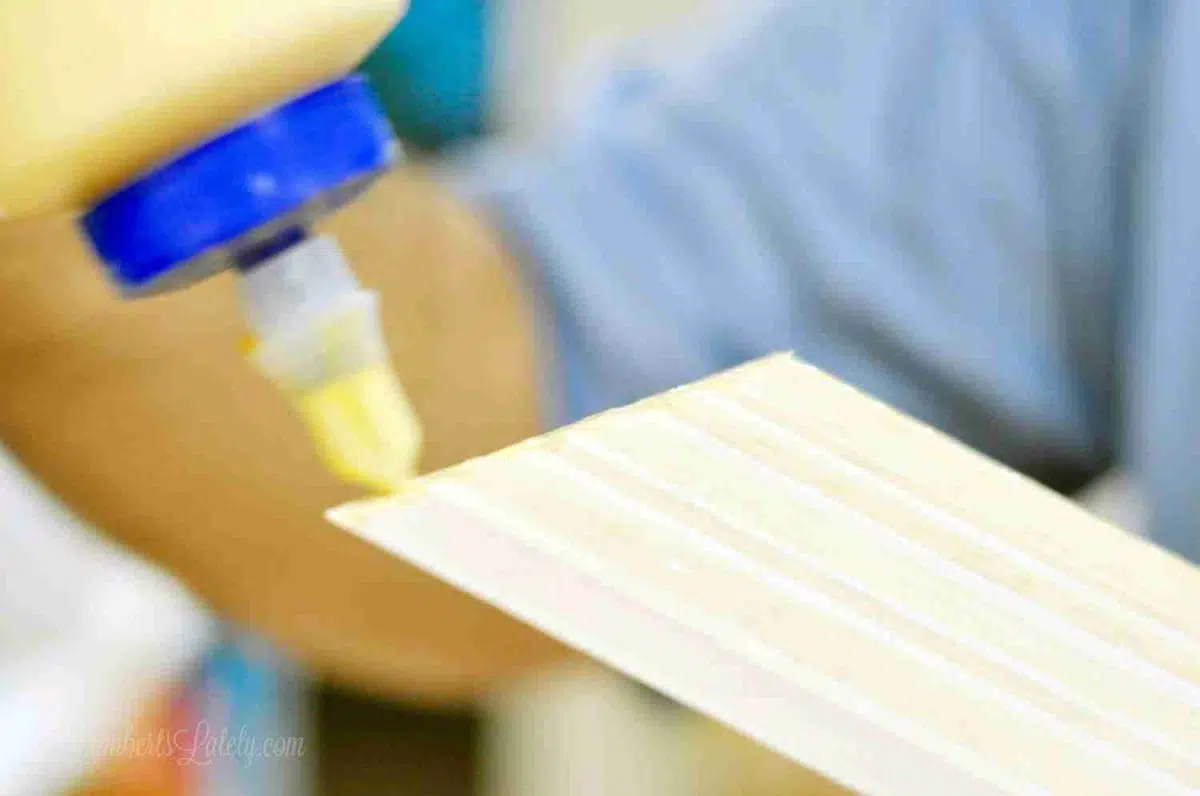
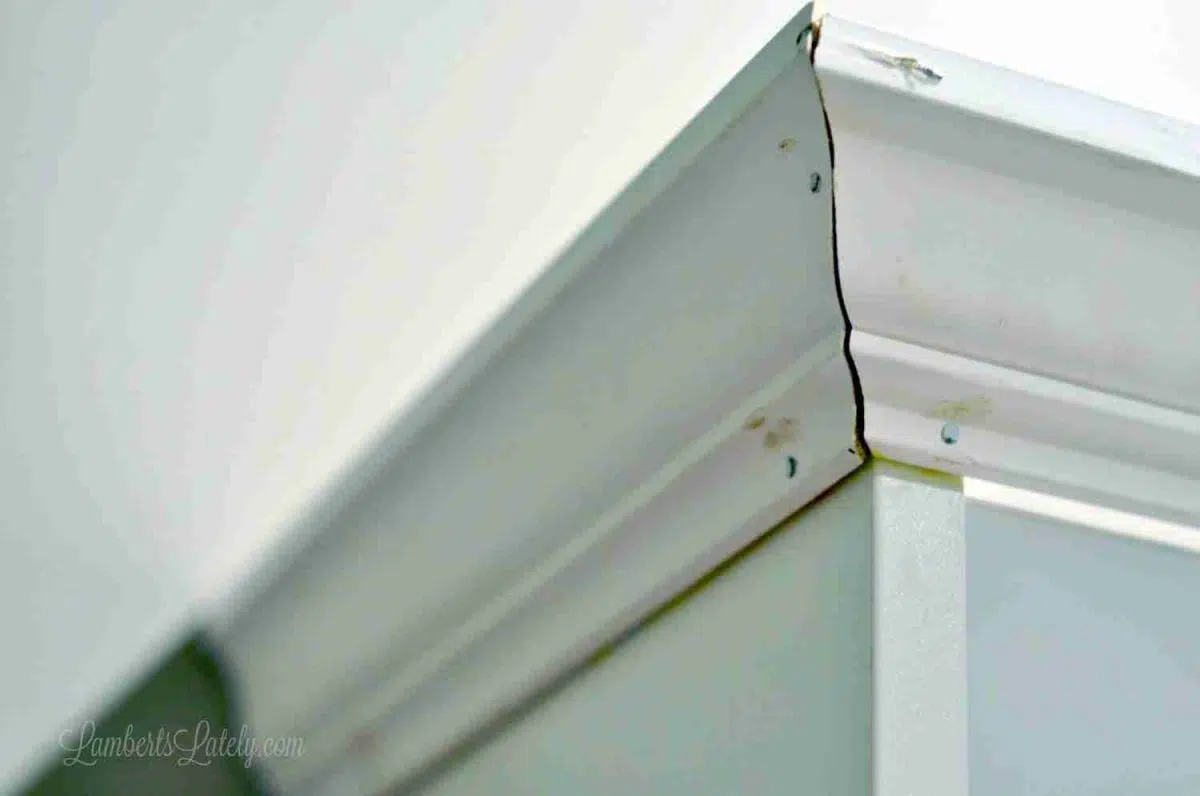
Once the three molding pieces are cut, use a little bit of wood glue on the angles and parts that touch the shelves to help hold the molding in place. Put 1-2 nails at the ends of each piece.
This is something we didn't do until the end that should have been done on this step: use a nail punch to drive the nails in past the surface of the molding so they'll be easier to patch later.
As you see above, the molding doesn't have to be pretty at this point - we'll clean it up later on!
The base molding was much easier to cut - just simple 45-degree angles at each corner.
We were able to reuse the original baseboards on the wall for the piece on the front. We just had to buy one piece of baseboard to cut for the two side pieces (and, if you look really closely, it doesn't match perfectly - not that that drives me crazy or anything 😉).
Again, adding a little bit of wood glue to the angles and whatever will be touching the Billy bookshelves will help to hold it in place. Use a nail every foot or so (punching the nail past the surface of the board after it's secure).
Note: Having a pneumatic nail gun would also be incredibly helpful throughout this step. We had not purchased ours yet, but it would have cut the time it took to install the molding in half.
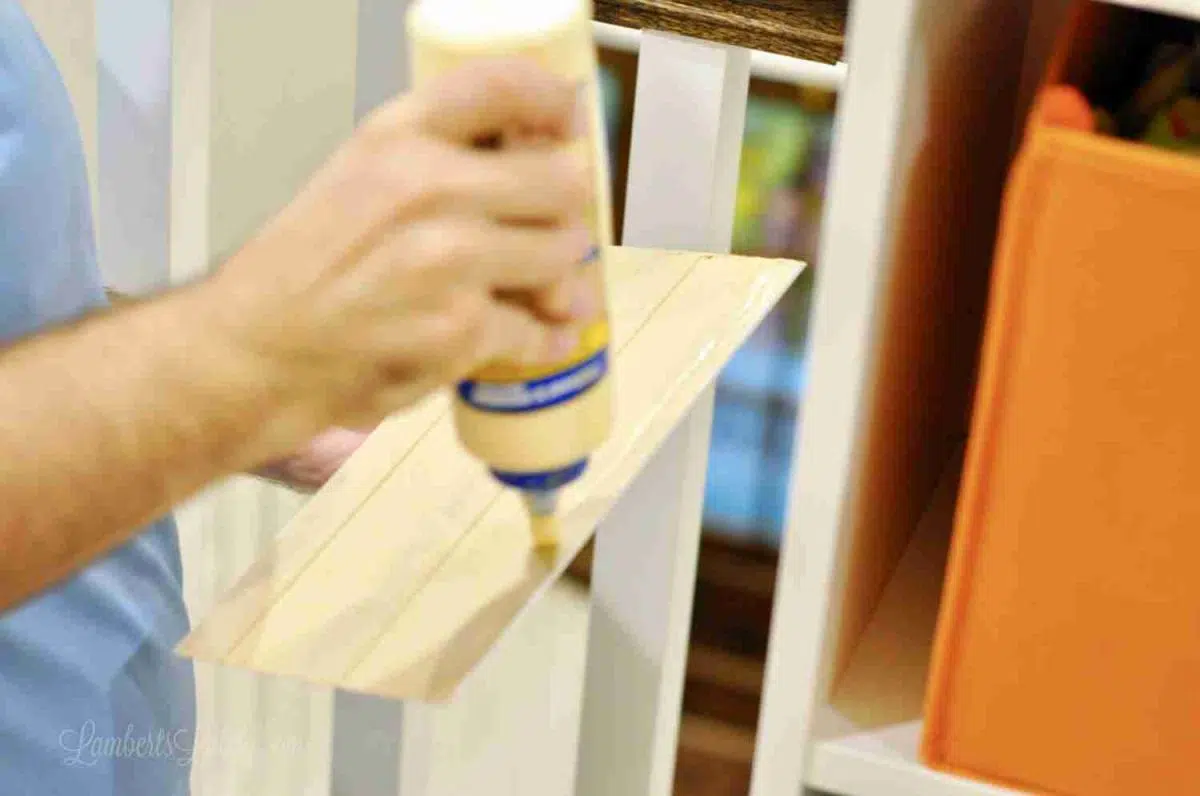
Step 7: Attach the middle shelf topper and cover any gaps.
We cut a piece of particle board to cover the top of the middle shelf and the gaps between each shelf so that you wouldn't see the gaps from the top and it will look like one continuous shelf.
We glued this MDF to the top of the middle shelf with some E6000 and secured it a little bit more by adding 4 screws from the bottom.
Make sure these screws are longer than the thickness of the top of the middle shelf but not as long as the top of the middle shelf plus the particle board. You don't want them coming through the top! We used 1.5" screws for this.
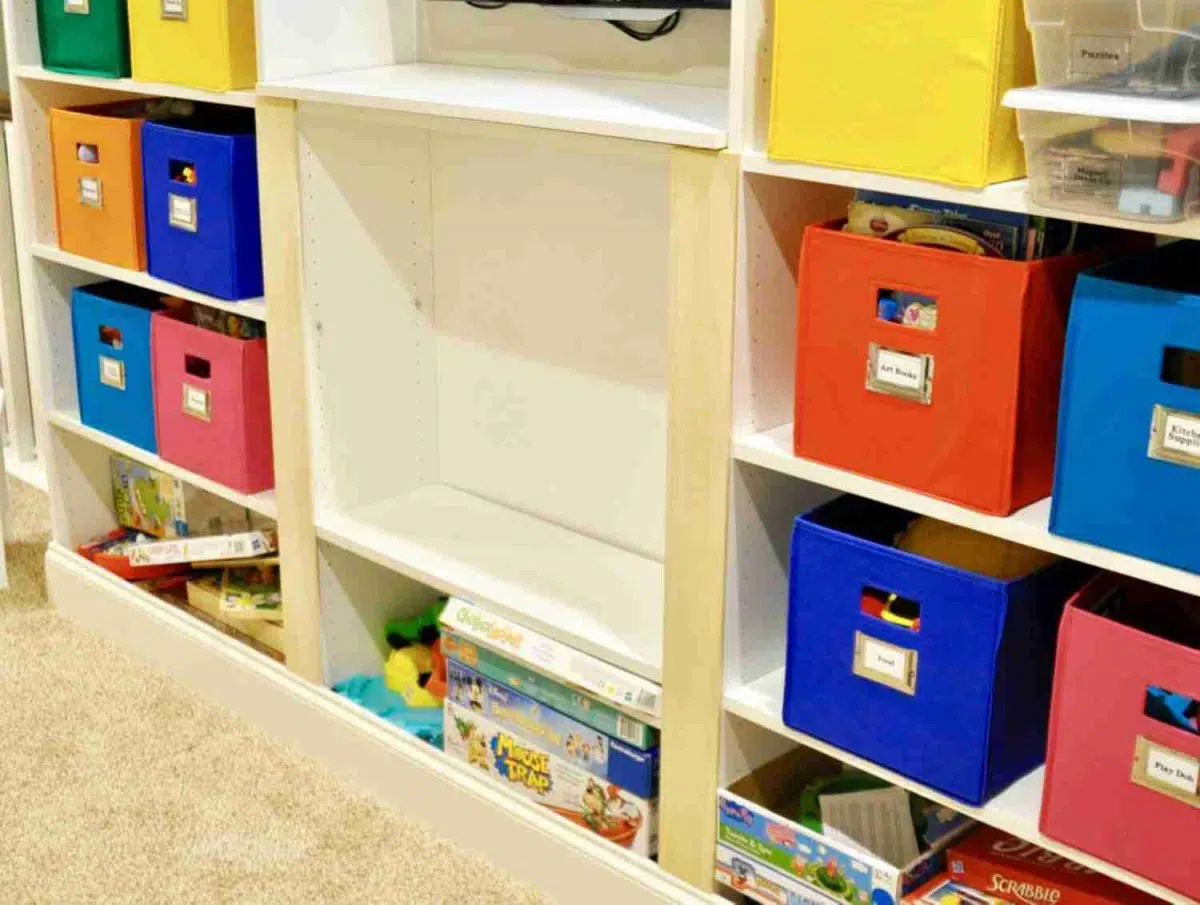
To cover the gaps between the bookshelves, we used a piece of poplar board. The was one 8-foot piece of ⅜" x 3" board cut to fit each gap.
The ⅜" thickness lined up perfectly with the top of our baseboards. We nailed this poplar board in place (again, punching the nails in so they can be patched).
We also cut teeny tiny squares to cover the outside edges of our particle board - it just didn't look right without this little detail. You could try to notch out one big piece of MDF board so there are no breaks, but we aren't that skilled. 😂
We just glued these little square pieces into place and caulked them really well in the next step. You can't really tell that it isn't one big piece unless you look closely!
Then, we used this 1" chair rail molding around the front to coordinate the front piece with the rest of the molding.
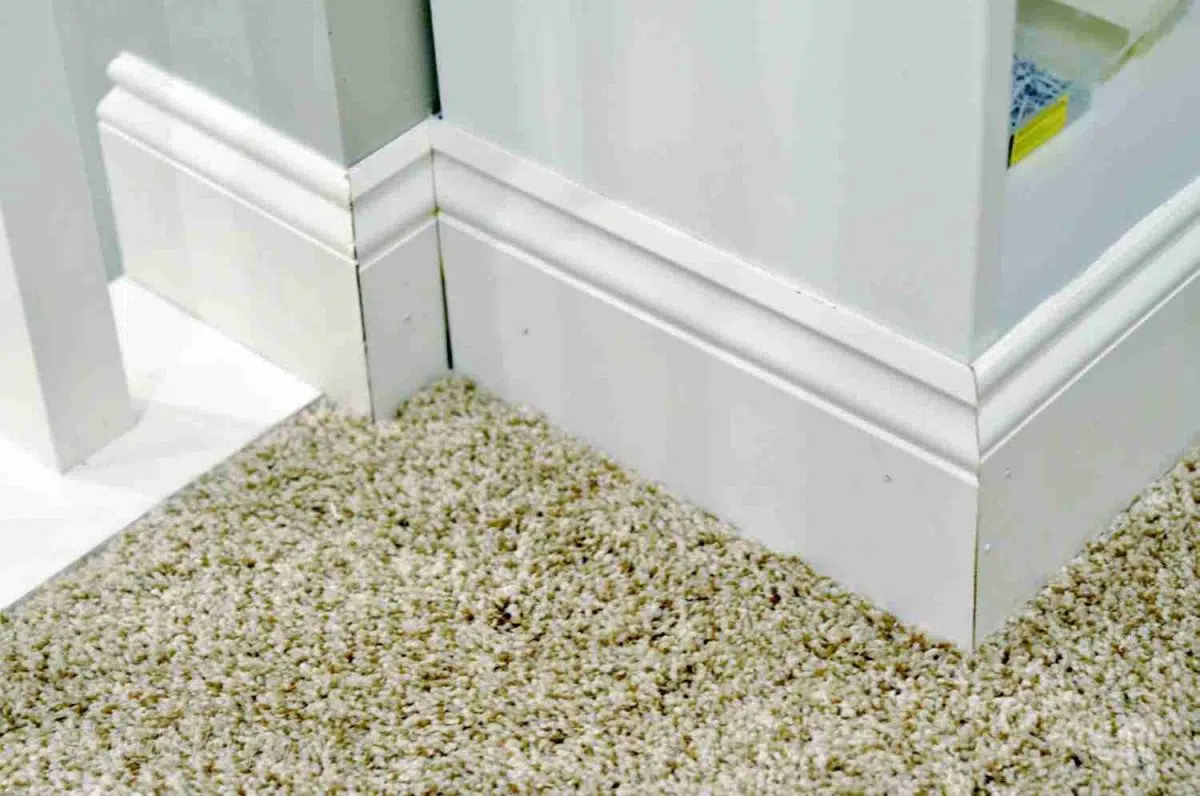
Step 8: Caulk gaps and patch nail holes.
This is the most important part of making this look like one big, built-in piece!
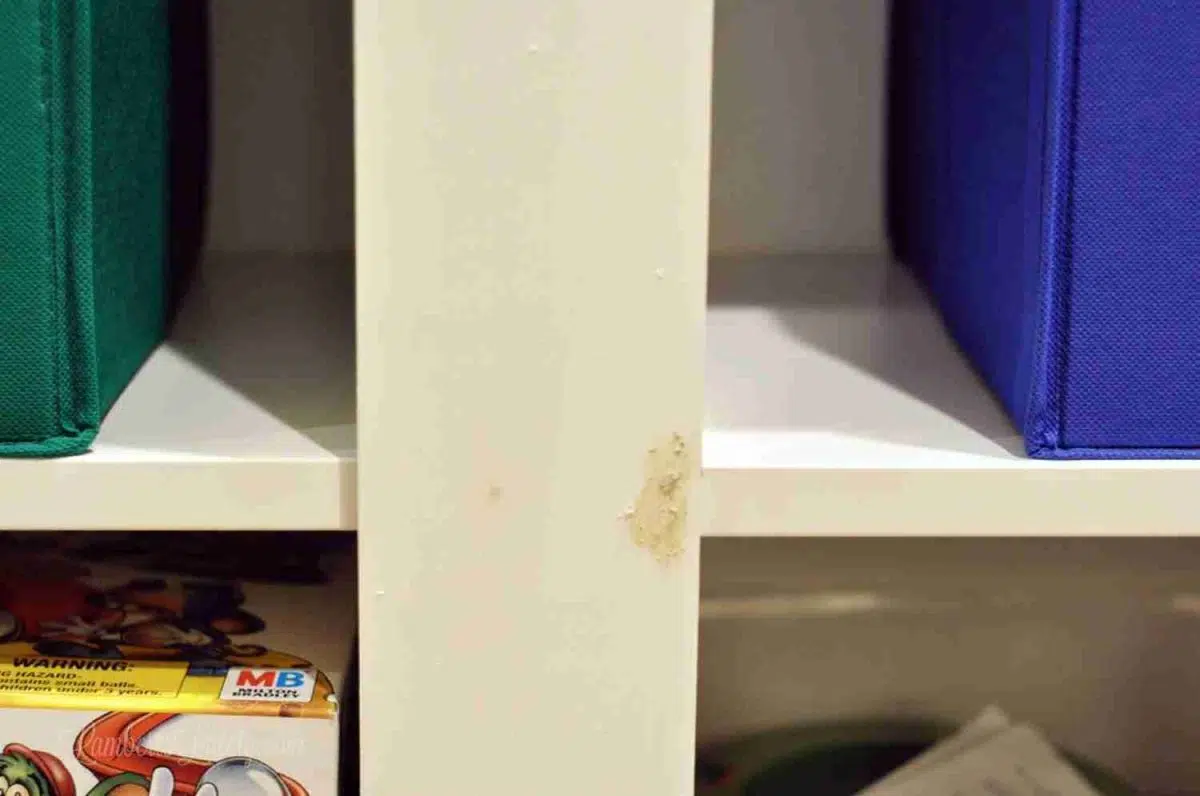
First, go over nail holes with wood filler. Just kind of smear it in with your finger - no tools required.
Once this is dry, go back and sand the filler so the surface is smooth.
Next, I went around every edge of the cabinets that touched the wall and caulked any gaps. I use this caulk (as I have for many other projects) and it's so easy to work with. I wasn't great about taking pictures of this step, but I showed how I caulk things like this in my DIY plantation shutter post.
I also used this caulk on all of the gaps in the crown and base molding, smoothing it out with my finger as I went. It's especially helpful to use a wet paper towel to really wipe off any excess as you go.
(See, doesn't that look so much better than the last time I showed it? The caulk makes a world of difference!)
Step 9: Paint trim to match bookcases.
The last step is (somewhat) easy! All you have to do is go over the whole thing with a coat of white paint.
The hard part is actually finding a truly white paint. For a year, I thought our trim throughout the house was Sherwin Williams Snowbound. There is even a huge leftover container of this color left in our garage.
I tried painting our trim with this color, thinking it would be the perfect way to blend our existing trim on the wall into the trim on the built-in bookcases.
Nope. It was SO much darker than the cabinets and existing trim. I have absolutely no idea where they used this color in our house!
So, after a heavy second and third coat of (actual) white paint, it was fixed. Be warned - just because you *think* your trim is white and that color will work on this, it might not. You need actual, 100% white.
I'd also recommend either a semi-gloss or a full gloss to match the finish of the Ikea Billy Bookcases.
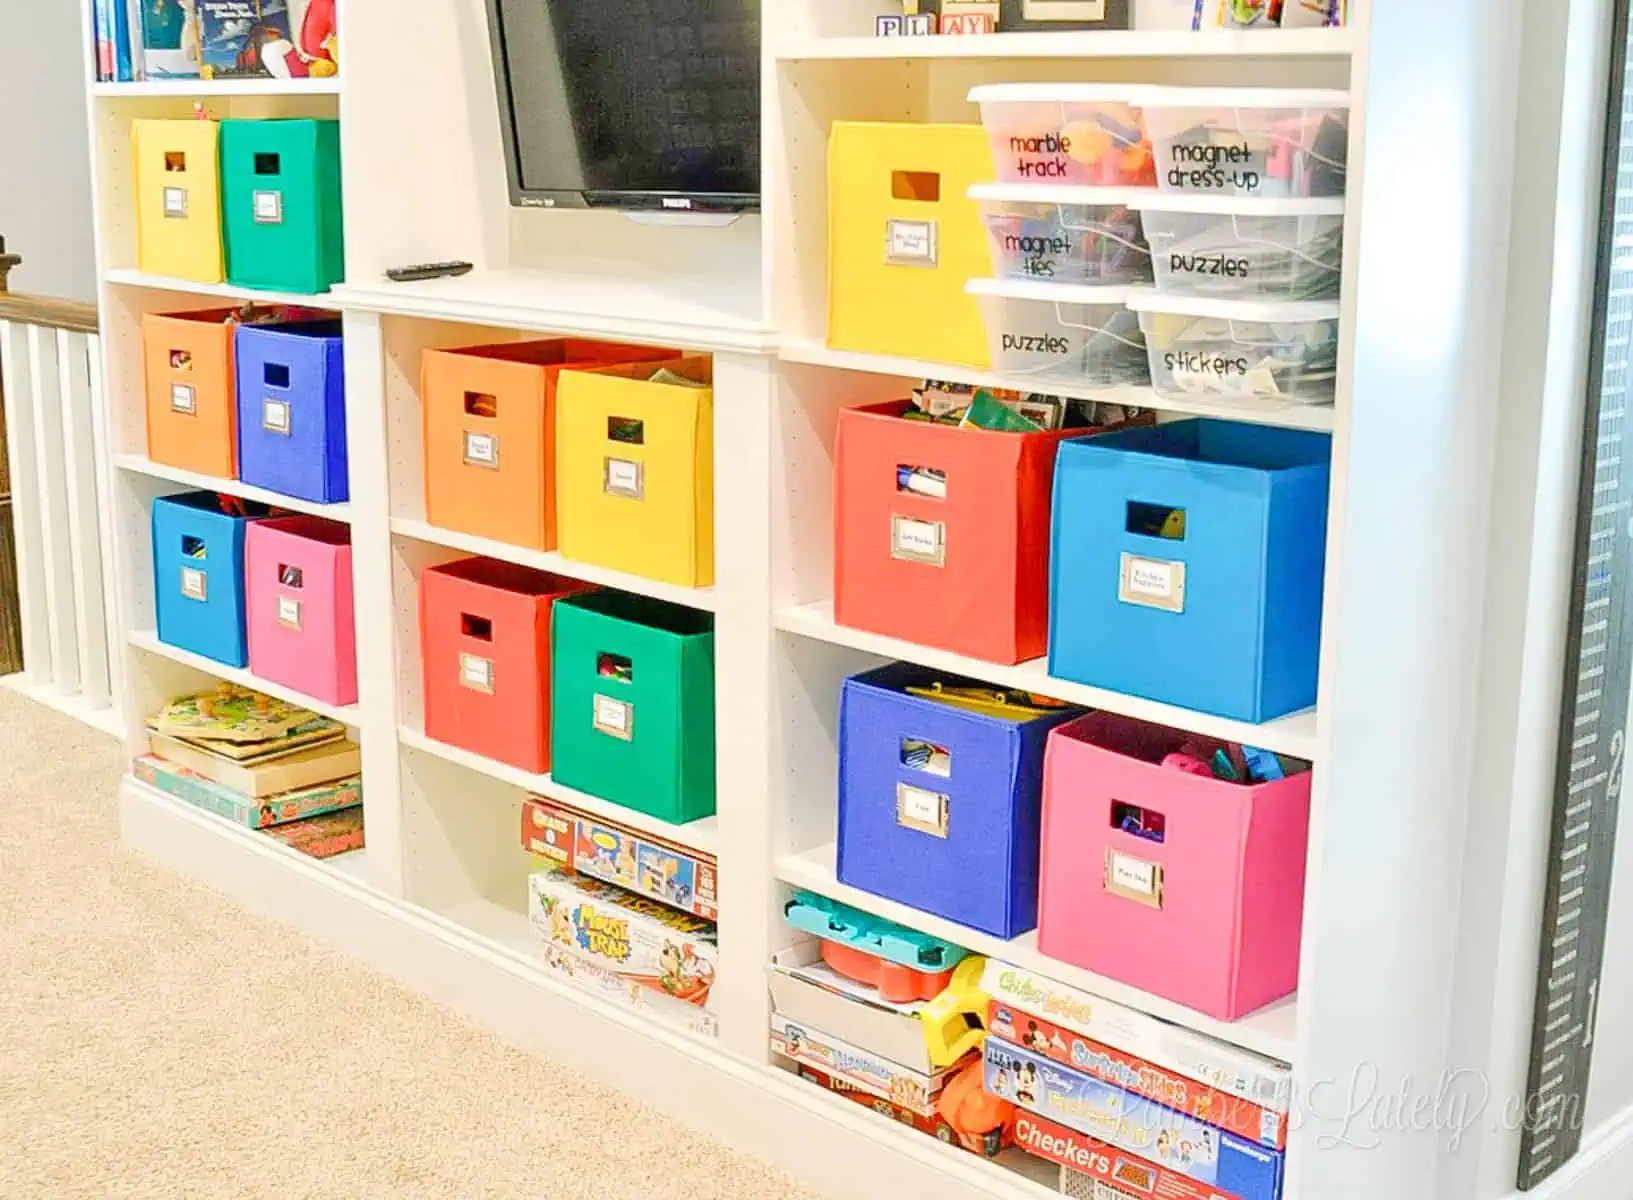
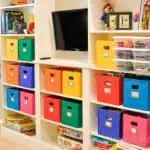
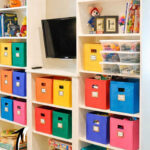
Final Results

I absolutely can't believe how pleased I am with this Ikea Built In Hack! It wasn't all that expensive (under $400) and totally made over our playroom space. It offers functional and pretty storage and really gives the space a focal piece.
More Home DIY Projects


Thanks for stopping by today! I'd love to see your Ikea built-in creations. Tag me on social media 📸 @lambertslately with your projects.

Leslie Lambert is a lifestyle writer and content creator specializing in home organization, family recipes, and intentional living. With 17 years of experience in blogging and digital storytelling, she helps busy women create calm, purposeful homes they love.


The bookshelves came out great! Would you mind telling me where the colored bins are from? The ones I have now are too deep for our billy bookshelves
Absolutely - I've got a link to all of my sources in the post now too, but here's where I list out everything! https://lambertslately.com/2018/10/how-we-organized-our-small-playroom.html
I have been obsessed with doing my own Billy hack. All the other tutorials are awesome, but require mad wood skills (building bases, top frames for molding, etc) that I just don't have. Yours is the most realistic and the exact configuration we are using! Thank you so much for sharing!
You are so welcome, Dawn! I hope it can help.
I absolutely love this Ikea built-in hack! The transformation using the Billy bookcases is incredible. It really shows how a little creativity can make such a big difference in a space. I can't wait to try this in my own home! Thanks for the inspiration!
This is great! When adding the continuous baseboard to the front of the shelves, there is a gap between new trim and front of base shelf. The base shelves are not as deep are the tall vertical pieces. What did you do to troubleshoot this? Thanks!
Hmm, I'm having trouble visualizing what you're saying. If you'd like to snap a picture and email me, I'd be glad to troubleshoot! leslie at lambertslately dot com